- Preface
- GettingStarted
- Creating the Spaces Services
- Adding Devices
- Configurations
- Working with Faults
- Working with the Signage Menu
- Working with the Signage Content
- RoomSetup
- EmergencyDisplay
- Working with Information Signage
- Working with Smart+Connected Green Advisor
- Working with Tools
- Managing Locations
- Managing the Quick Response Codes
- Managing Workspace Features
- Working with Reports
- Usage Scenarios
- Troubleshooting
Getting Started
This chapter describes the Cisco Smart+Connected Spaces (Smart+Connected Spaces) solution, how to log in to two administrator portals (for managing meeting spaces and digital, and managing workspaces), and the tasks that you can perform by using these portals.
About Smart+Connected Spaces
The Smart+Connected Spaces application is a part of the Smart+Connected Communities (S+CC) solutions, and leverages the platform capabilities of the Cisco Service Delivery Platform (SDP). The application allows utilization of resources at workspaces and minimizing the energy consumption. It provides features for conference/Cisco TelePresence room booking and workspace check in by using kiosks and the kiosk web portal, and the Smart+Connected Spaces web portal for users (URL context for calendar and ipsapp). The Smart+Connected Spaces includes signage based delivery of enhanced organizational communications and also via Cisco IP Phones as interface.
The Smart+Connected Spaces web portals allows users to search for, book, and set up the conference rooms for meetings, book resources for meeting rooms, send out invites to attendees, and manage your meetings. You can also search for and book the available workspaces for either yourself or another user and set your preferences, such as light settings, blinds, air conditioning, and so on. You can check into a booked workspace at the scheduled time by using either the web portal (ipsapp), kiosk, or a Cisco IP Phone. At the end of the current reservation, you are checked out of the workspace.
You can apply your preferred settings to customize the booking experience, save the search results to use them for future bookings, and set certain conference rooms and workspaces as your favorites so that they are displayed whenever you search for rooms or workspaces.
The Smart+Connected Spaces user portals for room booking (calendar) and workspaces (ipsapp) display the daily, weekly, and monthly meeting calendar, which is up-to-date and synchronized with your enterprise calendaring system. You can use the calendar to quickly view all your workspace bookings and the meetings that you are a part of, whether as the attendee or the organizer. You have the option of accepting, declining, or deleting the meetings from the calendar itself. The recurring meeting feature allows you to create a single reservation for multiple meetings that you need to repeatedly organize over a period of time. This saves you the inconvenience of creating separate reservations on a daily, weekly, or monthly basis. You can add the WebEx meeting option which allows the attendees to log in remotely using the web if they cannot be physically present in the meeting room.
You can view and/or book available conference/Cisco TelePresence rooms and workspaces using kiosks and check in using the kiosks. Kiosks are large touch screen panels that are mounted in elevator lobbies and placed in other common spaces. The Smart+Connected Spaces kiosk web portal has features and functionality similar to the kiosks.
You can easily access news and other general information such as emergency notifications, tips on better resource management, energy savings, and environment-friendly corporate practices via signage.
The Smart+Connected Spaces application allows the end user to access the following features/solutions:
–![]() Book conference rooms and Cisco TelePresence rooms.
Book conference rooms and Cisco TelePresence rooms.
–![]() Check into any available workspace.
Check into any available workspace.
–![]() View the availability and check-in status of your Jabber contacts.
View the availability and check-in status of your Jabber contacts.
–![]() View the route to locate a person, workspace, office, or conference/Cisco TelePresence room on a floor.
View the route to locate a person, workspace, office, or conference/Cisco TelePresence room on a floor.
–![]() View the overall conference/Cisco TelePresence room and workspace availability on all of the floors of all of the buildings in the organization and book/check into any of these spaces.
View the overall conference/Cisco TelePresence room and workspace availability on all of the floors of all of the buildings in the organization and book/check into any of these spaces.
–![]() View the neighborhoods/zones on a floor.
View the neighborhoods/zones on a floor.
–![]() View the building, floor, and name of the workspace or office that you have checked into.
View the building, floor, and name of the workspace or office that you have checked into.
–![]() Access the floor plans for any building in the enterprise to view the locations and availability of the conference room/Cisco TelePresence rooms and workspaces.
Access the floor plans for any building in the enterprise to view the locations and availability of the conference room/Cisco TelePresence rooms and workspaces.
–![]() Search for the available conference rooms and Cisco TelePresence rooms based on your requirements such as the features available, seating capacity, location, and time and book them.
Search for the available conference rooms and Cisco TelePresence rooms based on your requirements such as the features available, seating capacity, location, and time and book them.
–![]() Search for the people within the enterprise.
Search for the people within the enterprise.

Note![]() You can also perform all of these tasks by using the kiosk web portal.
You can also perform all of these tasks by using the kiosk web portal.
–![]() Reset the PIN by using the Forgot PIN option. The new PIN will be sent to your email ID and get updated in the kiosk web portal.
Reset the PIN by using the Forgot PIN option. The new PIN will be sent to your email ID and get updated in the kiosk web portal.
- Using the kiosk web portal (In addition to the above mentioned features that you can access using kiosks)
–![]() Locate the workspace that you have checked into.
Locate the workspace that you have checked into.
–![]() View the building, floor, and name of the workspace that you have checked into.
View the building, floor, and name of the workspace that you have checked into.
–![]() Choose not to display your current check-in location.
Choose not to display your current check-in location.
Note![]() This option is available only if it is configured by the administrator.
This option is available only if it is configured by the administrator.
–![]() Change the kiosk PIN that you use for authentication while checking in, booking rooms, and viewing the list of your Jabber contacts.
Change the kiosk PIN that you use for authentication while checking in, booking rooms, and viewing the list of your Jabber contacts.
–![]() Check out from the workspace that you have occupied.
Check out from the workspace that you have occupied.
–![]() Log in and log out of the kiosk web portal.
Log in and log out of the kiosk web portal.
–![]() View your upcoming meeting and workspace reservation details.
View your upcoming meeting and workspace reservation details.
–![]() Check into and check out of a reserved workspace using your mobile device.
Check into and check out of a reserved workspace using your mobile device.
–![]() Search for the desired conference/Cisco TelePresence room.
Search for the desired conference/Cisco TelePresence room.
–![]() View the availability status of all of the rooms on any floor in any building within the enterprise.
View the availability status of all of the rooms on any floor in any building within the enterprise.
–![]() Book conference/Cisco TelePresence rooms using your mobile device based on your requirements, such as the features available, seating capacity, location, and time.
Book conference/Cisco TelePresence rooms using your mobile device based on your requirements, such as the features available, seating capacity, location, and time.
–![]() Invite people in your enterprise to participate in meetings (during the room booking process).
Invite people in your enterprise to participate in meetings (during the room booking process).
–![]() Ad hoc checking in from the list of available workspaces and checking out using the QR code scanning feature.
Ad hoc checking in from the list of available workspaces and checking out using the QR code scanning feature.
–![]() Mark workspaces and people within an enterprise as favorites.
Mark workspaces and people within an enterprise as favorites.
–![]() Set your preferences for building and floor.
Set your preferences for building and floor.
–![]() Search for people within the enterprise.
Search for people within the enterprise.
–![]() Initiate either a call or send text messages and emails using the mobile device.
Initiate either a call or send text messages and emails using the mobile device.
–![]() Quickly book the conference room wherever a Cisco IP Phone is located based on the room availability.
Quickly book the conference room wherever a Cisco IP Phone is located based on the room availability.
–![]() Control the meeting room devices and equipment.
Control the meeting room devices and equipment.
–![]() Save energy by manually releasing a room for the duration that it is unoccupied, in addition to the energy savings made when the solution automatically switches off devices.
Save energy by manually releasing a room for the duration that it is unoccupied, in addition to the energy savings made when the solution automatically switches off devices.
–![]() Configure multiple devices to suit your meeting and presentation needs using a single menu option.
Configure multiple devices to suit your meeting and presentation needs using a single menu option.
–![]() Create a case to notify the facilities team of any issues/problems that might be present in the conference room, and convey the same information to the others in the organization by sending messages to the Cisco IP Phone in the conference room. Once the case is created, the facilities team for the building can try to resolve the fault.
Create a case to notify the facilities team of any issues/problems that might be present in the conference room, and convey the same information to the others in the organization by sending messages to the Cisco IP Phone in the conference room. Once the case is created, the facilities team for the building can try to resolve the fault.
–![]() Send preconfigured messages and emergency notifications to signage.
Send preconfigured messages and emergency notifications to signage.
–![]() Search for the available conference/Cisco TelePresence rooms based on your requirements such as room setup, room size, location, and so on, and book them. Rooms that closely meet your search criteria are displayed if no exact match is found.
Search for the available conference/Cisco TelePresence rooms based on your requirements such as room setup, room size, location, and so on, and book them. Rooms that closely meet your search criteria are displayed if no exact match is found.
–![]() Search for the available workspaces based on your requirements such as date, time, location, workspace type, and so on, and reserve them.
Search for the available workspaces based on your requirements such as date, time, location, workspace type, and so on, and reserve them.
–![]() View the current and upcoming meetings that you are part of or have organized.
View the current and upcoming meetings that you are part of or have organized.
–![]() View the current and upcoming workspace bookings
View the current and upcoming workspace bookings
–![]() Accept, decline, or tentatively accept meeting invites.
Accept, decline, or tentatively accept meeting invites.
–![]() View all of the scheduled meetings as a day-, week-, or month-based calendar view.
View all of the scheduled meetings as a day-, week-, or month-based calendar view.
–![]() Book conference rooms easily by holding down the mouse button and dragging across the required time slot in the calendar view.
Book conference rooms easily by holding down the mouse button and dragging across the required time slot in the calendar view.
–![]() Book conference rooms instantly using the Quick Booking option. The process of room reservation becomes simpler as you can enter the number of participants for the meeting. Booking duration options range from 30 (the default duration) to 60 minutes. The location is, by default, the one specified in your preferences.
Book conference rooms instantly using the Quick Booking option. The process of room reservation becomes simpler as you can enter the number of participants for the meeting. Booking duration options range from 30 (the default duration) to 60 minutes. The location is, by default, the one specified in your preferences.
–![]() Book the room on behalf of other users by using the Proxy Booking option. For example, an executive administrator can book a workspace for a visiting executive.
Book the room on behalf of other users by using the Proxy Booking option. For example, an executive administrator can book a workspace for a visiting executive.
–![]() Use the detailed booking option where you can request for a change in the room setup, book equipment, add meeting agenda, and so on.
Use the detailed booking option where you can request for a change in the room setup, book equipment, add meeting agenda, and so on.
–![]() Edit the meetings details and reschedule the meetings that you have organized.
Edit the meetings details and reschedule the meetings that you have organized.
–![]() Save drafts of the bookings and edit them later.
Save drafts of the bookings and edit them later.
–![]() Personalize your workspace by setting your preference for lights, blinds, dimmers, air conditioning, and digital signage. You can activate the personalized settings when you check into a workspace.
Personalize your workspace by setting your preference for lights, blinds, dimmers, air conditioning, and digital signage. You can activate the personalized settings when you check into a workspace.
–![]() Check in and check out of a reserved workspace.
Check in and check out of a reserved workspace.
–![]() Manage configurations for all of the devices located in a workspace.
Manage configurations for all of the devices located in a workspace.
–![]() Generate and view reports for usage trends, user statistics, and so on.
Generate and view reports for usage trends, user statistics, and so on.
–![]() Save your preferred settings such as favorite rooms, location, and time zone.
Save your preferred settings such as favorite rooms, location, and time zone.
–![]() Create messages for the various fault cases, such as a non-functioning air conditioner in the workspace or faulty projector in a conference room.
Create messages for the various fault cases, such as a non-functioning air conditioner in the workspace or faulty projector in a conference room.
–![]() View the conference/Cisco TelePresence room schedule and availability/occupancy status.
View the conference/Cisco TelePresence room schedule and availability/occupancy status.
–![]() Book conference/Cisco TelePresence rooms.
Book conference/Cisco TelePresence rooms.
–![]() Confirm conference/Cisco TelePresence room occupancy.
Confirm conference/Cisco TelePresence room occupancy.
–![]() Release conference/Cisco TelePresence rooms.
Release conference/Cisco TelePresence rooms.
–![]() Book conference/Cisco TelePresence rooms.
Book conference/Cisco TelePresence rooms.
–![]() View detailed floor plans with the locations of the conference rooms.
View detailed floor plans with the locations of the conference rooms.
–![]() View the conference room schedule in different views—Building level, Floor level, and Conference Room level.
View the conference room schedule in different views—Building level, Floor level, and Conference Room level.
–![]() Cisco Smart+Connected Emergency Notifications (Smart+Connected EN)—Displays the notifications and exit routes on the signage/IEC when there is an emergency and sends audio and visual notifications on the Cisco IP Phones during a crisis.
Cisco Smart+Connected Emergency Notifications (Smart+Connected EN)—Displays the notifications and exit routes on the signage/IEC when there is an emergency and sends audio and visual notifications on the Cisco IP Phones during a crisis.
–![]() Cisco Smart+Connected Information Signage (Smart+Connected IS)—Displays the general information and news on the digital signage.
Cisco Smart+Connected Information Signage (Smart+Connected IS)—Displays the general information and news on the digital signage.
–![]() Cisco Smart+Connected Green Advisor (Smart+Connected GA)—Displays energy consumption data, energy saving tips, and green information.
Cisco Smart+Connected Green Advisor (Smart+Connected GA)—Displays energy consumption data, energy saving tips, and green information.
In addition, Smart+Connected Spaces can help in energy savings by automatically switching devices to standby mode when the meeting room is unoccupied and based on the configuration, turn them back on before the actual occupancy.
As administrator, you need to manage the overall configuration, maintenance, and content creation for the Smart+Connected Spaces solution through the administrator web portals for managing meeting spaces and digital signage (solutions), and managing workspaces (ipsapp). You need to add locations and devices, create users, and associate devices to locations for the solution in the SDP. For more information on performing these tasks, see the Cisco Service Delivery Platform User Guide and Cisco Service Delivery Platform Installation Guide. After the locations are added, and the devices are associated to them in the SDP, they are available in the Smart+Connected Spaces user and administrator portals. You can select a location and associate a configuration to it. The features such as fault messages, device control options, signage menu messaging, and room booking that are added to the configuration can be accessed by the end user from the Cisco IP Phones at the location.
Smart+Connected Spaces Administrator Portals
The Smart+Connected Spaces administrator web portal for managing meeting spaces and digital signage (solutions) allows you to create, edit, and delete the content that appears on signage and Cisco IP Phones. From the administrator portal for meeting spaces and digital signage, you can manage the information exchange/content that get pushed to the different end points like IP phones, and digital signage. The solution provides end users interface to view additional information such as emergency notifications, news, general organizational updates, tips on better resource management, energy savings, and corporate practices through digital signage/IEC. You can also generate reports about the conference room and export the reports for future reference. All emergency or alert notifications can be configured so that they can be sent out on different channels such as the digital signage/IEC and the Cisco IP Phones.
The Smart+Connected Spaces administrator web portal for managing workspaces (ipsapp) allows you to generate reports about workspace usage, assign fixed desks (permanent workspaces where other employees are not allowed to check in) to the required employees in the enterprise, and import and export the details of the fixed desks. You can generate and download QR codes that users can scan to check in and check out of workspaces and provision the features such as lights, air conditioning and so on, that will be available at the workspaces.
Logging In to the Smart+Connected Spaces Administrator Portals
You can log in to the Smart+Connected Spaces portals by using any of the browsers certified for the application. After you complete the installation process, the administrator portal for managing meeting spaces and digital signage can be accessed by using http://host-name:domain-port/solutions. The administrator portal for managing workspaces and offices can be accessed by using http://host-name:domain-port/ipsapp. You can use “superadmin” as the username and password, which is created by default during installation.
Note![]() For security reasons, we recommend that you change the default password for the superadmin user by logging in to the SDP portal, clicking the Users and Roles tab, and editing the details of the superadmin user. Please note that this procedure is only for changing the password of the users who are authenticated through the database. For more information, see the Cisco Smart+Connected Spaces Installation Guide and the Cisco Service Delivery Platform User Guide.
For security reasons, we recommend that you change the default password for the superadmin user by logging in to the SDP portal, clicking the Users and Roles tab, and editing the details of the superadmin user. Please note that this procedure is only for changing the password of the users who are authenticated through the database. For more information, see the Cisco Smart+Connected Spaces Installation Guide and the Cisco Service Delivery Platform User Guide.
If you want other users to access the application, you need to create additional users by logging in to the Cisco Service Delivery Platform (SDP). For more information, see the Cisco Smart+Connected Spaces Installation Guide and the Cisco Service Delivery Platform User Guide.
The following are the available roles that you can assign to the users you create:
- proxyuser—Allows a user to access the Smart+Connected Spaces user portal for managing workspaces and offices, and make proxy reservations for other users via the ipsapp web interface.
- scpsuser—Allows a user to access the Smart+Connected Spaces user portal for managing workspaces and offices.
- Webcalendar User—Allows a user to access the Smart+Connected Spaces calendar portal.
- InfoBundle Manager—Allows a user to access the Smart+Connected Spaces admin portal for managing meeting spaces and digital signage.
- SuperAdmin—Allows a user to access all of the Smart+Connected Spaces admin and user portals.
To log in to the Smart+Connected Spaces administrator portal (solutions or ipsapp), perform the following steps:
Step 1![]() Enter the URL in the address field of the web browser, and click Enter.
Enter the URL in the address field of the web browser, and click Enter.
The Smart+Connected Spaces Login page appears.
Step 2![]() Enter the username and password.
Enter the username and password.
The Smart+Connected Spaces home page appears.
After logging in, if you do not use the portal beyond the idle time out duration, your browsing session will time out. In such a situation, you must log in again to access the portal.
Note![]() The default time out duration is 30 minutes. You can change the session time out duration for any of the Smart+Connected Spaces portals by modifying the session-timeout property in the web.xml file for the required portal. This file can be found at the following path: pkg-apps/SmartSpaces.ear/<war file for the portal>.
The default time out duration is 30 minutes. You can change the session time out duration for any of the Smart+Connected Spaces portals by modifying the session-timeout property in the web.xml file for the required portal. This file can be found at the following path: pkg-apps/SmartSpaces.ear/<war file for the portal>.
Understanding the Smart+Connected Spaces Administrator Interface
- Interface for Managing Meeting Spaces and Digital Signage
- Interface for Managing Workspaces and Offices
Interface for Managing Meeting Spaces and Digital Signage
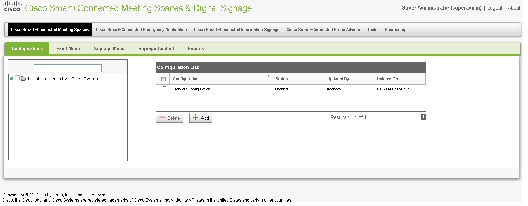
Figure 1-1 displays the Smart+Connected Spaces interface that the administrator can use to manage meeting spaces (conference and Cisco TelePresence rooms) and digital signage/IEC.
Figure 1-1 Admin Interface—Portal for Managing Meeting Spaces and Digital Signage
Interface for Managing Signage Content
Figure 1-2 displays the rich text editor that is provided in the administrator portal for managing meeting spaces and digital signage. You can use the rich text editor to create content that you want to display on the digital signage/IEC. This editor allows you to visually edit the content (see Figure 1-2), in addition to editing the source level (HTML source). This information can be the emergency notification messages, news content, or the green fact.
You can configure templates and insert those in the rich text editor. This enables you to quickly update the content during emergency situations.
For more information on how to work with the rich text editor, click the  icon available on the rich text editor toolbar.

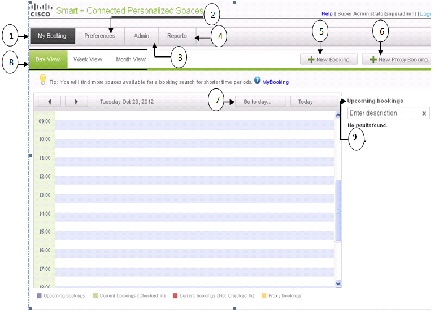
Interface for Managing Workspaces and Offices
Figure 1-3 User and Admin Interface–Portal for Managing Workspaces and Offices
 Feedback