User Guide for Cisco Digital Media Manager 5.4.x
Bias-Free Language
The documentation set for this product strives to use bias-free language. For the purposes of this documentation set, bias-free is defined as language that does not imply discrimination based on age, disability, gender, racial identity, ethnic identity, sexual orientation, socioeconomic status, and intersectionality. Exceptions may be present in the documentation due to language that is hardcoded in the user interfaces of the product software, language used based on RFP documentation, or language that is used by a referenced third-party product. Learn more about how Cisco is using Inclusive Language.
- Updated:
- April 29, 2013
Chapter: 12. Register DMPs
- Concepts
- Overview
- Glossary
- Partial Support for Cisco Medianet 2.1 Features
- DHCP Server Configuration Notes for MSI Service Discovery
- Understand Medianet Autoconfiguration for DMPs
- Information That Medianet and DMPs Exchange
- Medianet Activation Workflow for a DMP 4310G or 4400G
- Restrictions
- Guidelines
- Understand the Sequence of Operations for Non-Medianet Autoregistration
- Procedures
- Use DMPDM to Prepare a DMP for Manual Registration
- Use a System Task to Normalize DMP Passwords
- Establish Trust Between DigitalSigns and your Centrally Managed DMPs
- Add or Edit Address Ranges for Non-Medianet Autoregistration
- Delete Address Ranges for Non-Medianet Autoregistration
- Add or Edit One DMP Manually
- Delete DMPs Manually from Your Device Inventory
- Reference
Register DMPs
Revised: May 4, 2015
OL-15762-05

 Everyone — You understand IP addresses, subnets, and other LAN fundamentals.
  Everyone — Your user account permissions allow you to manage DMPs.
  Medianet Users — You understand Medianet fundamentals and have hands-on experience in its configuration and use. Or, because you lack this specialization, you will study technical materials on Cisco.com as needed.
 Concepts
- Overview
- Glossary
- Restrictions
- Guidelines
- Understand the Sequence of Operations for Non-Medianet Autoregistration
Overview
Before you can start to manage DMPs centrally, you must register them with DMM. You can automate this process or run it manually for one DMP at a time.
- Cisco DMS-native autoregistration finds every DMP in the subnets that you specify. Then, it configures these DMPs to recognize and trust your DMM appliance. It restarts the DMPs and then registers them in DMM for centralized management.
- Medianet autoregistration finds any DMP automatically when you attach it to a Medianet-ready switch in your Enterprise. This method optimizes the switch port for rich media delivery, and then registers the DMP in DMM for centralized management.
Glossary

Timesaver Go to terms that start with... [ A | C | D | L | M ].
|
|
|
|
information |
This value describes any non-default details to inject into the encapsulated CDP message. As this is a data injection, it depends wholly on the presence of a defined civic-location-id value. Absent that value, there is no way for this value to reach any endpoint (CSCti85043). Later, when you plug a Medianet-ready DMP into a properly configured switch, the Location Services feature of MSI populates the Location URL field automatically in DMPDM. 
|
|
|
|
|
|
|
|
|
 Glossary
|
|
|
|
|
|
|
|
|
 Glossary
|
|
|
|
|
|
|
|
|
 Glossary
|
|
|
|
Note CDP and LLDP constrain how much location information you can store on a Medianet-enabled switch. Make sure that this information never exceeds 255 bytes. Note A DMP 4400G cannot receive or use Location Services information over Wi-Fi. Its connection type to your Medianet-enabled switch must be Ethernet. 
|
 Glossary
|
|
|
|
|
|
|
|
|
|
|
|
|
|
|
|
Partial Support for Cisco Medianet 2.1 Features
Some DMP endpoints support some Cisco Medianet 2.1 features.
Note![]() We do not support any Medianet features on DMP 4305G endpoints.
We do not support any Medianet features on DMP 4305G endpoints.

Tip • To assess your network for Medianet readiness, see http://cisco.com/go/mra.
- To review solution reference network designs (SRNDs) for Medianet, see http://www.cisco.com/en/US/solutions/ns340/ns414/ns742/ns819/landing_vid_medianet.html .

|
DMP 4310G endpoints support discovery via DHCP and can learn their physical location. In addition, they know and can broadcast their product type, model, and software version. Through their use of your Medianet, they can receive their IP address, VLAN assignment, and network configuration settings automatically. Furthermore, they receive information from Medianet through DHCP3 that helps them to autoregister themselves with your DMM server. Later, after a successful autoregistration, the splash screen on these DMPs includes key parameters and states explicitly that setup succeeded. |
|
Medianet 2.1 feature support by DMP 4400G endpoints is equivalent to support by DMP 4310G endpoints, with just one exception. Ordinarily, a DMP 4400G can participate in networks via Ethernet or Wi-Fi. However: A Wi-Fi connection by a DMP 4400G prevents it from obtaining or using any Location Services information that Medianet might be configured to provide. |
|
3.With DHCP option 125 (V-I Vendor-Specific Information) for service discovery, after you configure your supported DHCP server to support this option. See RFC 3925. |
DHCP Server Configuration Notes for MSI Service Discovery
For your MSI service discovery purposes as a DMP administrator, Medianet must know that a DMM server is available and know exactly which addressable node it is on your network. You must configure your DHCP server to facilitate this information-sharing model.
Configuration methods vary among platforms and implementations.
dhcpd Example
An example here shows entries in the dhcpd.conf file for a Linux-based DHCP server called dhcpd. Entries like these advertise the IP address of your authoritative DMM appliance — converted here from decimal to hex and shown in red — to any DMPs that should trust its directives implicitly.
$ echo 'ibase=10;obase=16;
 ' | bc

And so, in keeping with the previous conversion example, shown in red:
Note![]() See the Medianet documentation on Cisco.com for detailed instructions.
See the Medianet documentation on Cisco.com for detailed instructions.
Windows Server Example
In contrast, the DHCP offering in Windows Server 2008 (and, likewise, Windows Server 2003) cannot handle DHCP option 125 queries natively. Therefore, you must install a “callout” DLL that injects this ability into the server before you can configure it to advertise the availability of any service.
Note ●![]() For 32-bit Windows Server, the DLL filename is DHCPSDDLLx86.DLL.
For 32-bit Windows Server, the DLL filename is DHCPSDDLLx86.DLL.
Afterward, you must edit \Medianet\msi\apps\dhcpsddll\src\dhcpsdconfig.reg to include a 3-tuple ( IP,port,transport), converted to hexadecimal, that identifies your DMM appliance as a provider of centralized management for DMPs.

And finally, you must add two keys to the Windows registry, under \HKEY_LOCAL_MACHINE\SYSTEM\CurrentControlSet\Services\DHCPServer\Paramters
Note![]() See the Medianet documentation on Cisco.com for detailed instructions.
See the Medianet documentation on Cisco.com for detailed instructions.
Understand Medianet Autoconfiguration for DMPs
DMP 4310G and 4400G endpoints can use CDP to announce and identify themselves on networks. And you might use Ethernet cables to connect such DMPs to switches where the autoconfiguration (Auto Smartports) features of Medianet are enabled. When you do, these switches recognize from the CDP announcements that the newly connected devices are DMPs.
After recognizing that a DMP is attached to one of its Ethernet ports, the switch can apply to this port a set of built-in configuration macros (Auto Smartports) that are optimized specifically for DMPs. By configuring so many settings automatically, Medianet can accelerate and simplify DMP mass deployments, QoS configuration, and asset tracking. In turn, these simplified deployments can lower your operating costs.
Information That Medianet and DMPs Exchange
Medianet and a DMP can exchange these types of data.
- name of the chassis
- system name
- system object
- hardware revision
- firmware revision
- software revision
- serial number
- manufacturing name
- model name
- asset identifier
- CDP timeout
- VLAN assignment
- switch port assignment
- switch name and model
- switch IP address
- location string
If you would like to learn more about Medianet, see http://cisco.com/go/medianet.
Medianet Activation Workflow for a DMP 4310G or 4400G
Medianet support is enabled by default on DMPs in Cisco DMS release 5.3. However, you can turn this support Off or back On again at your discretion.
Note![]() We do not support any Medianet features on DMP 4305G endpoints.
We do not support any Medianet features on DMP 4305G endpoints.
Tip![]() You can deactivate Medianet support on one or more DMPs. Simply reverse step 3b in this workflow.
You can deactivate Medianet support on one or more DMPs. Simply reverse step 3b in this workflow.
1.![]() Issue the command to enable Medianet 2.1 on a supported network switch that runs Cisco IOS 12.2(55.0.36)SE).
Issue the command to enable Medianet 2.1 on a supported network switch that runs Cisco IOS 12.2(55.0.36)SE).
2.![]() Enable the Auto Smartports feature globally on the switch.
Enable the Auto Smartports feature globally on the switch.
3.![]() Use either DMPDM or Digital Signs to enable Medianet features on your DMP 4310G or 4400G.
Use either DMPDM or Digital Signs to enable Medianet features on your DMP 4310G or 4400G.
a.![]() Click Network in the Settings area. ‘
Click Network in the Settings area. ‘

b.![]() Choose On from the Medianet Enabled list in the Medianet Services area.
Choose On from the Medianet Enabled list in the Medianet Services area.

c.![]() Save this changed setting, and then restart your DMP.
Save this changed setting, and then restart your DMP.
a.![]() Create and save a system task that uses:
Create and save a system task that uses:
• init.startService_msi=yes&mib.save=1&mng.reboot=1 as its request string.

b.![]() Schedule and deploy the system task to run on your DMP 4310G or 4400G.
Schedule and deploy the system task to run on your DMP 4310G or 4400G.
Restrictions
- DMM-native autoregistration does not use any Medianet technologies. It uses NMAP (CSCtk02451).
–![]() The DHCP implementation in Windows Server 2003
The DHCP implementation in Windows Server 2003
–![]() The DHCP implementation in Windows Server 2008
The DHCP implementation in Windows Server 2008
Note![]() This release does not support any DHCP server that runs on a Cisco router or switch.
This release does not support any DHCP server that runs on a Cisco router or switch.
- A DMP 4310G might come to use the wrong IP address when it relies upon a Medianet switch where more than one VLAN uses DHCP. For the switch to bungle IP address assignment in this way, temporary conditions that do not sever the DMP’s AC power connection must nonetheless interrupt its network connection through the switch. (Thus, this problem cannot possibly occur while the DMP uses PoE.) Specifically, the Medianet switch assigns its default VLAN to your DMP. But then — after your DMP’s network connection is interrupted and restored — your Medianet switch assigns to your DMP a dynamic IP address from another VLAN on this same switch. The mismatch disrupts centralized management of your DMP.
To prevent this problem or to recover from it, you must run a shell script on your switch. See the “Prevent DHCP Address Assignments to the Wrong VLAN” section.
Guidelines
Limit Your Use of Manual Registration

We recommend that you never use the method to register a DMP manually, except in a lab for testing purposes. Manual registration is neither suitable for, nor scalable in, a production network.
Eventually, when autoregistration finds and adds a DMP that you registered manually, the device inventory database develops multiple records for the one device. We see this duplication as an IP address conflict, which interferes with normal operation and triggers an alarm in DMS-Admin.
General Best Practices for Non-Medianet Autoregistration
Choose Network Ranges Cautiously
When you autoregister DMPs that are new to your DMM appliance, they restart immediately even when they are known already to another DMM appliance, and even when they are running an event. Therefore, when your organization uses more than one DMM appliance, be careful to autoregister only those DMPs that you are not already managing centrally elsewhere. Otherwise, you might temporarily disrupt media playback for the signs in your network.
Best Practices to Schedule Non-Medianet Autoregistration Events
DMP autoregistration operations that are native to DMM (as opposed to the superficially similar operations in a Medianet) occur in a sequence that does not tolerate disruption.
- You can schedule multiple DMP autoregistration operations to run simultaneously only when they will all search the same one subnet.
- However, when you define DMP autoregistration operations to search more than one subnet, you must not schedule them to run simultaneously, or even to overlap. When they overlap, only the first of them can run at all. Furthermore, DMM does not show any error message to explain why the similar operations all failed.
- Therefore, you should plan to stagger the start times by at least 35 minutes apiece when you schedule DMP autoregistration tasks that will search multiple subnets.
Note![]() In a very large network that contains thousands of DMPs, the necessary interval might be longer than 35 minutes.
In a very large network that contains thousands of DMPs, the necessary interval might be longer than 35 minutes.
- We recommend that you autoregister DMPs after normal business hours. Autoregistration of 5,000 DMPs takes approximately 4 minutes in a fast network and does not use polling.
DMM runs any non-Medianet autoregistration job once each time that you schedule it to run.
DMM does not scan the specified network range continuously for DMPs that you might add in the future. Therefore, when you plan to add DMPs frequently, you should schedule a non-Medianet autoregistration event to recur accordingly.
- Your DMPs must all share identical user credentials for their respective accounts. Otherwise, non-Medianet autoregistration cannot occur. Nor can DMM centrally manage DMPs whose passwords differ from your universal DMP password.
Note![]() Special characters, including exclamation points (!), question marks (?), ampersands (&), at signs (@), and asterisks (*) are forbidden in DMP passwords. (CSCsq41233; CSCsw47873; CSCub67295)
Special characters, including exclamation points (!), question marks (?), ampersands (&), at signs (@), and asterisks (*) are forbidden in DMP passwords. (CSCsq41233; CSCsw47873; CSCub67295)
- Verify that the routers, switches, and firewalls between your DMM appliance and the NMAP address range for non-Medianet autoregistration allow TCP port 7777 to send and receive packets (CSCtk02451). Verify also that ICMP (ping) traffic is allowed to pass from your DMM appliance to your DMPs on this port. When any of this traffic is blocked anywhere along its route, non-Medianet autoregistration cannot occur.
Understand the Sequence of Operations for Non-Medianet Autoregistration
DMM-native (non-Medianet) autoregistration operations follow this sequence.
1.![]() DMM scans every device in the specified address range, looking for devices where TCP port 7777 is open.
DMM scans every device in the specified address range, looking for devices where TCP port 7777 is open.
2.![]() DMM confirms which such devices are DMPs.
DMM confirms which such devices are DMPs.
3.![]() DMPs receive information about your DMM server, and are then instructed to restart.
DMPs receive information about your DMM server, and are then instructed to restart.
4.![]() Upon restarting, DMPs transmit updated information about themselves to DMM and set their own status to “Up.”
Upon restarting, DMPs transmit updated information about themselves to DMM and set their own status to “Up.”
5.![]() DMM generates new database records for all DMPs that are newly autoregistered.
DMM generates new database records for all DMPs that are newly autoregistered.
6.![]() DMM assigns newly registered DMPs to any DMP groups that match the address range that you entered.
DMM assigns newly registered DMPs to any DMP groups that match the address range that you entered.
7.![]() DMM assigns newly registered DMPs to the “All DMPs” group.
DMM assigns newly registered DMPs to the “All DMPs” group.
Procedures
- Use DMPDM to Prepare a DMP for Manual Registration
- Use a System Task to Normalize DMP Passwords
- Establish Trust Between Digital Signs and your Centrally Managed DMPs
- Add or Edit Address Ranges for Non-Medianet Autoregistration
- Delete Address Ranges for Non-Medianet Autoregistration
- Add or Edit One DMP Manually
- Delete DMPs Manually from Your Device Inventory
Use DMPDM to Prepare a DMP for Manual Registration
When autoregistration is not suitable, such as for testing purposes, you can perform the required steps manually to register a DMP in DMM. However, you must first prepare the DMP.
Step 1![]() Point your browser to the IP address of a DMP that you will manage centrally.
Point your browser to the IP address of a DMP that you will manage centrally.
Step 2![]() At the DMPDM login prompt, enter the username and the password that you configured for the DMP.
At the DMPDM login prompt, enter the username and the password that you configured for the DMP.
Step 3![]() Click DMP Management in the Administration area, and then enter the required values.
Click DMP Management in the Administration area, and then enter the required values.

a.![]() Enter in the DMM Appliance IP Address field the full and correct IP address of your DMM appliance.
Enter in the DMM Appliance IP Address field the full and correct IP address of your DMM appliance.
b.![]() Enter in the DMM Server Timeout (in seconds) field the maximum number of seconds that your DMP should wait for a response from your DMM appliance.
Enter in the DMM Server Timeout (in seconds) field the maximum number of seconds that your DMP should wait for a response from your DMM appliance.
Step 4![]() Click Apply to confirm your entries.
Click Apply to confirm your entries.
Step 5![]() Click Save and Restart DMP in the Administration area, and then click to confirm.
Click Save and Restart DMP in the Administration area, and then click to confirm.

Step 6![]() Stop. You have completed this procedure.
Stop. You have completed this procedure.
Use a System Task to Normalize DMP Passwords
Do the management passwords on any of your DMPs differ from your norm for DMPs? Or do any DMP passwords include forbidden characters?
If so, you must edit these values to normalize them and remove any forbidden characters. Centralized management of DMPs is possible in DMM only when your DMPs all use one identical username (admin) and one identical password.
Note![]() Special characters, including exclamation points (!), question marks (?), ampersands (&), at signs (@), and asterisks (*) are forbidden in DMP passwords. (CSCsq41233; CSCsw47873; CSCub67295)
Special characters, including exclamation points (!), question marks (?), ampersands (&), at signs (@), and asterisks (*) are forbidden in DMP passwords. (CSCsq41233; CSCsw47873; CSCub67295)
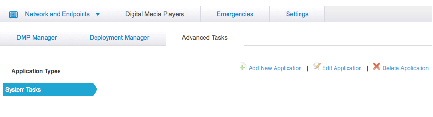
Step 1![]() Click Network and Endpoints.
Click Network and Endpoints.

Step 2![]() Choose Digital Media Players > Advanced Tasks > System
Choose Digital Media Players > Advanced Tasks > System![]() Tasks. Then, click Add New Application.
Tasks. Then, click Add New Application.
The Create New System Task form opens.

Step 3![]() Enter a name and description for your new task.
Enter a name and description for your new task.
Step 4![]() Choose Set from the Request Type list.
Choose Set from the Request Type list.
Step 5![]() Enter this command string in the Request text box.
Enter this command string in the Request text box.
init.WEB_password=s/5_x/5_4/dmm/user/guide/dmp/inventory.fm/jcr:content/renditions/inventory-33.jpg" ALIGN="BASELINE" ALT=""> &mib.save=1&mng.reboot=1
Step 6![]() Click Submit to save the task and make it available to use.
Click Submit to save the task and make it available to use.
Step 7![]() Send the password-changing instruction simultaneously to multiple DMPs in your network.
Send the password-changing instruction simultaneously to multiple DMPs in your network.
a.![]() Choose Schedules > Play Now.
Choose Schedules > Play Now.
b.![]() Choose a group from the DMP Groups object selector.
Choose a group from the DMP Groups object selector.
c.![]() Check the check box for each DMP where the DMP Web Account password should change.
Check the check box for each DMP where the DMP Web Account password should change.
d.![]() Choose from the Select an Event Type list the system task that you named in Step 2.
Choose from the Select an Event Type list the system task that you named in Step 2.
Note![]() After your targeted DMPs restart, you must update DMM user credential entries at Settings > Server Settings.
After your targeted DMPs restart, you must update DMM user credential entries at Settings > Server Settings.
Step 8![]() Stop. You have completed this procedure.
Stop. You have completed this procedure.
Establish Trust Between Digital Signs and your Centrally Managed DMPs
You must tell Cisco Digital Signs what user credentials to use at 5-minute intervals when it polls your DMPs and at any other time when it sends commands, queries, schedules or assets to your DMPs. Also, you must tell your DMPs which one DMM appliance to trust with this authority.
Note![]() This procedure assumes that you manage your DMPs centrally. Furthermore, it assumes that you use Cisco Digital Signs and not Cisco StadiumVision for this purpose.
This procedure assumes that you manage your DMPs centrally. Furthermore, it assumes that you use Cisco Digital Signs and not Cisco StadiumVision for this purpose.
Step 1![]() Click Network and Endpoints.
Click Network and Endpoints.

Step 2![]() Choose Settings > Server Settings.
Choose Settings > Server Settings.

Step 3![]() Enter the required values.
Enter the required values.
- Servlet Server Address — If you have not already done so, enter the DNS-resolvable hostname and domain (together, these are the FQDN) for your DMM appliance, such as dmm.example.com.
Note![]() Your entry here must be DNS-resolvable! Otherwise your DMPs cannot load any media assets or other deployments from DMM. (CSCtx15347)
Your entry here must be DNS-resolvable! Otherwise your DMPs cannot load any media assets or other deployments from DMM. (CSCtx15347)
- DMP User Name — Enter admin or, when you have changed the DMP Web Account username from the default value, enter the new username that you assigned.
- DMP User Password — Enter the password that corresponds to the username.
Step 5![]() Stop. You have completed this procedure.
Stop. You have completed this procedure.
Add or Edit Address Ranges for Non-Medianet Autoregistration
Even without access to Cisco Medianet technologies, you can autoregister all of the DMPs in any NMAP address range that you specify (CSCtk02451). Afterward, the registered DMPs support centralized management from DMM.
Step 1![]() Click Network and Endpoints.
Click Network and Endpoints.

Step 2![]() Choose Digital Media Players > Advanced Tasks.
Choose Digital Media Players > Advanced Tasks.
Step 3![]() Click the DMP Discovery row in the Application Types list.
Click the DMP Discovery row in the Application Types list.
Step 4![]() Do one of the following.
Do one of the following.
Step 5![]() Set the necessary values.
Set the necessary values.
Step 6![]() Click Submit to save your work.
Click Submit to save your work.
OR
Click Cancel to discard your work.
Step 7![]() Schedule a channel event to deliver or run this application.
Schedule a channel event to deliver or run this application.
Step 8![]() Stop. You have completed this procedure.
Stop. You have completed this procedure.
Timesaver Alternatively, you can use DMM-native (non-Medianet) autoregistration to populate a DMP group.
1. Choose Digital Media Players > DMP Manager.
2. Click a DMP group to highlight it.
3. Choose More Actions > Edit Group.
4. Proceed as you would with any other non-Medianet autoregistration.
Delete Address Ranges for Non-Medianet Autoregistration
You can delete network range definitions you saved for DMP autoregistration events.
Step 1![]() Click Network and Endpoints.
Click Network and Endpoints.

Step 2![]() Choose Digital Media Players > Advanced Tasks.
Choose Digital Media Players > Advanced Tasks.
Step 3![]() Click the DMP Discovery row in the Application Types list.
Click the DMP Discovery row in the Application Types list.
Step 4![]() Click the Applications list row whose settings should be deleted.
Click the Applications list row whose settings should be deleted.
Step 5![]() Click Delete Application.
Click Delete Application.
Step 6![]() Click Submit to save your work.
Click Submit to save your work.
OR
Click Cancel to discard your work.
Step 7![]() Schedule a calendar event to deliver or run this application.
Schedule a calendar event to deliver or run this application.
Step 8![]() Stop. You have completed this procedure.
Stop. You have completed this procedure.
Add or Edit One DMP Manually
Step 1![]() Click Network and Endpoints.
Click Network and Endpoints.

Step 2![]() Choose Digital Media Players > DMP Manager.
Choose Digital Media Players > DMP Manager.
Step 3![]() Do either of the following.
Do either of the following.
Tip Is the Add DMP button missing from your DMP Manager page? If so, something has blocked port 843 on your switch or router. Open port 843 and try again.
Step 4![]() Choose options and enter required values for the DMP.
Choose options and enter required values for the DMP.
After you register a DMP manually, its Description value in DMP Manager might be blank, even though your other DMPs show “registered” as their Description value. This happens only when you have not entered anything in the Description field. (CSCtr51123)
Step 5![]() Click Submit to save your work.
Click Submit to save your work.
OR
Click Clear to discard your work.
Step 6![]() (Optional) Add the DMP to a DMP group.
(Optional) Add the DMP to a DMP group.
Step 7![]() Schedule a calendar event to deliver or run this application.
Schedule a calendar event to deliver or run this application.
Step 8![]() Stop. You have completed this procedure.
Stop. You have completed this procedure.
Delete DMPs Manually from Your Device Inventory
Step 1![]() Click Network and Endpoints.
Click Network and Endpoints.

Step 2![]() Choose Digital Media Players > DMP Manager.
Choose Digital Media Players > DMP Manager.
Step 3![]() Do either of the following.
Do either of the following.
Step 4![]() Click to highlight the DMP to be deleted.
Click to highlight the DMP to be deleted.
Step 5![]() Choose More Actions > Delete from System
Choose More Actions > Delete from System![]() .
.
DMM shows a warning message and asks that you either confirm or cancel your request.
Step 6![]() Click OK to save your work.
Click OK to save your work.
OR
Click Cancel to discard your work.
Step 7![]() Schedule a calendar event to deliver or run this application.
Schedule a calendar event to deliver or run this application.
Step 8![]() Stop. You have completed this procedure.
Stop. You have completed this procedure.
Reference
Software UI and Field Reference Tables
Elements to Autoregister DMPs
- Network and Endpoints > Digital Media Players > DMP Manager > Create Group
- Network and Endpoints > Digital Media Players > DMP Manager > More Actions > Edit Group
Elements to Add or Edit One DMP Manually
- Network and Endpoints > Digital Media Players > DMP Manager > Add DMP
- Network and Endpoints > Digital Media Players > DMP Manager > Edit DMP
Tip![]() Is the Add DMP button missing from your DMP Manager page? If so, something has blocked port 843 on your switch or router. Open port 843 and try again.
Is the Add DMP button missing from your DMP Manager page? If so, something has blocked port 843 on your switch or router. Open port 843 and try again.
Elements to Delete One DMP Manually
|
|
|
Deletes from your inventory database all records of the DMP that you highlighted. |
Elements to Configure Non-Medianet Autoregistration
Prevent DHCP Address Assignments to the Wrong VLAN
Note![]() You can run the following shell script (“mandatory.cdp.sh”) on a Cisco Catalyst 3750 Series switch. This shell script can prevent a type of DHCP-VLAN misalignment problem that we describe under the “Medianet” heading in the “Restrictions” section.
You can run the following shell script (“mandatory.cdp.sh”) on a Cisco Catalyst 3750 Series switch. This shell script can prevent a type of DHCP-VLAN misalignment problem that we describe under the “Medianet” heading in the “Restrictions” section.
Tip![]() To learn about shell script execution on your switch, see the documentation for your switch on Cisco.com.
To learn about shell script execution on your switch, see the documentation for your switch on Cisco.com.
FAQs and Troubleshooting
FAQs
Q. Why does DMM report that a DMP is down within 5 minutes of my registering the DMP successfully in DMM?
Make sure that the “Servlet Server Address” value is correct in DMM. See the “Establish Trust Between Digital Signs and your Centrally Managed DMPs” section.
Q. Can I take advantage of DMM autoregistration without any Medianet-ready switch?
Yes. You can use the DMM-native autoregistration that we have always supported or you can configure your DHCP server to support option 125, and thereby advertise to your DMPs the IP address of their trusted DMM appliance.
Q. Can I use a Cisco switch or router as my DHCP server?
No. Cisco switches and routers do not support DHCP configurations that include option 125.
Q. Can a DMP that uses a static IP address autoregister itself to DMM?
It depends. Although a DMP with a static IP address does not communicate with any DHCP server — and, thus, is blind to information that it might otherwise receive via DHCP option 125 — it should still be possible to use DMM native-autoregistration, as described elsewhere in this chapter.
Q. Can I obtain the serial number of a DMP?
Yes, you can — but only for a DMP 4310G whose installed firmware version is at least 5.2.3. There are two methods.
- Use DMM
1. Define an advanced task in DMM.
2. Choose Get as its request type.
3. Enter exactly this request string.
init.serial
4. Name and save your advanced task.
5. Send your advanced task to one or more DMP 4310G endpoints.
- Use HTTP
Follow exactly this syntax.
https://admin: @
@ :7777/get_param?p=init.serial
 Feedback