Configuring ToR Switches and Deploying Networks in External Fabrics

This chapter describes how to configure the Top-of-Rack (ToR) switches and deploy networks in NDFC.

Overview

NDFC supports the Top-of-Rack (ToR) switches. You can add the Layer 2 ToR switches in an external fabric, and they can be connected to the Leaf switches in the Easy Fabric. Typically, the Leaf and ToR devices are connected with back-to-back vPC connection. For more information, see Supported Topologies for ToR Switches.

Supported Topologies for ToR Switches

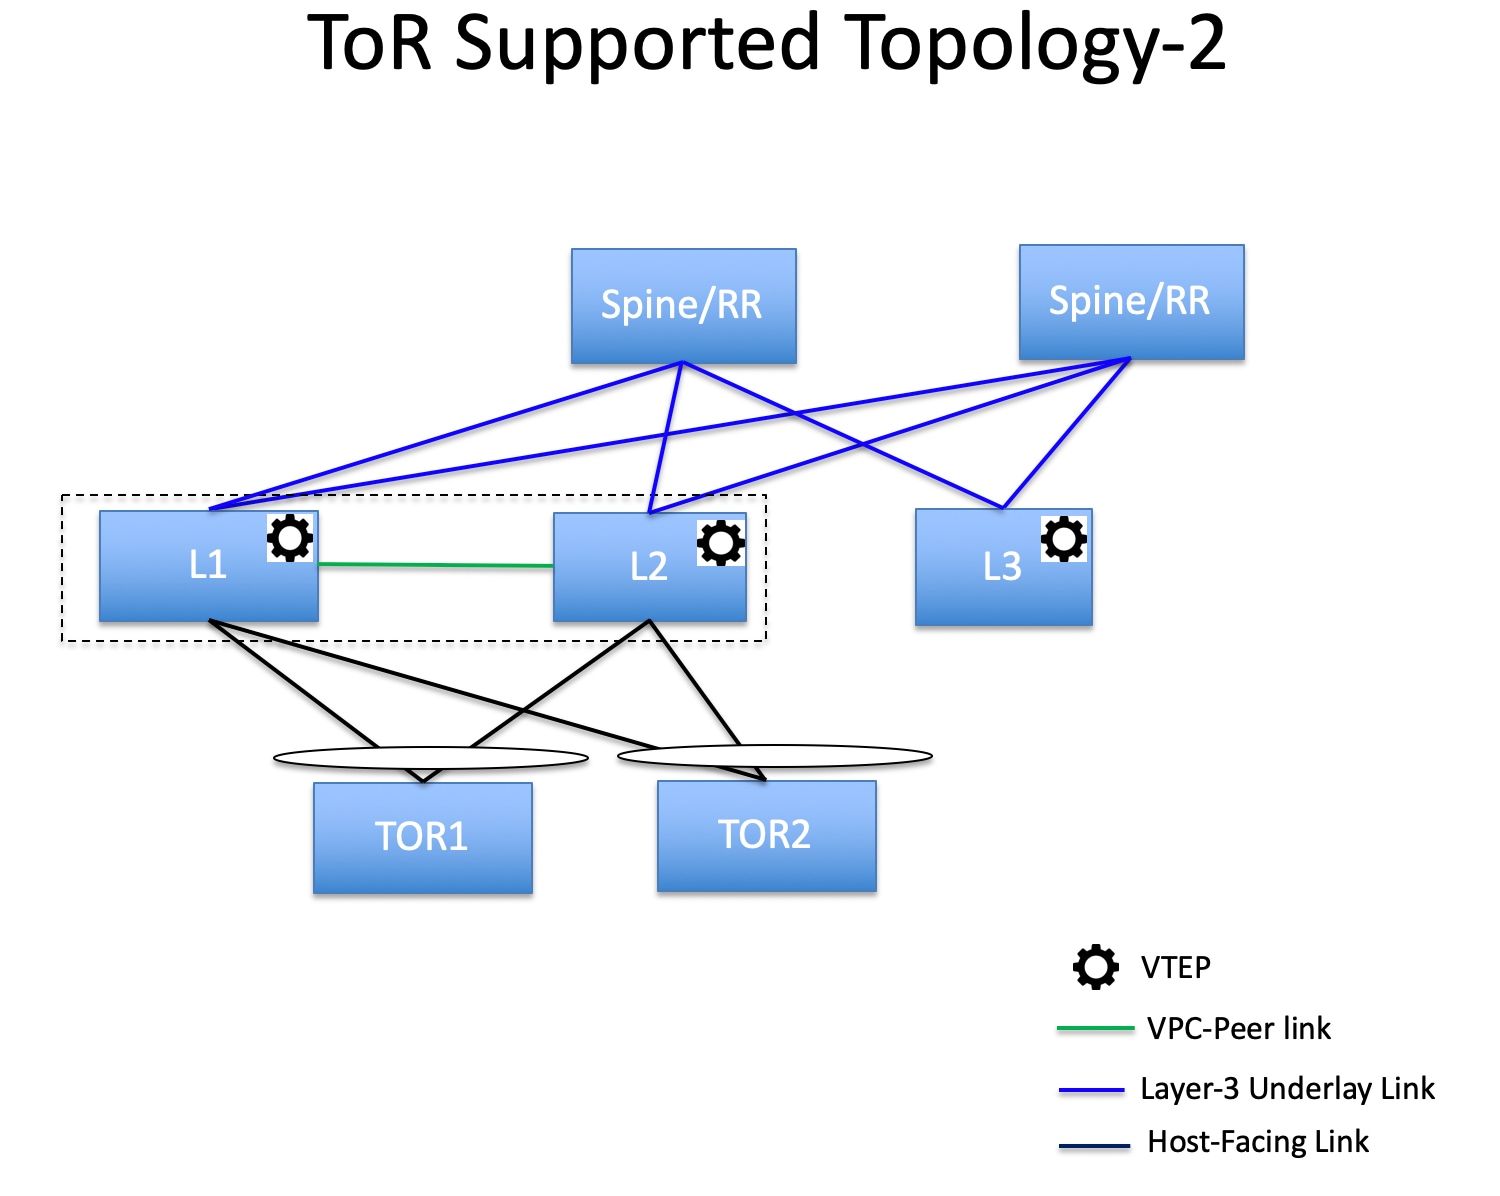
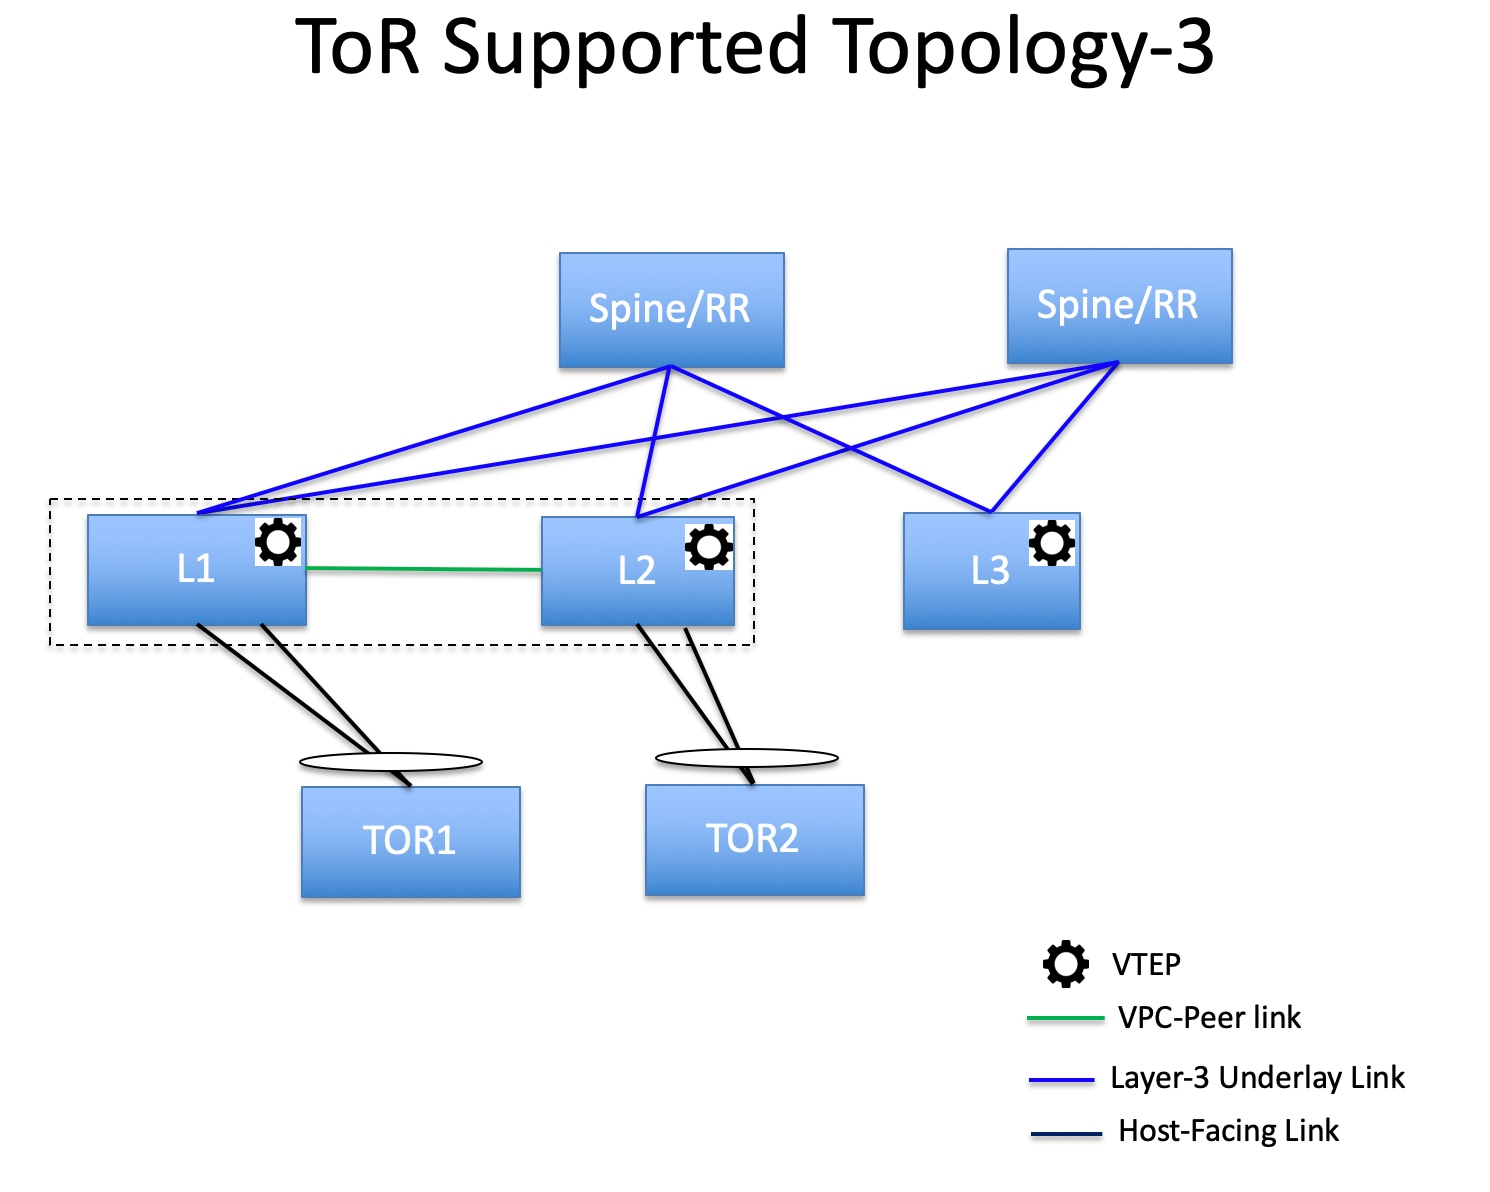
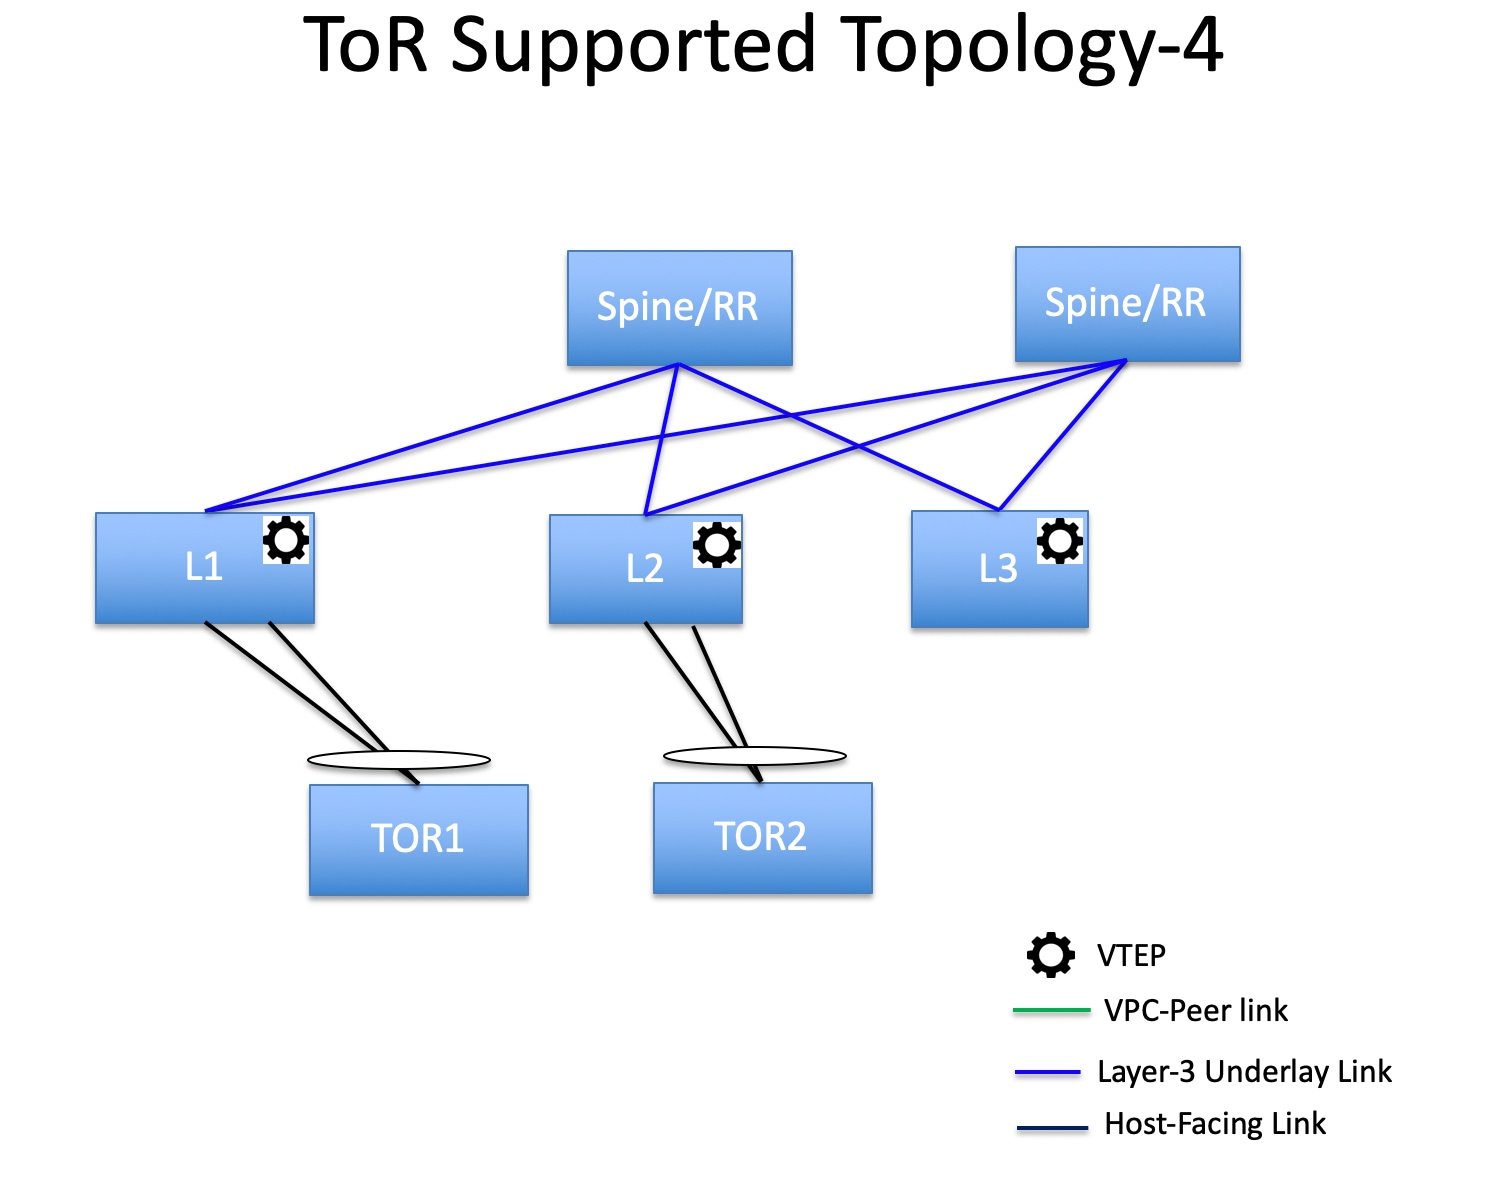
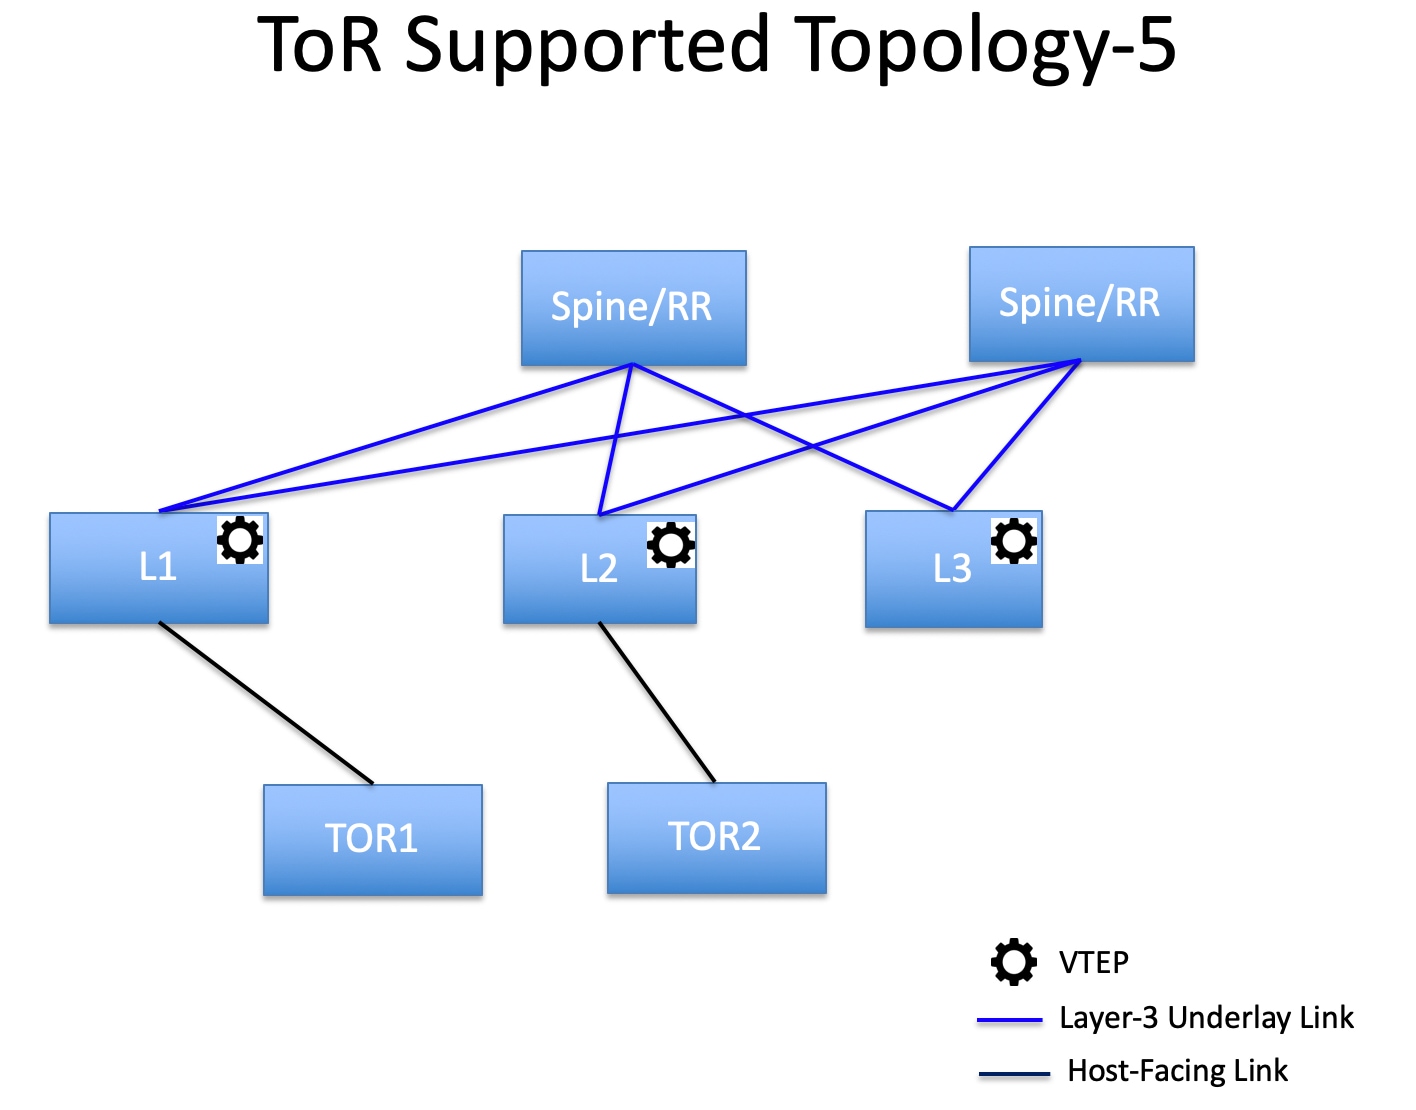
The following topologies with ToR switches are supported in NDFC:


Note

Cisco Nexus 7000 Series Switches do not support the ToR switch role in Cisco NDFC.


  • ToR switches with back to back vPC connection to the leaf switches.

  • ToR switches with port channels connected to both the leaf switches. The L1 and L2 switches are connected as a vPC pair.

  • ToR switches with port channels directly connected to the leaf switches. The L1 and L2 switches are connected as a vPC pair.

  • ToR switches with port channels directly connected to the leaf switches. vPC pairs are not configured for the leaf or ToR switches.

  • ToR switches directly connected to the leaf switches. vPC pairs are not configured for the leaf or ToR switches.

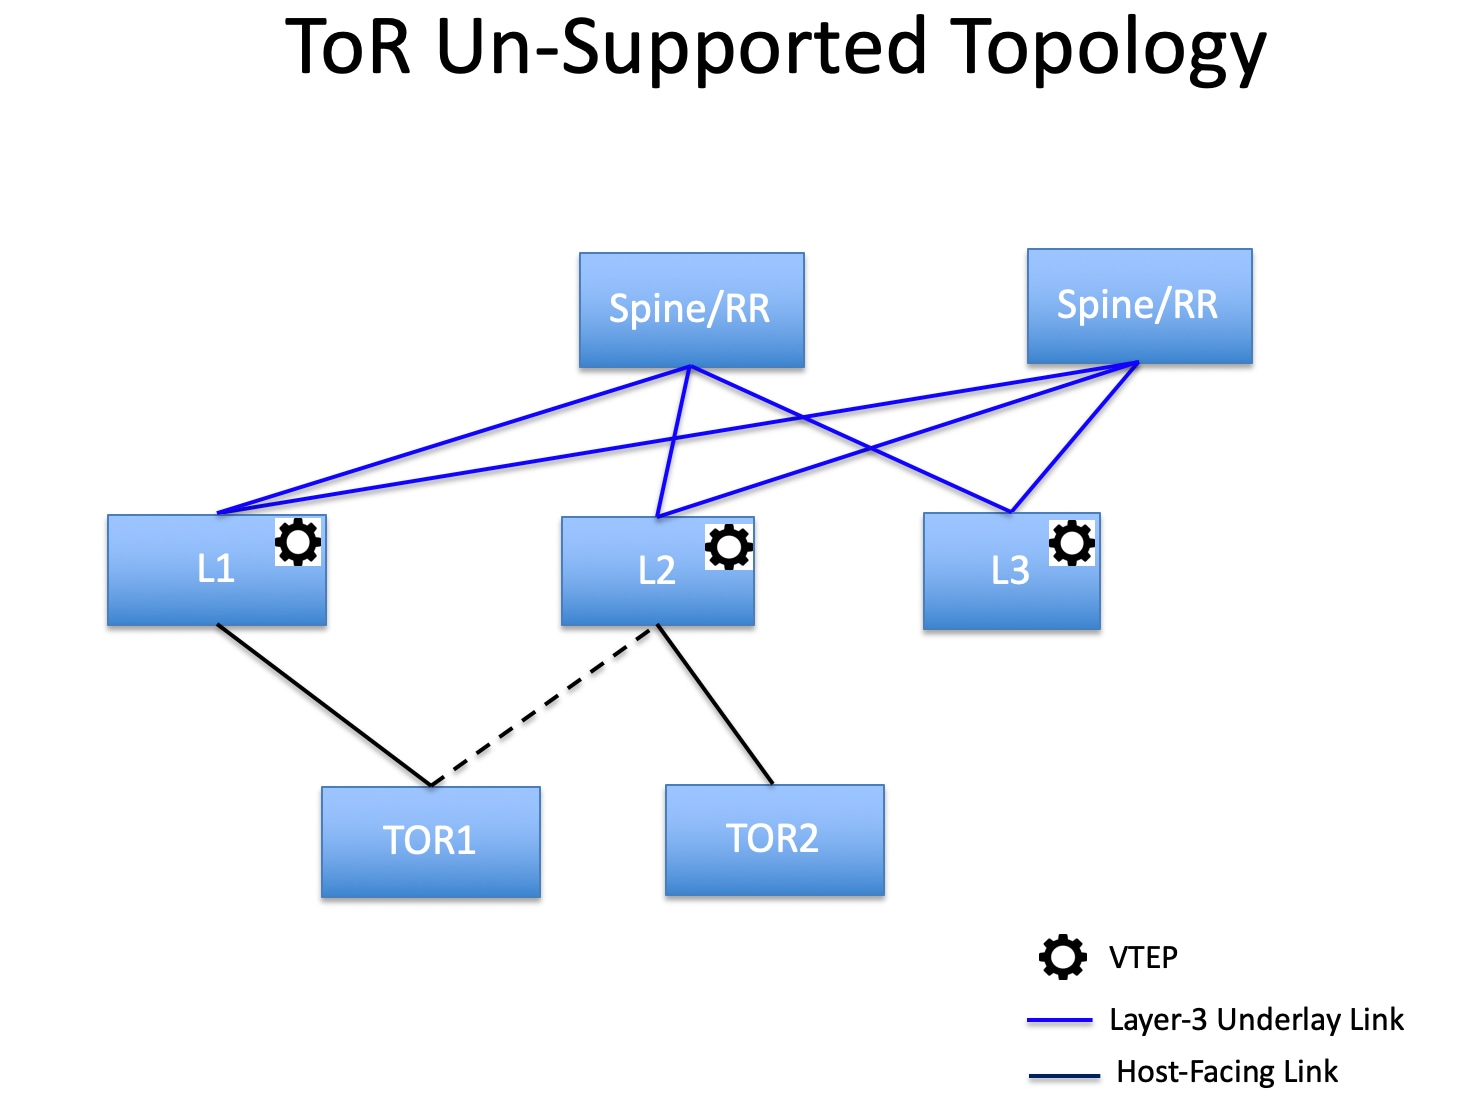
The following topology with ToR switches is not supported in NDFC:

Configuring ToR Switches

Before you begin, make sure you have an Easy Fabric or create and deploy a new fabric. For more information, see Creating a New VXLAN BGP EVPN Fabric.


Note

NDFC supports the trunk_host policies for the ToR switches. Make sure ToR has vPC, port channel or trunk host policy attached on the interfaces connected to Leaf. These policies are used to connect the ToR switches in the external fabric to the Leaf switches in the Easy Fabric.


Procedure


Step 1

Create an external fabric and add two ToR switches. For more information, see Creating an External Fabric.

The number of ToR switches can be more than two. This procedure shows how to configure ToR switches as shown in the ToR Topology-1, where ToR switches are connected using vPC. The following are the different scenarios for connecting the ToR switches:

  • If vPC is not configured on the ToR switches, then vPC policy need to be applied on ToR facing interfaces if uplinks of these ToR switches are connected to vPC leaf switches.

  • If ToR switches are connected to leaf using port-channel, then port-channel policies need to be applied on the ToR interfaces connected to the leaf switches.

  • If ToR switches are connected to leaf switches as standalone, the trunk policies need to be applied on the TOR interfaces.

Note 
  • While creating the external fabric, make sure that the Fabric Monitor Mode check box is not chosen.

  • The two ToR switches must be connected and have same switch role.

After adding the ToR switches, make sure that the role for the ToR switches is chosen as ToR.

Step 2

Select one of the ToR switch and click on Actions > vPC Pairing.

Choose the second ToR switch as a vPC Peer.

Step 3

Under vPC Pair Template, enter all the relevant details for a vPC connection between both the ToR switches. For more information about fields and their descriptions, see Creating a vPC Setup.

Note 

Step 2, and 3 are required since this example shows the ToR configuration for Topology-1. For Topology 2, 3, 4, and 5, the steps 2 and 3 are not required.

Step 4

On Switch Overview window, click Actions > Recalculate and Deploy.

Step 5

After the configuration is completed in the Config Deployment window, click Close.

Step 6

Create an MSD fabric.

While creating the MSD fabric, under the General tab, choose the ToR Auto-deploy Flag check box. This action enables automatic deployment of the networks and VRFs in the Easy Fabric to the ToR switches in the External Fabric when you click Recalculate and Deploy in the MSD fabric. For more information, see Deploying Networks on ToR Switches.

For information about the remaining tabs and fields, see Creating an MSD Fabric.

Step 7

Open the MSD fabric. Navigate to Child Fabrics and click on Actions to move fabric into MSD. Select the Easy Fabric where ToRs are connected and click Add.

Similarly, move the external fabric that contains the ToR switches to the MSD fabric.

Step 8

Open the Easy fabric containing the leaf switches.

Step 9

You need to create back-to-back vPC between the leaf and ToR switches.

Step 10

Navigate to LAN > Interfaces > Actions > Interface.

Choose vPC and enter all the relevant details and click Save.

For more information about the fields in this window, see Adding Interfaces.

After saving all the information, click Deploy.

Similarly, follow the Steps 9 and 10 to create a vPC on the ToR switch as well.


Deploying Networks on ToR Switches

To deploy networks on ToR switches in the external fabrics, you need to deploy them on the switches in the Easy Fabric through MSD. These switches should be connected to the ToR switches.

Procedure


Step 1

Choose LAN > Fabrics, double-click on the Easy fabric.

Step 2

In the Networks window, select the networks that you want to deploy or create a new network. For information about creating a network, see Creating Networks for the Standalone Fabric.

Step 3

Select the Network from the Network Attachment window. Click on Actions and Edit. Attach the network and select the appropriate interface/port-channels and then click on Save. These port channels connect the leaf switches to the ToR switches. The networks will be deployed on these port channels.

Step 4

On Fabric Overview window, click Actions > Recalculate and Deploy.

Now the VLANs are deployed on the leaf switches.

Step 5

Navigate to MSD fabric.

Step 6

On Fabric Overview window, click Actions > Recalculate and Deploy.

The networks created and deployed on the leaf switches in the Easy Fabric are also deployed on the ToR switches in the external fabric. This step allows the same VLANs to be configured on the ToR switches that are deployed on the leaf switches in the Step 4.

Note 

If VLANs are created on the ToR switches manually using the freeform configs, they are not modified.