Mitigate Threats Using MITRE Framework in Snort 3 Intrusion Policies

About MITRE ATT&CK Framework

The MITRE ATT&CK Framework is a comprehensive knowledge base that outlines the tactics, techniques, and procedures (TTPs) used by threat actors to compromise systems. It organizes these TTPs into matrices for different operating systems and platforms, mapping each attack stage (tactics) to specific methods (techniques). Each technique includes information about execution, procedures, defenses, detections, and real-world examples.


Note


See https://attack.mitre.org for additional information about MITRE ATT&CK.


The management center uses the MITRE ATT&CK Framework to enhance threat detection and response, incorporating the following capabilities:

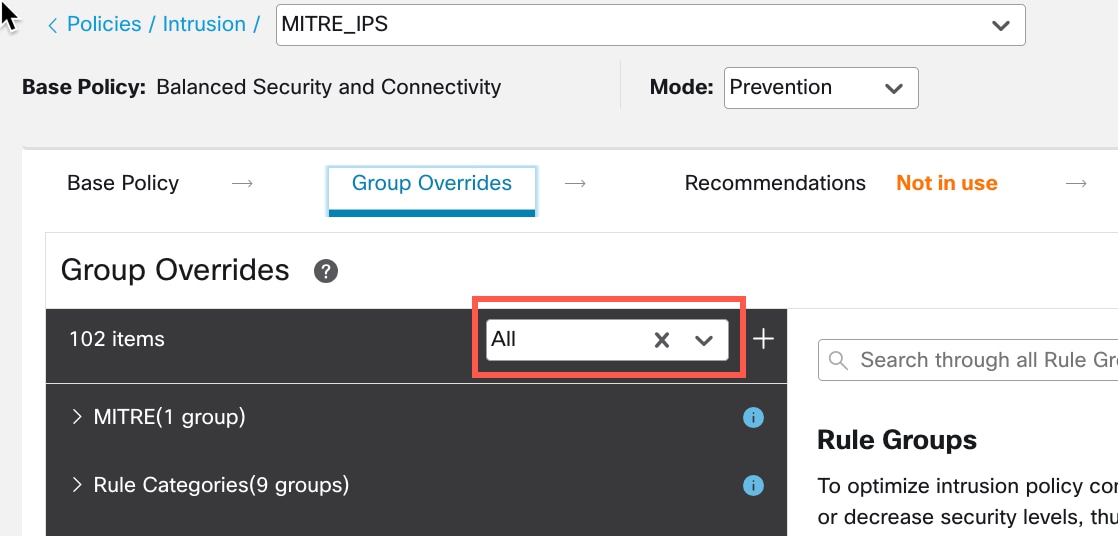
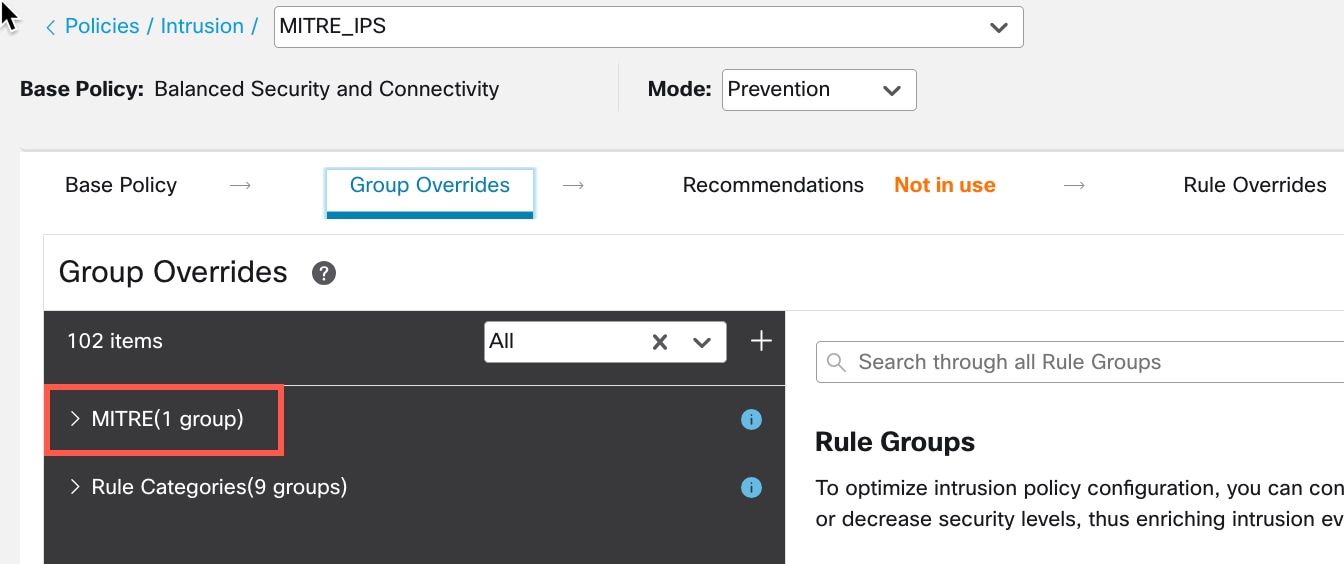
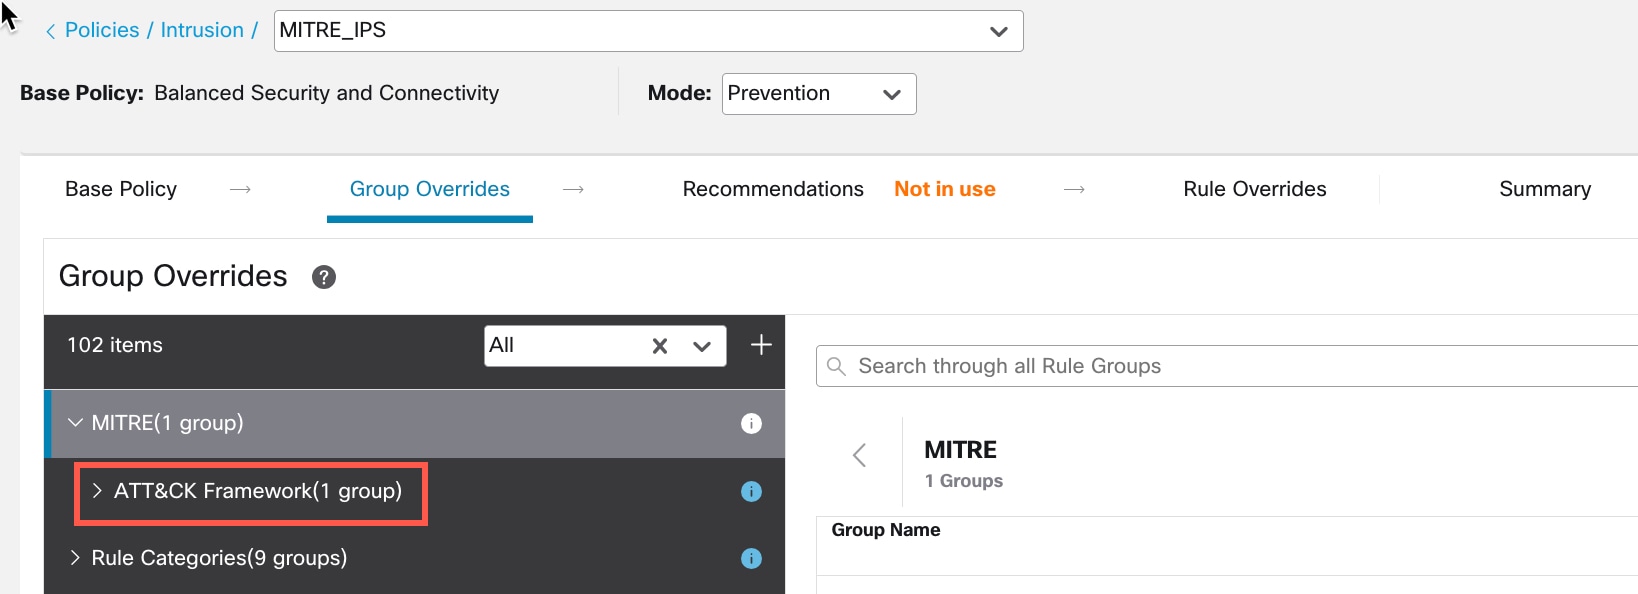
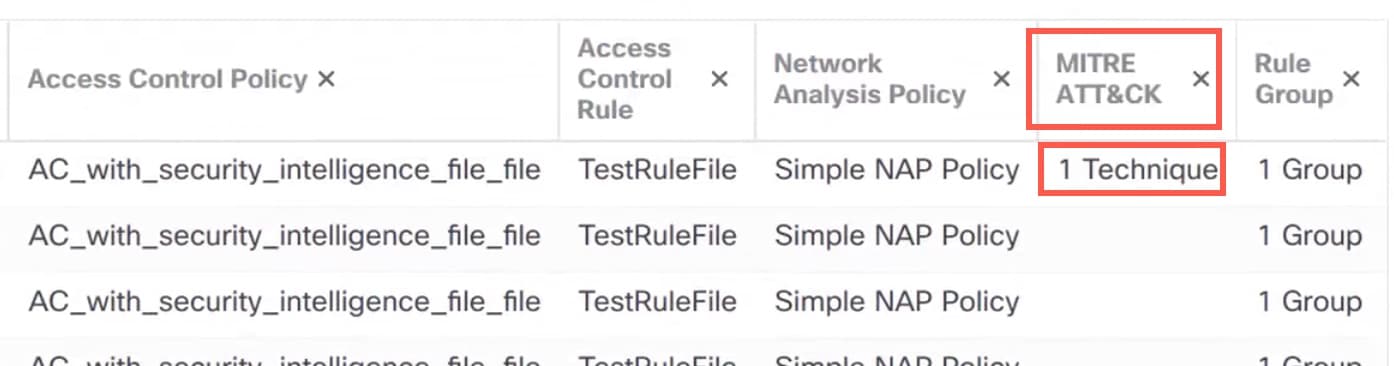
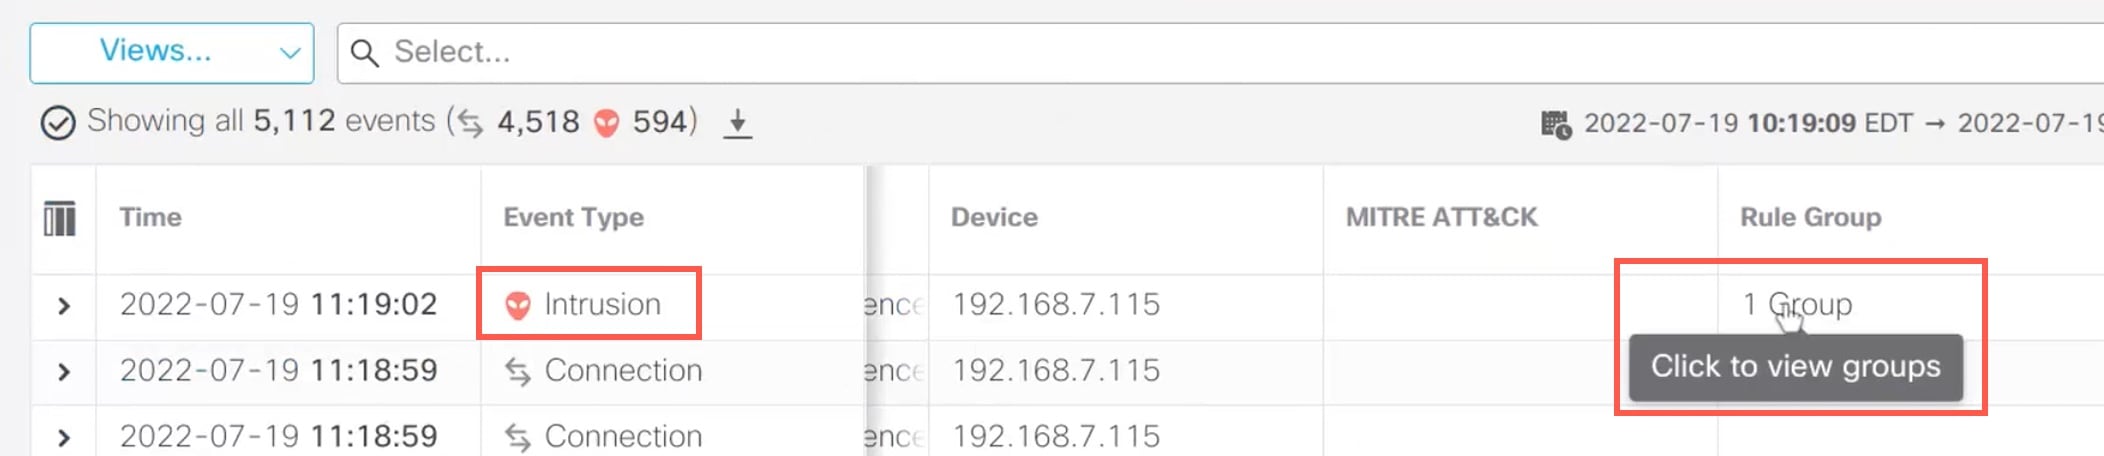
  • Intrusion events include TTPs, allowing administrators to manage traffic with greater granularity by grouping rules according to vulnerability type, target system, or threat category.

  • Select malware events use TTPs, enhancing the ability to detect and respond to threats.

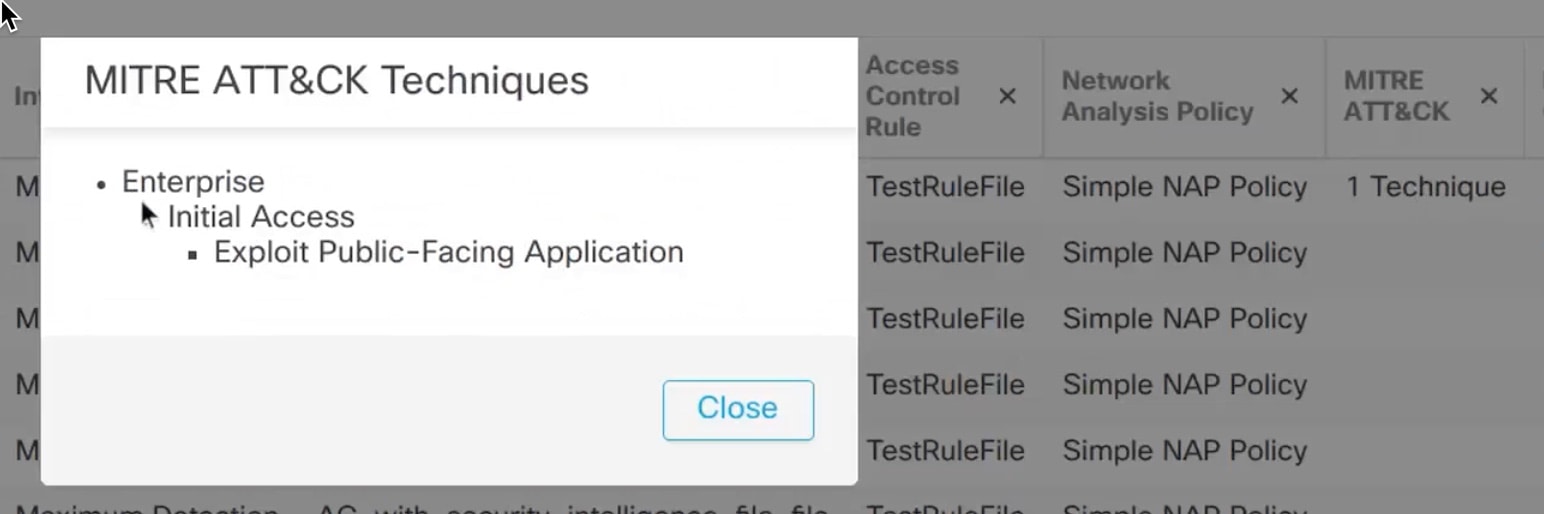
  • Unified and Classic Event Viewers display tactics, techniques, attack lifecycle graphs, and contextual enrichments from the Talos taxonomy. These enrichments include MITRE tags and a hierarchical view of associated tactics, techniques, and sub-techniques. You can also filter events using MITRE identifiers.

Benefits of MITRE Framework

  • MITRE Tactics, Techniques, and Procedures (TTPs) are added to intrusion events, which enable administrators to act on traffic, based on the MITRE ATT&CK framework. This enables administrators to view and handle traffic with more granularity, and group rules by vulnerability type, target system, or threat category.

  • You can organize intrusion rules according to the MITRE ATT&CK framework. This allows you to customize policies according to specific attacker tactics and techniques.

Sample Business Scenario for MITRE Network

A large corporate network uses Snort 3 as its primary intrusion detection and prevention system. In a rapidly evolving threat landscape, adoption of robust network security measures is necessary and important. Network administrators need to know if the configured policies are finding traffic of interest and if they are tracking a known attack group. For example, you may want to know if adversaries are attempting to take advantage of a weakness in your systems or applications in order to cause unanticipated behavior. The weakness in the system can be a bug, a glitch, or a design vulnerability. The applications may be websites, databases, standard services, such as Server Message Block (SMB) or Secure Shell (SSH), network device administration and management protocols or applications, such as web servers and related services.

The insights provided by the MITRE framework provides administrators with a more precise opportunity to specify protection for specific assets and protect their network from specific threat groups.

Prerequisites for MITRE Framework

  • You must be running Secure Firewall Management Center and Secure Firewall Threat Defence Version 7.3.0 or later with Snort 3.

  • You must have at least one intrusion policy. See Create a Custom Snort 3 Intrusion Policy.

View and Edit Your Snort 3 Intrusion Policy

Procedure


Step 1

Choose Policies > Intrusion.

Step 2

Ensure that the Intrusion Policies tab is chosen.

Step 3

Click Snort 3 Version next to the intrusion policy that you want to view or edit.

Step 4

Close the Snort helper guide that is displayed.

Step 5

Click the Group Overrides layer.

This layer lists all the categories of rule groups in an hierarchical structure. You can drill down to the last leaf rule group under each rule group.

Step 6

Under Group Overrides, ensure that All is chosen in the drop-down list, so that all the rule groups for the corresponding intrusion policy are visible in the left pane.

Step 7

Click MITRE in the left pane.

Note


Depending on your specific requirements, you can choose the Rule Categories rule group or any other rule group and subrule groups under it. All the rule groups use the MITRE framework.

Step 8

Under MITRE, click ATT&CK Framework to drill down.

Step 9

Under ATT&CK Framework, click Enterprise to expand it.

Step 10

Click the Edit (edit icon
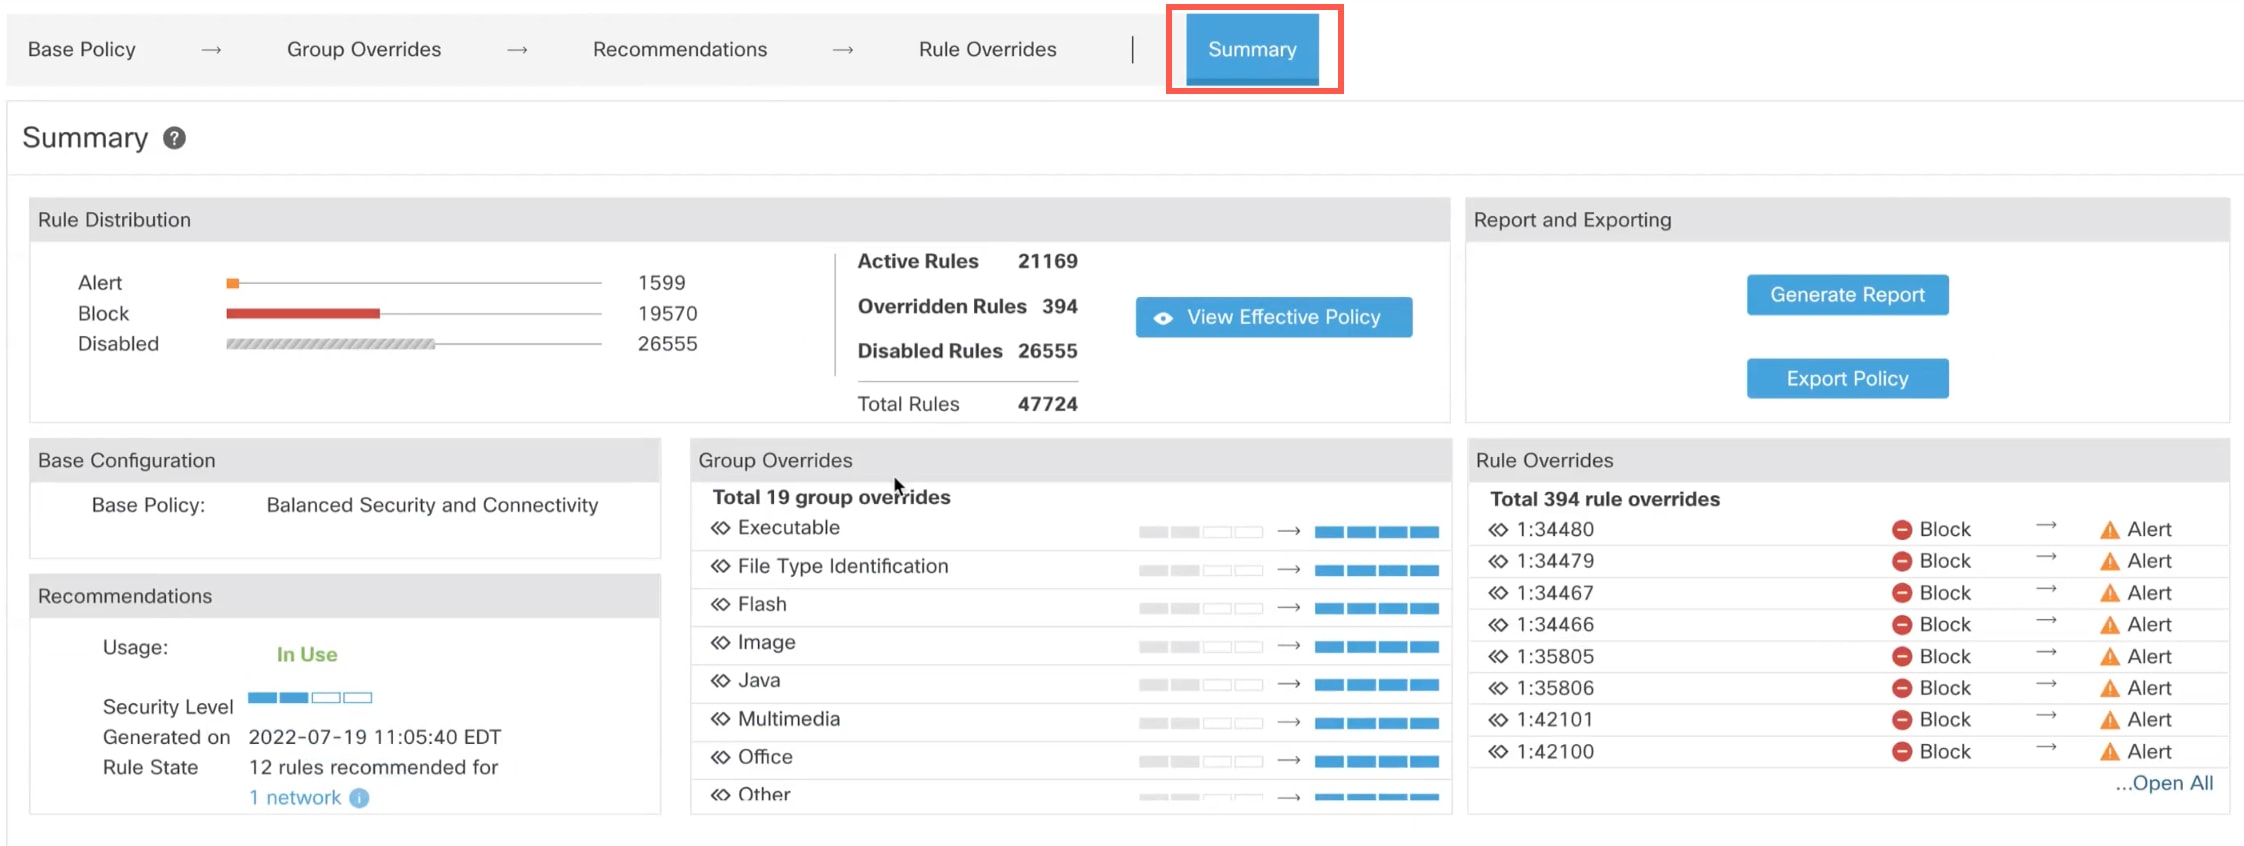
) icon next to the Security Level of the rule group to make bulk changes to the security level of all the associated rule groups under the Enterprise rule group category.

Step 11

In the Edit Security Level window, choose a Security Level (in this example, 3), and click Save.

Step 12

Under Enterprise, click Initial Access to expand it.

Step 13

Under Initial Access, click Exploit Public-Facing Application, which is the last leaf group.

Step 14

Click View Rules in Rule Overrides to view the different rules, rule details, rule actions, and so on, for the different rules. You can change the rule actions for one or multiple rules in the Rule Overrides layer.

Step 15

Click the Recommendations layer and then click Start to start using Cisco-recommended rules. You can use the intrusion rule recommendations to target the vulnerabilities that are associated with the host assets detected in the network. For more information, see Generate New Secure Firewall Recommendations in Snort 3.

Step 16

Click the Summary layer for a holistic view of the current changes to the policy. Based on the rule overrides, security-level changes, and generation of Cisco-recommended rules, you can view the rule distribution of the policy, group overrides, rule overrides, rule recommendations, and so on, to verify your changes.


What to do next

Deploy your intrusion policy to detect and log events that are triggered by the Snort rules. See Deploy Configuration Changes.

View Intrusion Events

You can view the MITRE ATT&CK techniques and rule groups in the intrusion events on the Classic Event Viewer and Unified Event Viewer pages. Talos provides mappings from Snort rules (GID:SID) to MITRE ATT&CK techniques and rule groups. These mappings are installed as part of the Lightweight Security Package (LSP).

Procedure


Step 1

Click Analysis and select Events under Intrusions.

Step 2

Click the Table View of Events tab.

Step 3

Under MITRE ATT&CK, you can see the techniques for an intrusion event. Click 1 Technique to view the MITRE ATT&CK techniques.

In this example, Exploit Public-Facing Application is the technique.

Step 4

Click Close.

Step 5

Click Analysis and select Unified Events.

Step 6

If not enabled, click the column selector icon to enable the MITRE ATT&CK and Rule Group columns.

Step 7

In this example, the intrusion event is triggered by an event that is mapped to one rule group. Click 1 Group under the Rule Group column.

Step 8

You can view Protocol, which is the parent rule group, and the DNS rule group under it. Choose Protocol > DNS to search for all the intrusion events that have at least one rule group that is .

The search results are displayed.