Template Usage in Cisco DCNM LAN Fabric Deployment

templateType

Specifies the type of Template used.

  • CLI

  • POLICY

  • SHOW

  • PROFILE

  • ABSTRACT

Policy Template

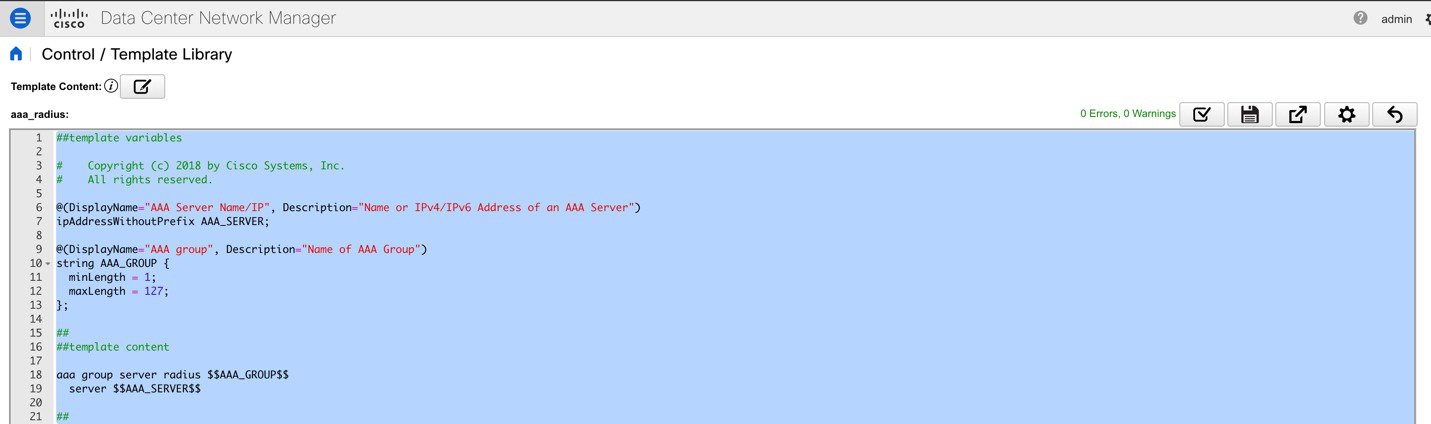
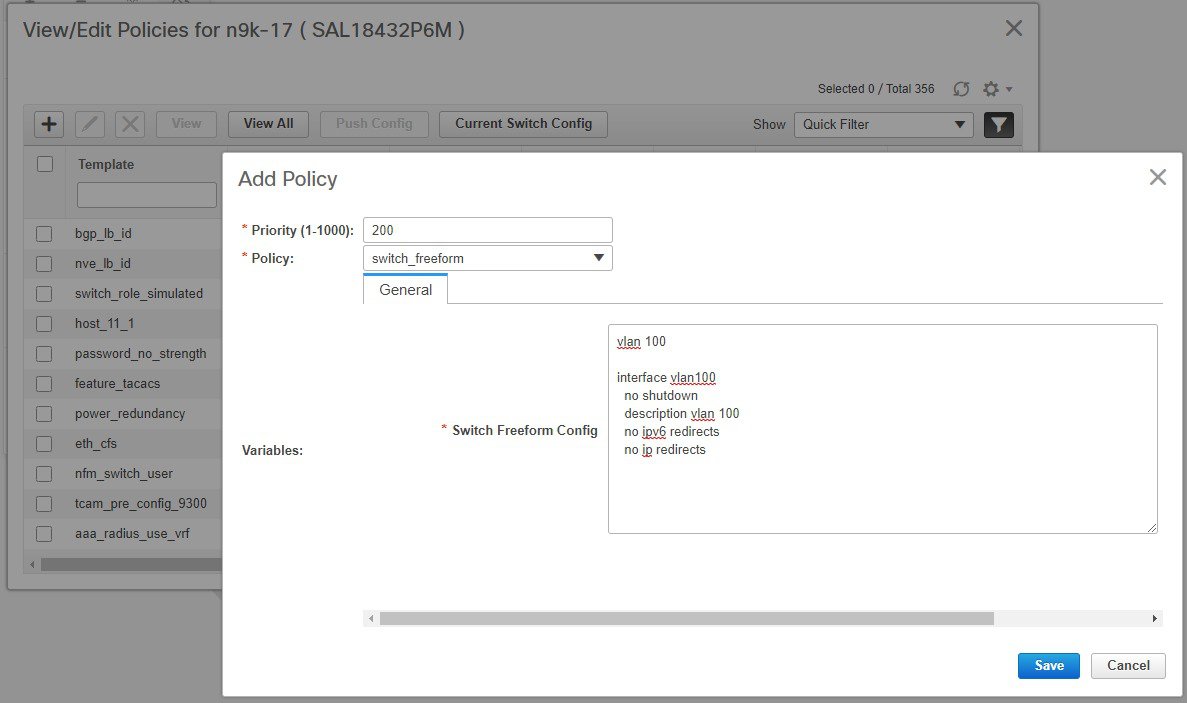
For the policy template, there are two template content types: CLI and PYTHON. With CLI content type, the policy templates are parameterized CLI templates. They can have a lot of variables and CLIs. Typically, CLI policy templates are small and do not have any if-else-for etc. like constructs. An example CLI policy template for AAA server configuration is shown below:

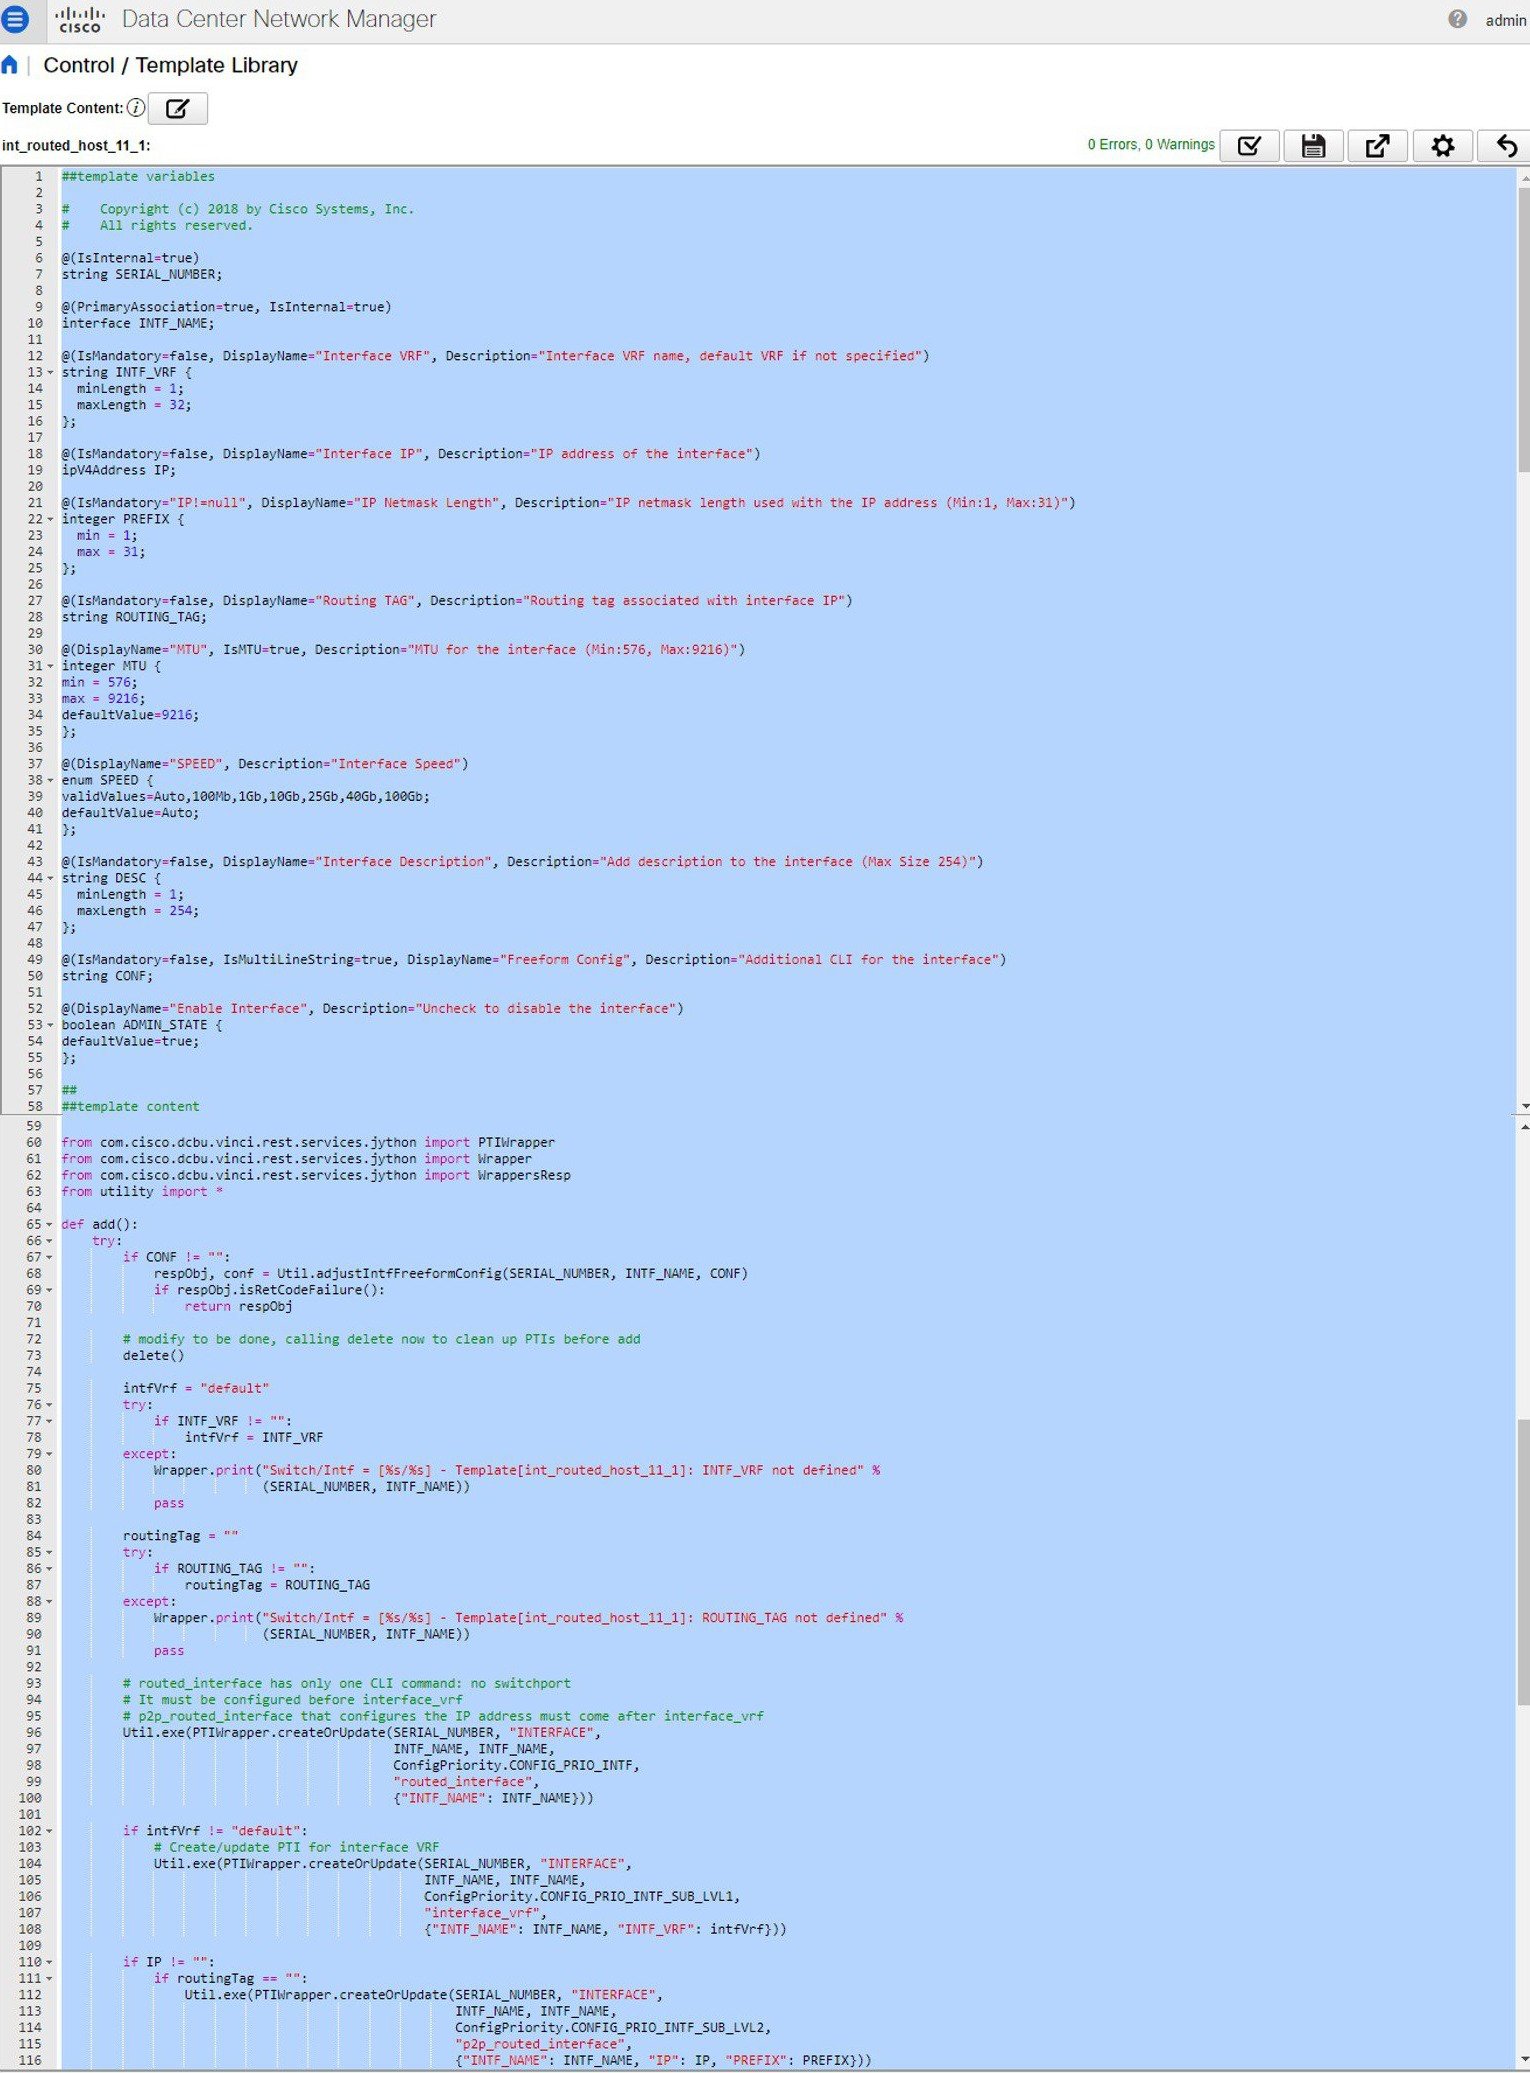
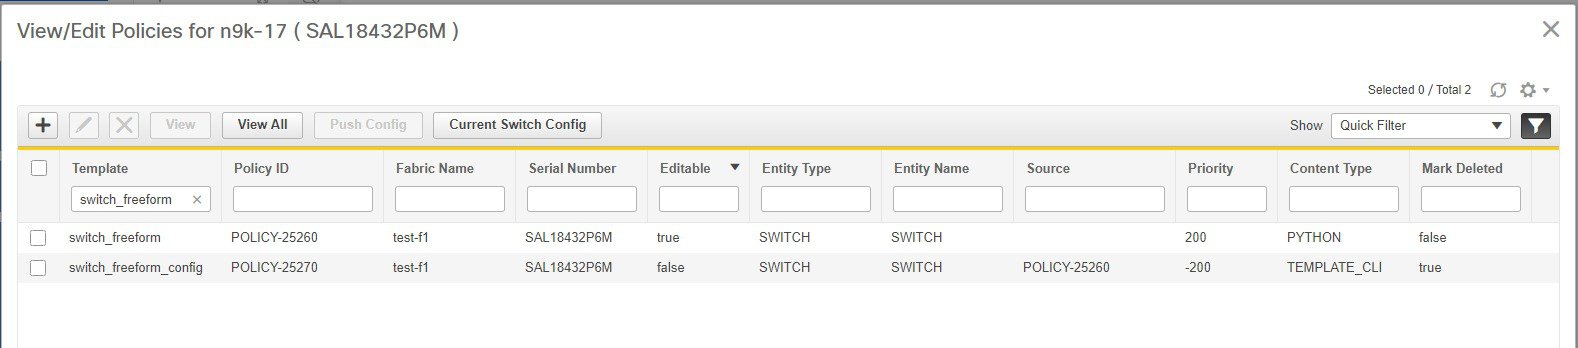
But you can also have policy templates of template content type PYTHON. Essentially, this allows multiple CLI policy templates to be combined together with a common “source” so that they get all applied/un-applied at one go. For example, when you want to create a vPC host port, it has to be created symmetrically on both peers that are part of the vPC pair. In addition, you have to create port-channel, member interfaces, channel-group, etc. This is why a python vPC host policy template has been added. An example interface PYTHON template for setting up a routed interface is shown below:

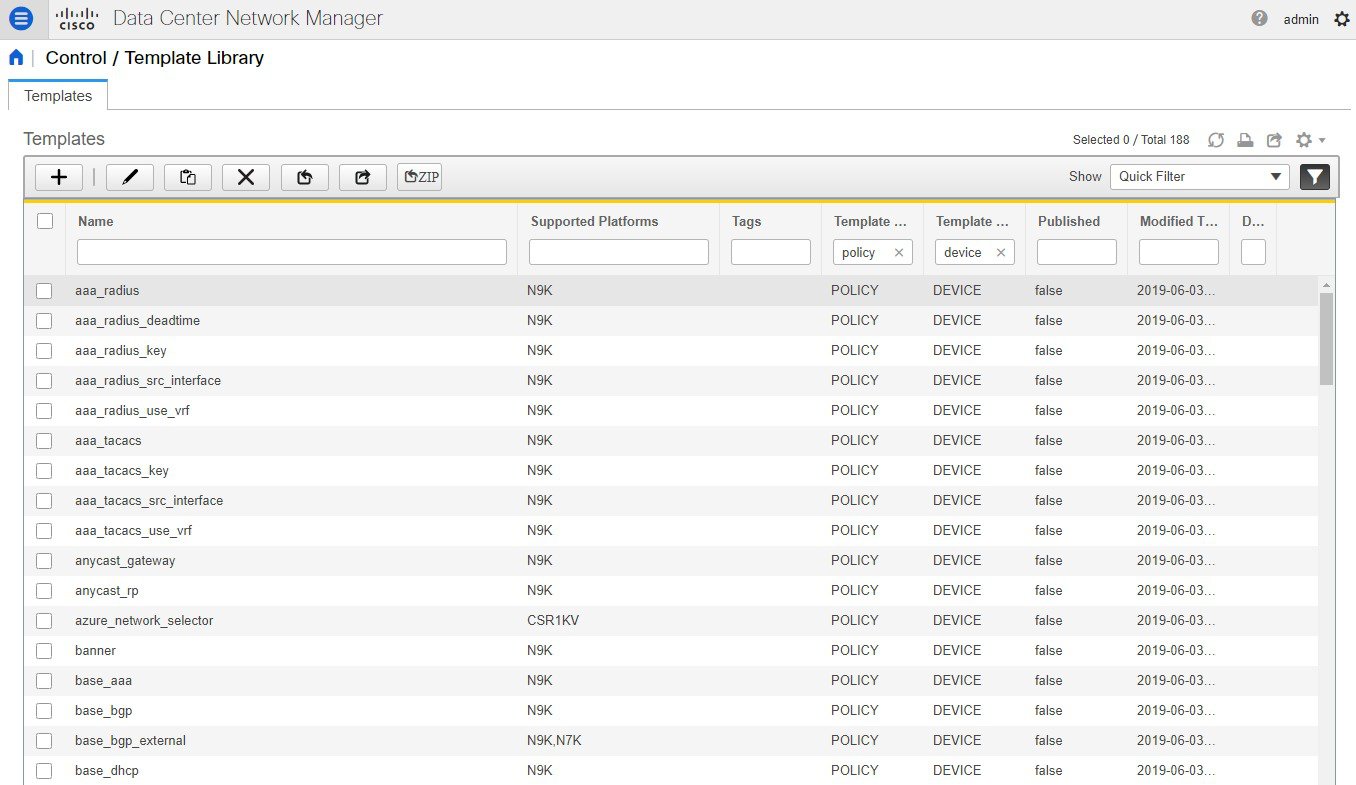
Each policy template has a template subtype like DEVICE, INTERFACE, etc. This allows the right policy template to appear at the right selection point. For example, in the Interface window, you will only see the interface policy templates.

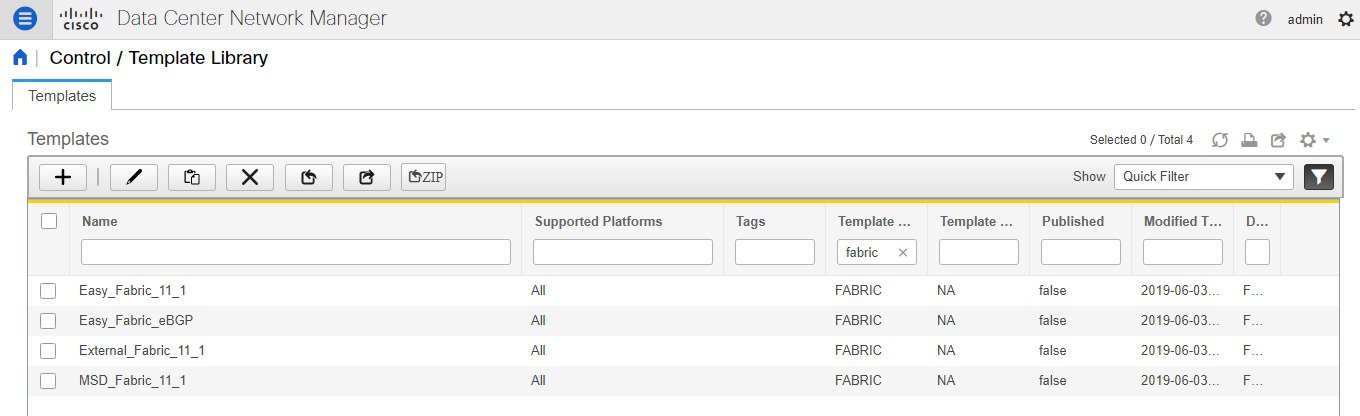
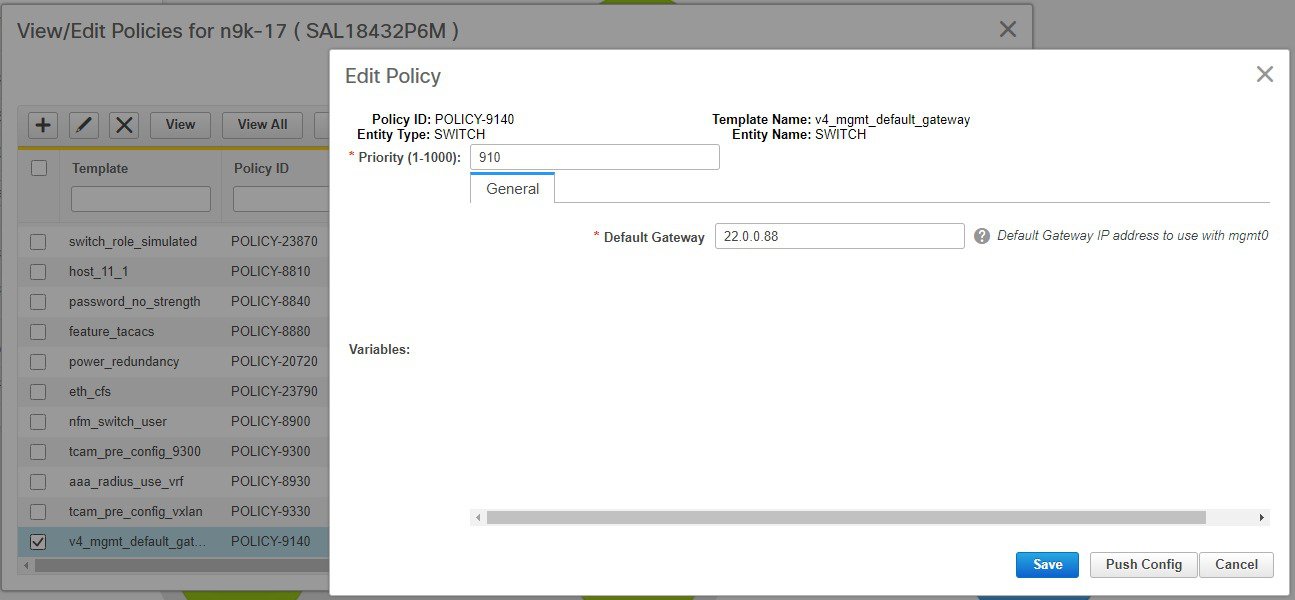
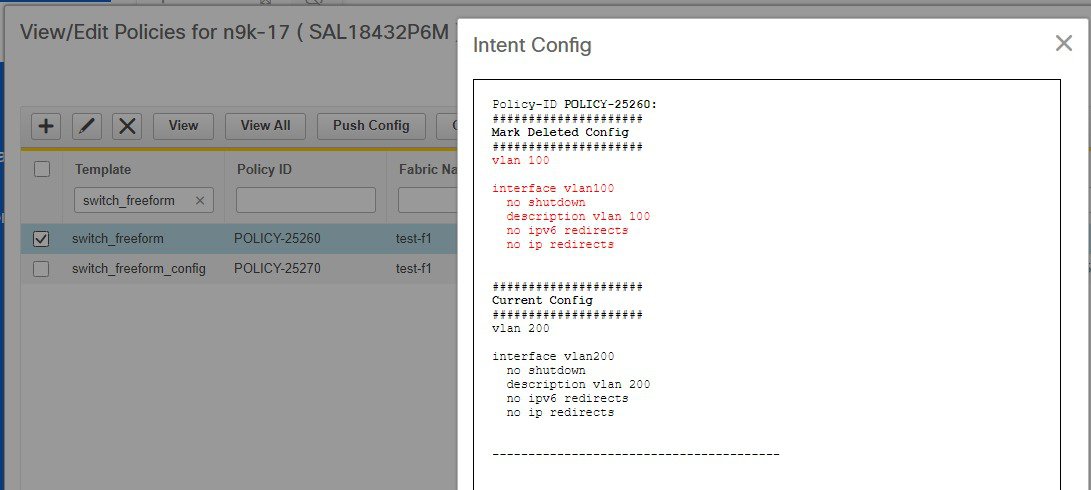
In the View/Edit Policies window on the Fabric Builder, you will only see device policy templates.

You can make a copy of any of these templates and customize them as per their needs. That is the typical use-case for customization. Do not modify existing policies but make a copy, and then customize as per the requirements. Otherwise, after a DCNM upgrade, the changes may be lost.

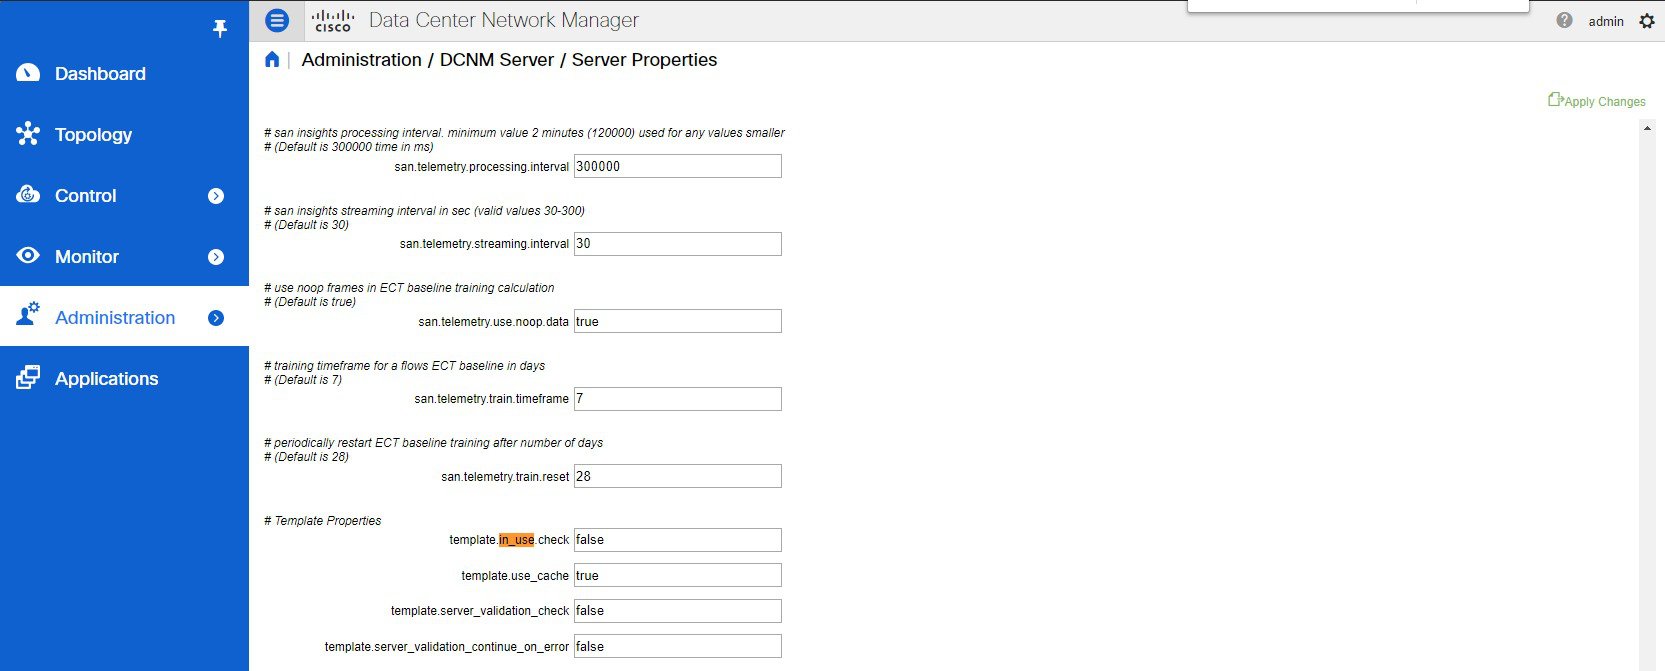
In general, a template already in use, meaning one that is already applied to some switch within any fabric, cannot be edited.


Note

No Type-CLI templates are used in the LAN fabric installation mode. They are all replaced with more powerful Policy templates which are a super set.


Fabric Template

A fabric template is basically a python template, specifically jython, which is java + python. A fabric template is quite comprehensive, and in that it embeds the rules that are required for deploying a fabric, including all the logic required to generate intended configuration of all switches within the entire fabric. Configuration is generated based on published Cisco best practice guidelines. In addition to the embedded rules, the fabric template also integrates with other entities such as resource manager, topology database, device roles, configuration compliance, etc. and generates the configuration accordingly for all the devices in the fabric. This is the inherent part of the DCNM fabric builder.

The expectation is that users will not create their own fabric templates. DCNM provides a few fabric templates out of the box such as Easy Fabric, External Fabric, MSD Fabric, eBGP Fabric (introduced in DCNM 11.2).

Profile Template

A profile template is used for provisioning of overlays (networks or VRFs). The idea is that when you apply some overlay configuration, there are multiple pieces of configurations that should go together. For example, valid layer-3 network configuration in a VXLAN EVPN fabric requires VLAN, SVI, int nve config, EVPN route-target, etc. All of these pieces are put together into what is called a configuration profile (NX-OS construct) and then effectively applied at one go. Either the whole configuration profile gets applied or nothing gets applied, on the switch. In this way, you are not left with any dangling or stray configurations on the switches. For any kind of overlay configurations, whether it is on the leaf or on the borders, DCNM employs profile templates.

There are four kinds of profile templates that are distinguished with tags as depicted below:

  • Network Profile (applied to all devices with role leaf)

  • Network Extension Profile (applied to all devices with role ‘border*’)

  • VRF Profile (applied to all devices with role leaf)

  • VRF Extension Profile (applied to all devices with role ‘border*’)

For more information about how to apply overlay configuration via the Networks & VRFs workflow in DCNM, see Creating and Deploying Networks and VRFs section.

Additional Notes

When a policy or profile template is applied, an instance is created for each application of the template. The common terminology used for this is Policy Template Instance or PTI. A PTI is effectively a policy or profile template + the Name-value pairs that give it a specific instance, post substitution. PTIs created for a device can be viewed under the View/Edit policies option for that device in Fabric Builder. In the tabular view, the View/Edit policies button allows selection and bulk creation/deletion of policies across a subset of devices in the entire fabric. For more information, see Viewing and Editing Policies section.

Viewing, Editing, and Adding Policies

To navigate to the View/Edit Policies window, right-click a device in the Fabric Builder window and select View/edit policies.

The View/Edit Policies window can be used to view, edit, or create a policy for a device. Note that Interface policies can only be viewed but cannot be edited/created from the View/Edit Policies window. Interfaces can only be edited, created, or deleted from the Interfaces window.

Viewing Policies

To view certain policies for a device, you can use filters by specifying the search criteria in the empty boxes under each field. After the policies are found, you can view the content by selecting multiple policies and clicking on the “View” button. Below are examples that show how to use filters and how to view the configuration associated with a policy instance.

Example: Viewing Policies for a Device

Enter tcam in the search field to filter the templates, select the template that you want to view, and click the View button to view TCAM policies created for the device.

Example: Viewing Policies for an Interface

Enter the interface name in the search field under Entity Name to filter interfaces. Select an interface, and click the View button to view policies created for the interface.


Note

  • Each interface should be associated with one interface jython policy template.

  • An interface jython policy template does not have CLI in its content but rather creates PTIs of CLI policy templates. All these PTIs are combined to generate a complete configuration associated with an interface.


Editing Policies

Not all device policies can be edited from the View/Edit policies window. Only the policies that are created with an empty Source and have the flag Editable = true, can be edited.

Procedure


Step 1

To edit a device policy, select an existing policy and click on the edit or ‘Pencil’ button. The ‘Edit Policy’ window opens.

Step 2

After changing 1 or more Name-value pairs, press the ‘Save’ button to save the changes on the Edit Policy window.

Step 3

To deploy the changed config, go back to the Fabric Builder window, right-click on the device and select ‘Deploy Config’.

This will invoke Configuration Compliance to generate the pending config for the device. Pending config is the diff between the current config on the switch and the new intent config.

Step 4

If the pending config is correct, click ‘Deploy Config’ to push the pending config onto the switch.


Example: Editing a Policy

This example shows how to change the IPv4 management default gateway.

Adding Policies

Procedure


Step 1

To add a policy to a device, click the ‘+’ button on the View/Edit Policies page.

The ‘Add Policy’ windows opens.

Step 2

From the Policy drop-down list, select a policy to be added to the device.

Step 3

Set the policy priority and input the mandatory fields.

Step 4

Click the ‘Save’ button to save and complete adding the policy.

Note 

Policy Priority is used to determine the order in which the configuration will be applied to the switch. Lower priority PTIs are placed before the higher priority PTIs in the expected configuration or intent and this in turn is the order to which the configuration will be pushed via the deployer module. Default priority is 500.


Adding a Banner Policy

This example shows how to add a banner policy to a device.

Deploying New Configurations

There are two ways to deploy the new configurations:

  1. Navigate to the Fabric Builder window, right-click on the device and select ‘Deploy Config’ (this is the recommended way).

  2. From the View/Edit Policies window, select the newly added policy, click ‘View’ to verify the config. If the new config looks good, click the ‘Push Config’ button to push the new config to the device. Note that ‘Push Config’ will bypass Configuration Compliance. This option should only be used for exception scenarios such as the case where a new user or SNMP user needs to be added to the switch.

switch_freeform Template Usage

The switch_freeform is a special policy template that allows users to specify any freeform config for a device. Usage of the template is as follows:

  • Specify switch-level config in the Switch Freeform Config parameter.

  • The specified config must match the show run output with respect to case and newlines. Any mismatch will yield unexpected diffs during deploy.

  • An internal switch_freeform_config CLI policy is created for the specified config.

  • Should not use this template for interface configuration except for the SVI interface, as SVI interfaces cannot be configured on the Interfaces page currently.

  • Users can create many switch_freeform policies for different configs.

  • switch_freeform PTIs are sorted together with the other PTIs based on their policy priorities from low to high.

  • A switch_freeform policy can be edited before or after the config is deployed.

  • If there is any change in the config content, the previously created internal switch_freeform_config policy will have its priority changed from a positive to a negative number, and a new internal policy is created for the new config.

  • A negative priority PTI means that CLIs in the PTI need to be deleted; Configuration Compliance will generate the no commands accordingly.

  • Deleting a switch_freeform policy will change the PTI priority of its internal policy to a negative number.

The following section shows how to create a switch_freeform policy, deploy the policy, and subsequently edit and redeploy the updated policy.

Example: Create a switch_freeform policy

To create a switch_freeform policy, perform the following steps:

Procedure


Step 1

Select the switch_freeform template from the policy list in the Add Policy screen.

Set the priority and switch freeform config. Save the policy.

Step 2

View the intent config of the switch_freeform policy.

Step 3

Deploy the switch_freeform policy from Fabric Builder.

Step 4

Edit the switch_freeform policy from the View/Edit Policies window.

Change the config.

Step 5

Save the change.

As shown below, the previously created internal switch_freeform_config policy has its priority changed to a negative number (-200), and the Mark Deleted flag is set to true However, by design, the newly created internal switch_freeform_config policy is NOT shown.

Step 6

View the intent config of the mark deleted internal policy.

Step 7

View the intent config of the changed switch_freeform policy before deployment.

Note that both the mark-deleted and current configs are shown.

Step 8

Deploy the changed config from Fabric Builder.


Changing the Contents of a Template in Use

A template in general, whether it is a policy, fabric or profile template, cannot be modified once it has been instantiated. However, there could be cases where you want to edit the content of a template, like fixing a bug in the template or changing an already deployed config. This can be achieved by toggling the template.in_use.check option in the Administration > Server Properties tab.

Procedure


Step 1

Change the template.in_use.check from true (default) to false.

Step 2

Click ‘Apply Changes’ at the upper righthand corner.

A warning will be popped up indicating that a restart of DCNM is needed.

Ignore this warning as no restart is needed for the in_use flag to take effect.

Step 3

Edit the desired template(s).

Step 4

Go to the Fabric Builder page and click ‘Save & Deploy’ for the entire fabric.

This will regenerate PTIs and the updated content will be picked up and used for the expected configuration (or intent).

Step 5

Once the contents are re-generated and deployed, change the template.in_use.check back to true to avoid performance issues.