Hybrid Calendar with Google Calendar deployment task flow
To deploy Hybrid Calendar with your Google Calendar environment, perform the following tasks.
Before you begin
Procedure
| Command or Action | Purpose | |
|---|---|---|
| Step 1 |
Register your Google Calendar environment to the Webex cloud, test the connection, and set the default Webex site. |
|
| Step 2 |
(Optional) Localize meeting join details |
(Optional)
To override how the Hybrid Calendar localizes meeting join details for your entire organization, set the Default Language setting in https://admin.webex.com. |
| Step 3 |
(Optional) Configure @webex and @meet keywords |
(Optional)
To change the action that the Hybrid Calendar takes when users enter @webex or @meet, set the Keywords settings in https://admin.webex.com. |
| Step 4 |
(Optional) Customize email templates |
(Optional)
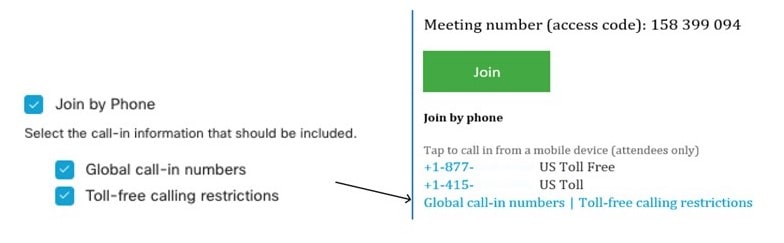
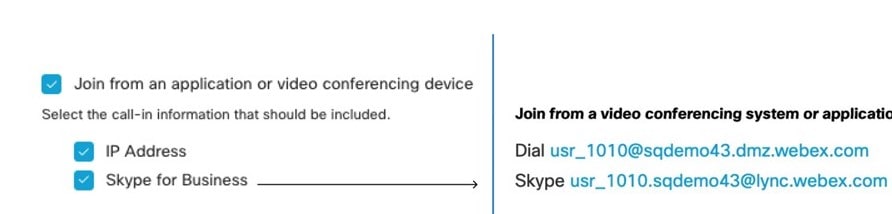
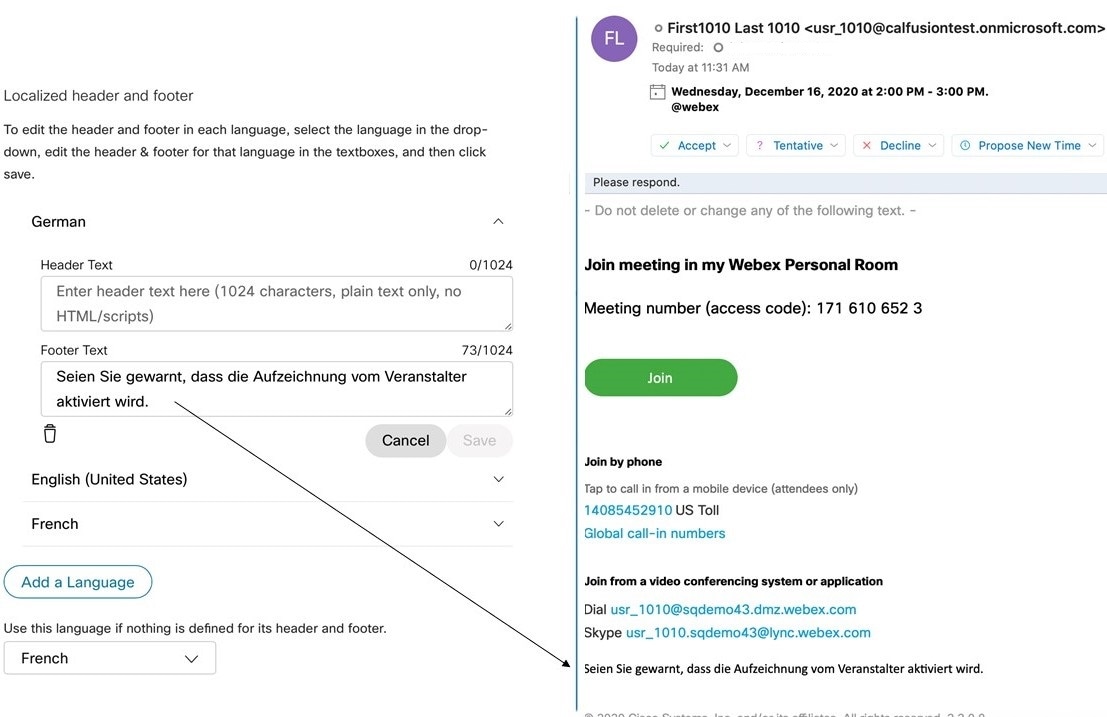
Choose what the Hybrid Calendar adds to meeting invitations, including audio or video join details and a localized header and footer in any language that the service supports. |
| Step 5 |
After successfully provisioning the service, you must explicitly activate users to allow the service to access their respective G suite calendars. |
|
| Step 6 |
(Optional) Add Hybrid Calendar to workspaces with Webex Room, Desk, and Board Devices |
(Optional)
If you want One Button to Push (OBTP) functionality to be provided to cloud-registered room and desk devices and Webex Boards, toggle on the calendar service for the devices, and configure the resource email address. |
| Step 7 |
(Optional) Associate personal rooms with Webex App |
(Optional)
For OBTP on Webex room and desk devices and Webex Boards, make sure that meeting schedulers have their Personal Rooms associated with their Webex App accounts. |
| Step 8 |
 Feedback