Center shutdown/reboot

You can trigger a safe shutdown and reboot of the Center. Click Admin > System.
Use Reboot to fix a minor bug, such as a system overload.
The documentation set for this product strives to use bias-free language. For the purposes of this documentation set, bias-free is defined as language that does not imply discrimination based on age, disability, gender, racial identity, ethnic identity, sexual orientation, socioeconomic status, and intersectionality. Exceptions may be present in the documentation due to language that is hardcoded in the user interfaces of the product software, language used based on RFP documentation, or language that is used by a referenced third-party product. Learn more about how Cisco is using Inclusive Language.
You can trigger a safe shutdown and reboot of the Center. Click Admin > System.
Use Reboot to fix a minor bug, such as a system overload.
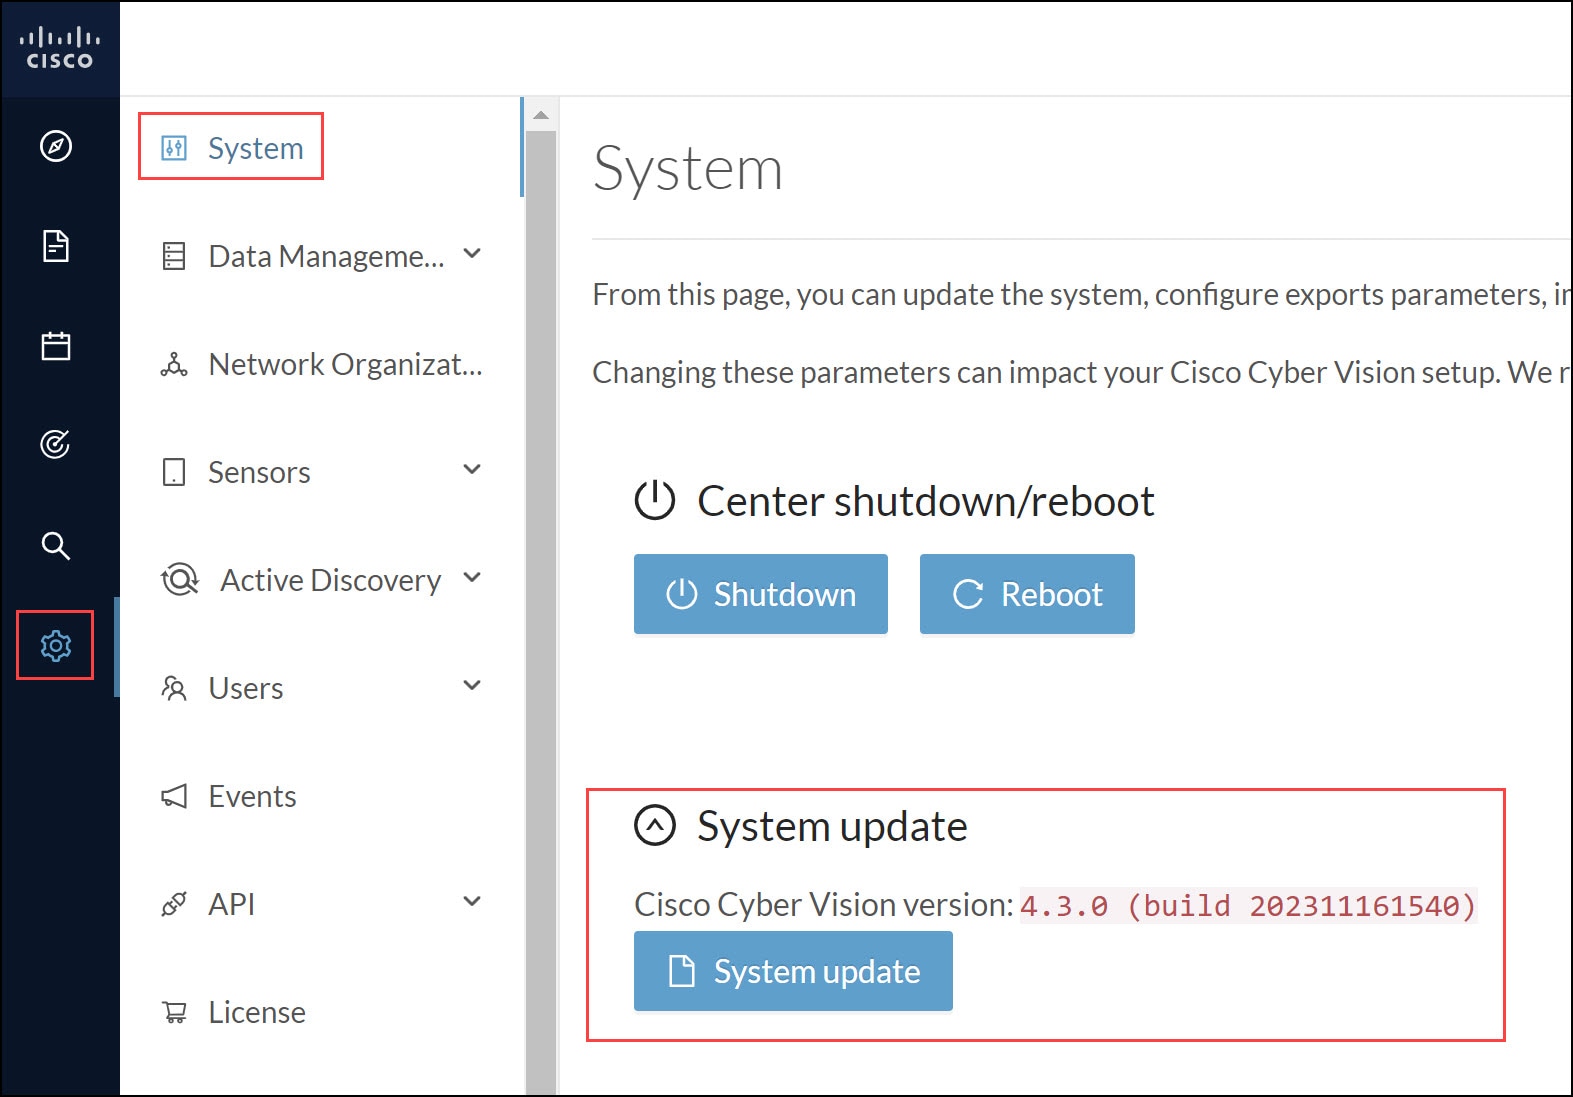
Version releases include a combined update file for the Center, the SENSOR3, SENSOR5, SENSOR7 and the Cisco IC3000 Industrial Compute Gateway. If operating conditions allow, update the Center and all these sensors at once from the GUI. Click Admin > System.
 Note |
Verify all your sensors are connected and SSH is authorized between the Center and the sensors before proceeding to a combined update. Click Admin > Sensors > Sensor Explorer. |
Important |
Rolling back to an older Cisco Cyber Vision version is not supported. |
Requirements
A combined update to retrieve from cisco.com.
Use the SHA512 checksum provided by Cisco to verify that the file you just downloaded is healthy.
Windows users:
|
Step 1 |
Retrieve the Cisco Cyber Vision combined update from cisco.com. |
|
Step 2 |
Open a shell prompt such as Windows Powershell and use the following command to retrieve the file checksum: Get-FileHash .\CiscoCyberVision-<TYPE>-<VERSION>.<EXT> -Algorithm SHA512 | Format-List
|
|
Step 3 |
In cisco.com, mouse over the file and copy the SHA512 checksum.
|
|
Step 4 |
Compare both checksums.
|
To update the Center and all applicable sensors:
|
Step 5 |
Login to Cisco Cyber Vision. |
|
Step 6 |
Click Admin > System > System update. |
|
Step 7 |
Select the update file CiscoCyberVision-update-combined-<VERSION>.dat |
|
Step 8 |
Confirm the update. As the Center and sensors update, a holding page appears. When done, click Center Reboot. You will be logged out. |
|
Step 9 |
Log in. If sensors were offline when the update occurred, repeat the procedure until all sensors update. |

Cisco Cyber Vision provides syslog configuration so that events can be exported and used by a SIEM. The following procedure configures to which machine the syslogs will be sent.
|
Step 1 |
Click Configure.  |
|
Step 2 |
Select a protocol. Use the drop-down arrow. If you select TCP + TLS connection, the Set certificate button displays to import a p12 file. The administrator of your SIEM solution provides this file to secure communications between the Center and the syslog collector. |
|
Step 3 |
Enter the Host IP address of the SIEM reachable from the Administration network interface (i.e., eth0) of the Center. |
|
Step 4 |
Enter the Port on the SIEM that will receive syslogs. Use the arrrows. |
|
Step 5 |
Select the variant of syslog Format.
|
|
Step 6 |
Click Save configuration. |
Use the System interface to import and export the Cisco Cyber Vision database. Click Admin > System.
Regularly export the database to back up the industrial network data on Cisco Cyber Vision or if you need to transfer the database to a different Center.

Exports database file limitation is up to 2 GB of data. This avoids side effects related to slow database exports. If the
database is larger than 2 GB, you get an error message. In this case, connect to the Center using SSH and perform a data dump.
Use the command: sbs db dump.
Network data, events, and users are retained, as well as all customizations (e.g., groups, component names).
Only configurations created in Cisco Cyber Vision's GUI persist. If you change Center, perform a basic configuration of the Center and then configure Cisco Cyber Vision again. Refer to the corresponding Center Installation Guide.
Note |
The Import process may take one hour for big databases. Refresh the page to check that the import remains active (i.e., no error message). |
Cisco Cyber Vision uses an internal database which contains the list of recognized vulnerabilities, icons, threats, etc.
Important |
To remain protected against vulnerabilities, always update the Knowledge DB in Cisco Cyber Vision as soon as possible after notification of a new version. |
To update the Knowledge DB:
|
Step 1 |
Download the latest.db file available from cisco.com. |
|
Step 2 |
Click Admin > System > Import a Knowledge DB. Find the file, click Open to upload the file. Importing the new database rematches your existing components against any new vulnerabilities and updates the network data.
|
Use the certificate fingerprint to register a Global Center with its synchronized Centers and vice versa.
Click Admin > System > Enroll to a Global Center to enroll a Center with its synchronized Centers.

For more information, refer the Centers Installation Guides.
Telemetry monitors your system to provide anonymous diagnostics and usage data, helps us to understand and enhance product usage. Cisco Cyber Vision telemetry data communication occurs as HTTPS traffic through Port 443 with https://connectdna.cisco.com/
Telemetry is enabled by default. To disable this feature, follow these steps:
|
Step 1 |
From the left pane, click Admin > System. |
|
Step 2 |
To disable the telemetry, click ON button. 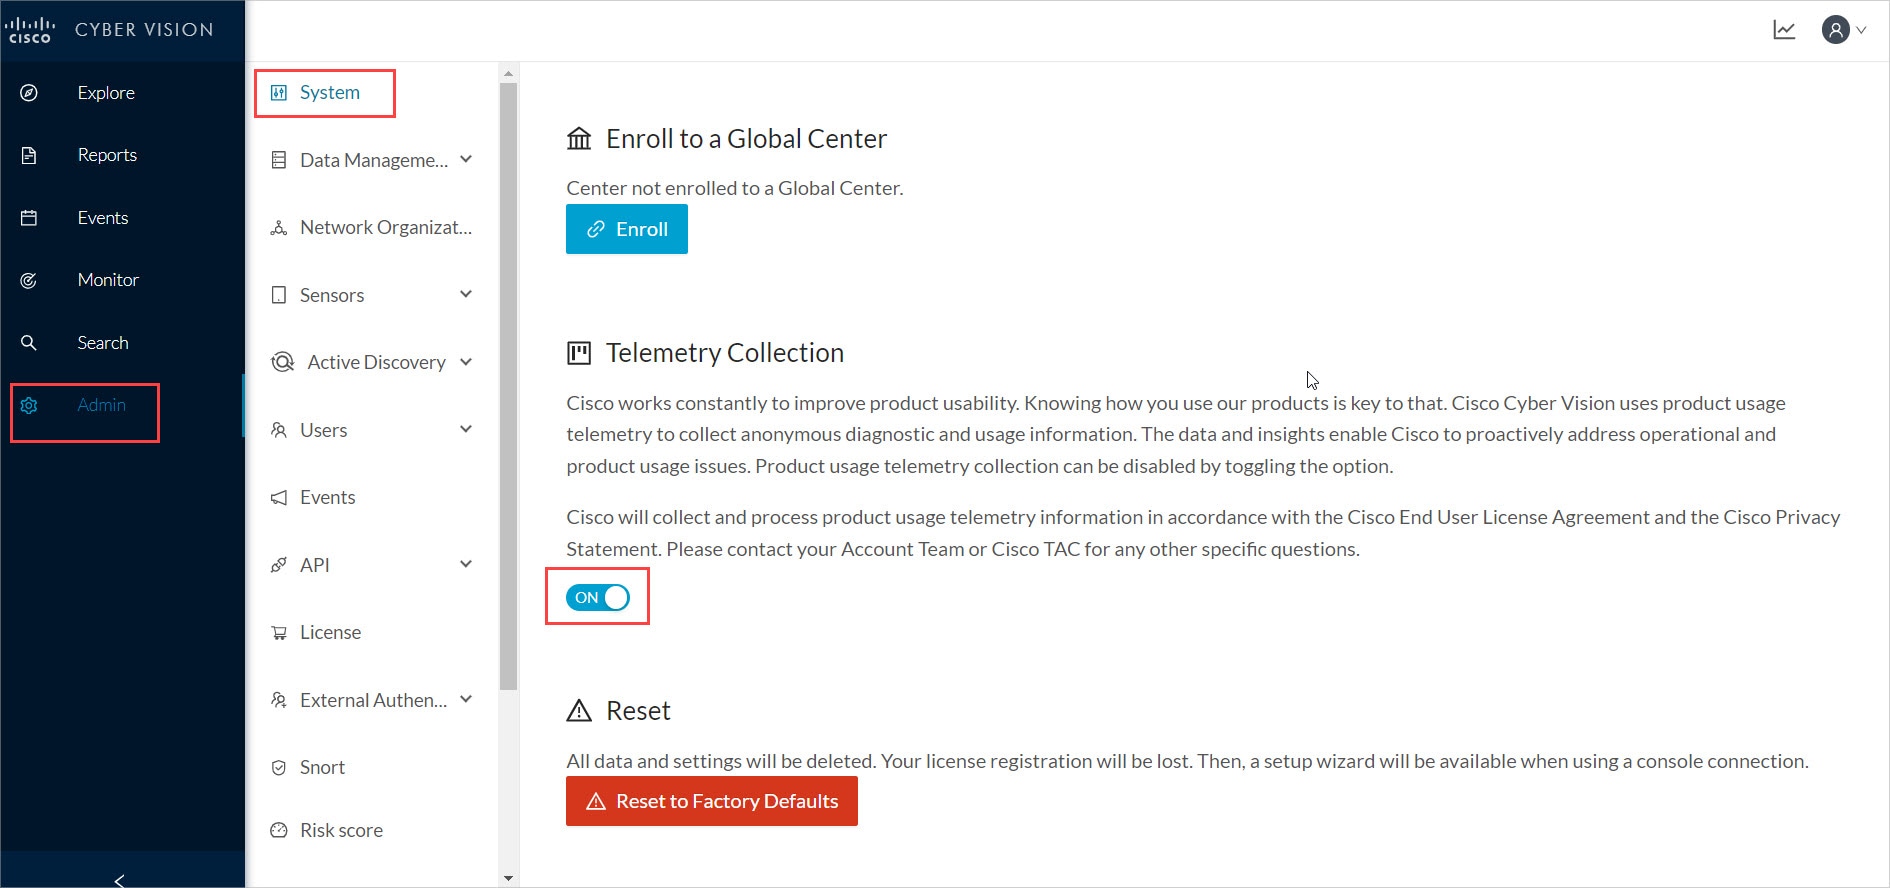 |
Only use Reset to Factory Defaults as a last resort, after all other troubleshooting attempts fail. Get help from Cisco product support.

A Reset to Factory Defaults deletes the following:
Some Center configuration data elements.
The GUI configuration (such as user accounts, the setup of event severities, etc.).
Data collected by the sensors.
The configuration of all known sensors (such as IP addresses, capture modes, etc.).
Root password, certificates and configurations from the Basic Center configuration persist.
After a Reset to Factory Defaults occurs, the GUI refreshes with the Cisco Cyber Vision installation wizard. Refer to the corresponding Center Installation Guides.


 Feedback