Roles
You can restrict access to features and data using role-based access control (RBAC) model.
-
User - someone with login access to Cisco Secure Workload.
-
Role - user created set of capabilities that is assigned to a user.
-
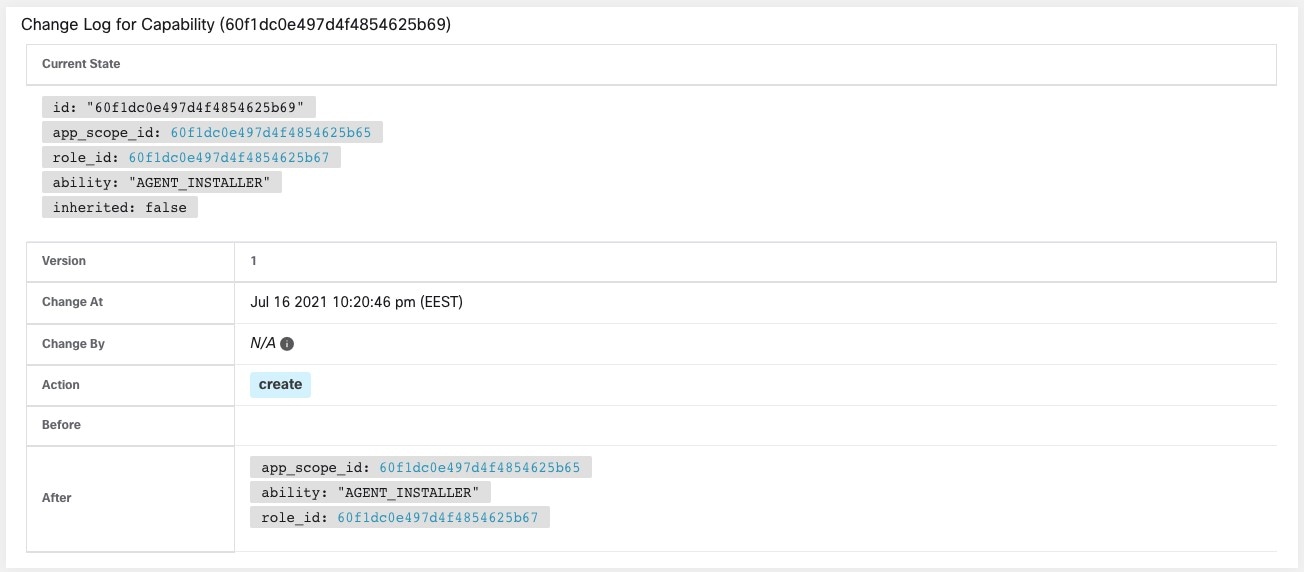
Capability - scope + ability pair
-
Ability - collections of actions
-
Action - low-level user action such as “change workspace name”
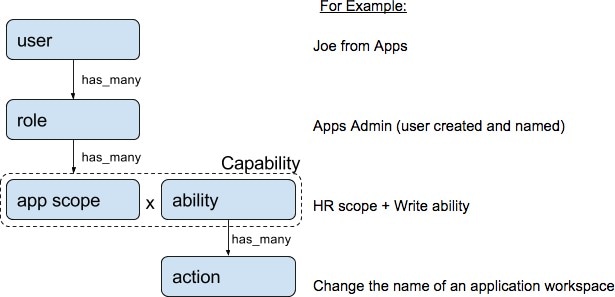
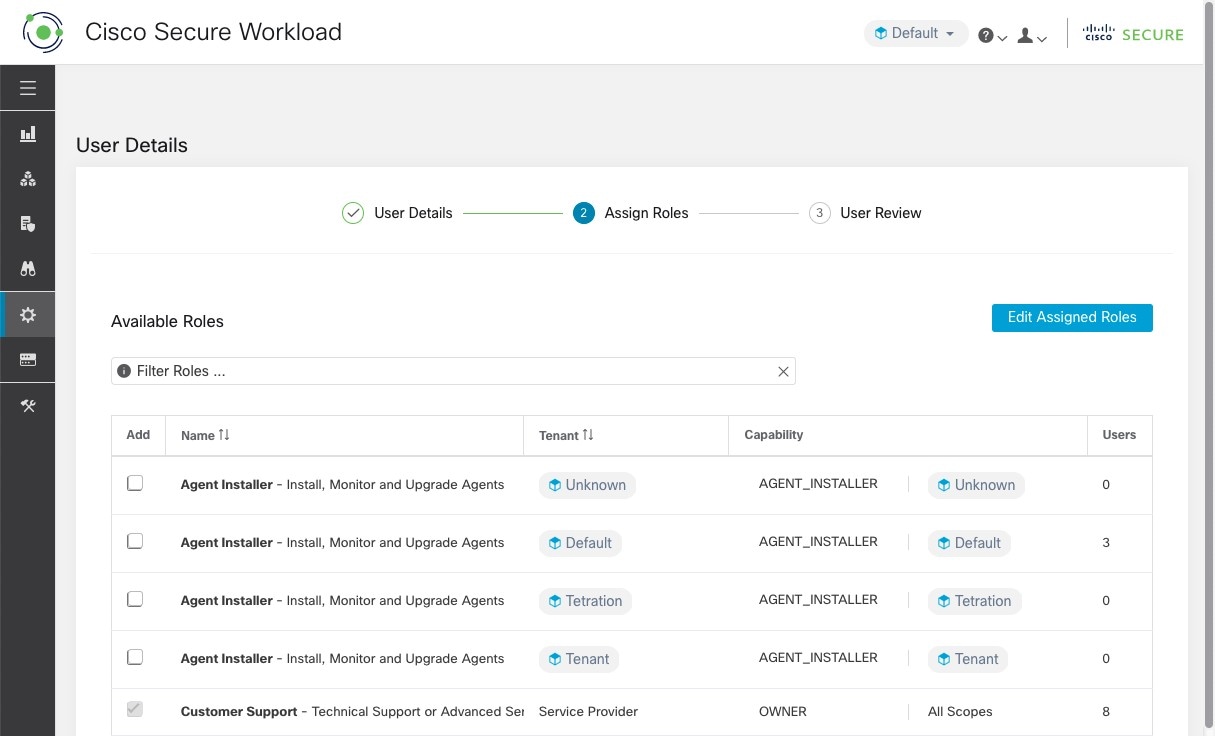
A user can have any number of roles. Roles can have any number of capabilities. For example, the “HR Search Engineer” role could have two capabilities: “Read on the HR Scope” to give visibility and context and “Execute on “HR:Search” capability to allow the engineers assigned this role to make specific changes that are related to their applications.
Use the Users page to assign users to the different roles. Roles have several capabilities and you can assign users to any number of roles.
System roles are defined to allow users to get started more quickly. They define different levels of access to all Scopes, that is, all data on the system. These system roles are defined below.
|
Role |
Description |
|---|---|
|
Agent Installer |
Provide the ability to manage agents life cycle including install, monitor, upgrade, and convert, but cannot delete agents and access agent config profile. |
|
Customer Support |
For Technical Support or Advanced Services. Provides access to cluster maintenance features. Allows the same access as Site Admin, but cannot modify users. |
|
Customer Support Read Only |
For Technical Support or Advanced Services. Provides access to cluster maintenance features. Allows the same access as Site Admin, but cannot modify users. |
|
Site Admin |
Provides the ability to manage users, agents, and so on. Can view and edit all features and data. There must be at least one site admin. |
|
Global Application Enforcement |
Provides the Enforce ability on every scope. |
|
Global Application Management |
Provides the Execute ability on every scope. |
|
Global Read Only |
Provides the Read ability on every scope. |
Abilities and Capabilities
Roles are made up of capabilities which include a scope and an ability. These define the allowed actions and the set of data that they apply to. For example, the (HR, Read) capability should be read and interpreted as “Read ability on the HR scope”. This capability would allow access to the HR scope and all its children.
|
Ability |
Description |
|---|---|
|
Installer |
Install, monitor, and upgrade software agents. |
|
Audit |
Global appliance data read support and access to change logs. |
|
Read |
Read all data including flows, application, and inventory filters. |
|
Write |
Make changes to applications and inventory filters. |
|
Execute |
Perform Automatically discover policies run and publish policies for analysis. |
|
Enforce |
Enforce policies that are defined in application workspaces that are associated with the given scope. |
|
Owner |
Required to toggle an application workspace from secondary to primary. Access to Data Tap Admin abilities, such as managing User App sessions, adding Data Taps, and creating Visualization Data Sources. |
 Important |
Abilities are inherited, for example, the Execute ability allows all the Read, Write, and Execute actions. |
Important |
Abilities apply to the scope and all the scope’s children. |
Menu Access by Role
The menu items you see and use on the navigation pane depend on the assigned role:
|
Menu |
Option |
Site Admin |
Customer Support |
Customer Support Read Only |
Global Application Enforcement |
Global Application Management |
Global Read Only |
Agent Installer |
|---|---|---|---|---|---|---|---|---|
|
Overview |
Overview |
Yes |
Yes |
Yes |
Yes |
Yes |
Yes |
No |
|
Menu |
Option |
Site Admin |
Customer Support |
Customer Support Read Only |
Global Application Enforcement |
Global Application Management |
Global Read Only |
Agent Installer |
|---|---|---|---|---|---|---|---|---|
|
Organize |
Scopes and Inventory |
Yes |
Yes |
Yes |
Yes |
Yes |
Yes |
No |
|
Organize |
Label Management |
Yes |
Yes |
Yes |
Yes |
Yes |
Yes |
No |
|
Organize |
Inventory Filters |
Yes |
Yes |
Yes |
Yes |
Yes |
Yes |
No |
|
Menu |
Option |
Site Admin |
Customer Support |
Customer Support Read Only |
Global Application Enforcement |
Global Application Management |
Global Read Only |
Agent Installer |
|---|---|---|---|---|---|---|---|---|
|
Defend |
Segmentation |
Yes |
Yes |
Yes |
Yes |
Yes |
Yes |
No |
|
Defend |
Enforcement Status |
Yes |
Yes |
Yes |
Yes |
Yes |
Yes |
No |
|
Defend |
Policy Templates |
Yes |
Yes |
Yes |
Yes |
Yes |
Yes |
No |
|
Defend |
Forensic Rules |
Yes |
Yes |
Yes |
Yes |
Yes |
Yes |
No |
|
Menu |
Option |
Site Admin |
Customer Support |
Customer Support Read Only |
Global Application Enforcement |
Global Application Management |
Global Read Only |
Agent Installer |
|---|---|---|---|---|---|---|---|---|
|
Investigate |
Traffic |
Yes |
Yes |
Yes |
Yes |
Yes |
Yes |
No |
|
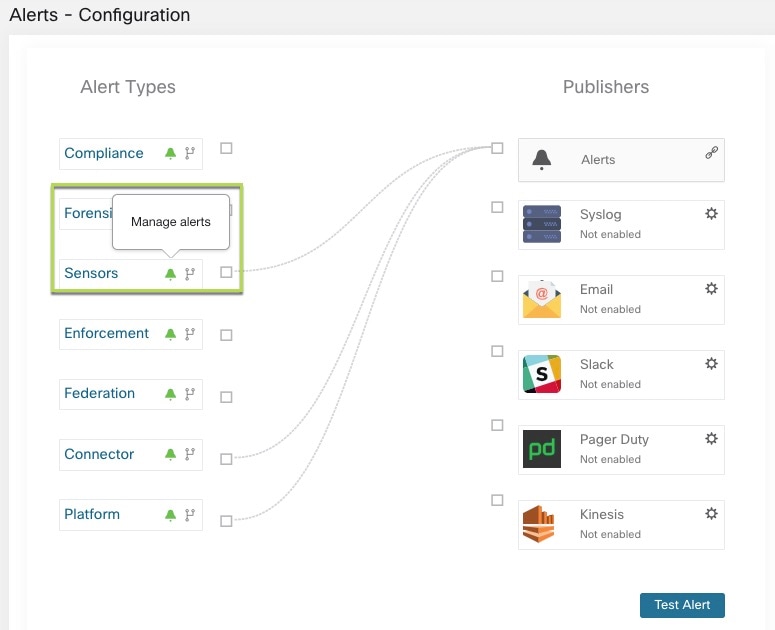
Alerts |
Yes |
Yes |
Yes |
Yes |
Yes |
Yes |
No |
|
|
Vulnerabilities |
Yes |
Yes |
Yes |
Yes |
Yes |
Yes |
No |
|
|
Forensics |
Yes |
Yes |
Yes |
Yes |
Yes |
Yes |
No |
|
Menu |
Option |
Tenant Owner |
Agent Installer |
|---|---|---|---|
|
Reporting |
Reporting Dashboard |
Yes |
No |
|
Menu |
Option |
Site Admin |
Customer Support |
Customer Support Read Only |
Global Application Enforcement |
Global Application Management |
Global Read Only |
Agent Installer |
|---|---|---|---|---|---|---|---|---|
|
Manage |
Alerts Configs |
Yes |
Yes |
Yes |
Yes |
Yes |
Yes |
No |
|
Manage |
Change Logs |
Yes |
No |
Yes |
No |
No |
No |
No |
|
Manage |
Connectors |
Yes |
Yes |
No |
No |
No |
No |
No |
|
Manage |
External Orchestrators |
Yes |
Yes |
No |
No |
No |
No |
No |
|
Manage |
Secure Connector |
Yes |
Yes |
No |
No |
No |
No |
No |
|
Manage |
Virtual Appliances |
Yes |
Yes |
No |
No |
No |
No |
No |
|
Manage |
Users |
Yes |
Yes |
No |
No |
No |
No |
No |
|
Manage |
Roles |
Yes |
Yes |
Yes |
No |
No |
No |
No |
|
Manage |
Threat Intelligence |
Yes |
Yes |
Yes |
No |
No |
No |
No |
|
Manage |
Licenses |
Yes |
No |
No |
No |
No |
No |
No |
|
Manage |
Collection Rules |
Yes |
Yes |
Yes |
Yes |
Yes |
Yes |
No |
|
Manage |
Session Configuration |
Yes |
Yes |
No |
No |
No |
No |
No |
|
Manage |
Usage Analytics |
Yes |
Yes |
No |
No |
No |
No |
No |
|
Manage |
Data Tap Admin |
Yes |
No |
No |
No |
No |
No |
No |
|
Menu |
Option |
Site Admin |
Customer Support |
Customer Support Read Only |
Global Application Enforcement |
Global Application Management |
Global Read Only |
Agent Installer |
|---|---|---|---|---|---|---|---|---|
|
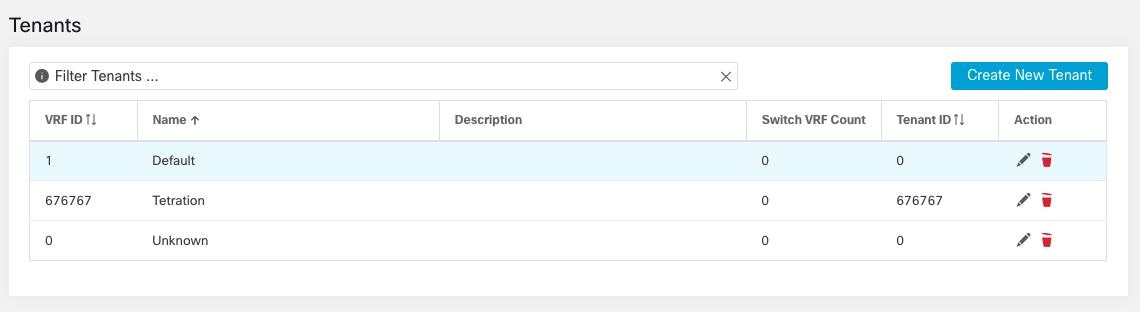
Platform |
Tenants |
Yes |
Yes |
No |
No |
No |
No |
No |
|
Platform |
Cluster Configuration |
Yes |
Yes |
No |
No |
No |
No |
No |
|
Platform |
Outbound HTTP |
Yes |
Yes |
No |
No |
No |
No |
No |
|
Platform |
Collectors |
Yes |
Yes |
No |
No |
No |
No |
No |
|
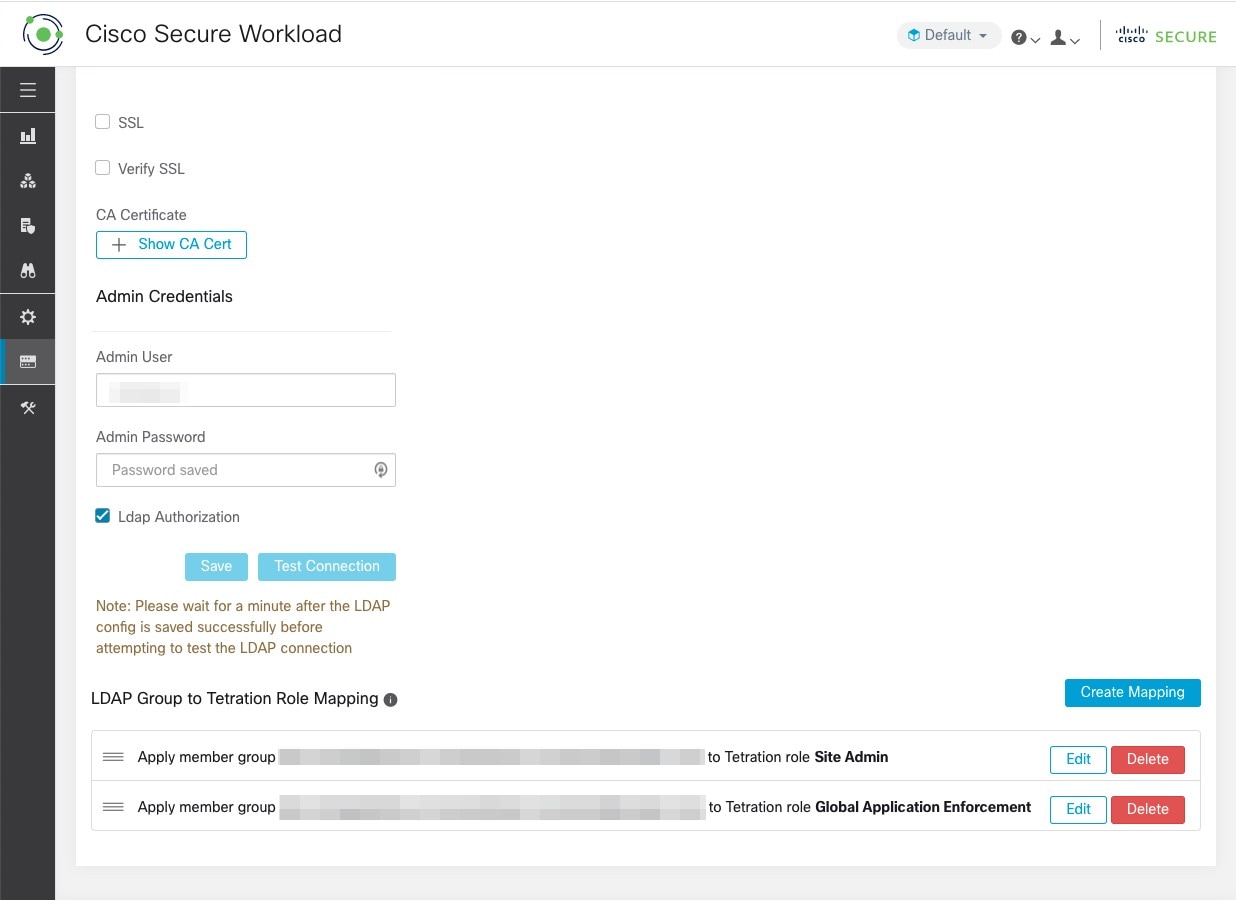
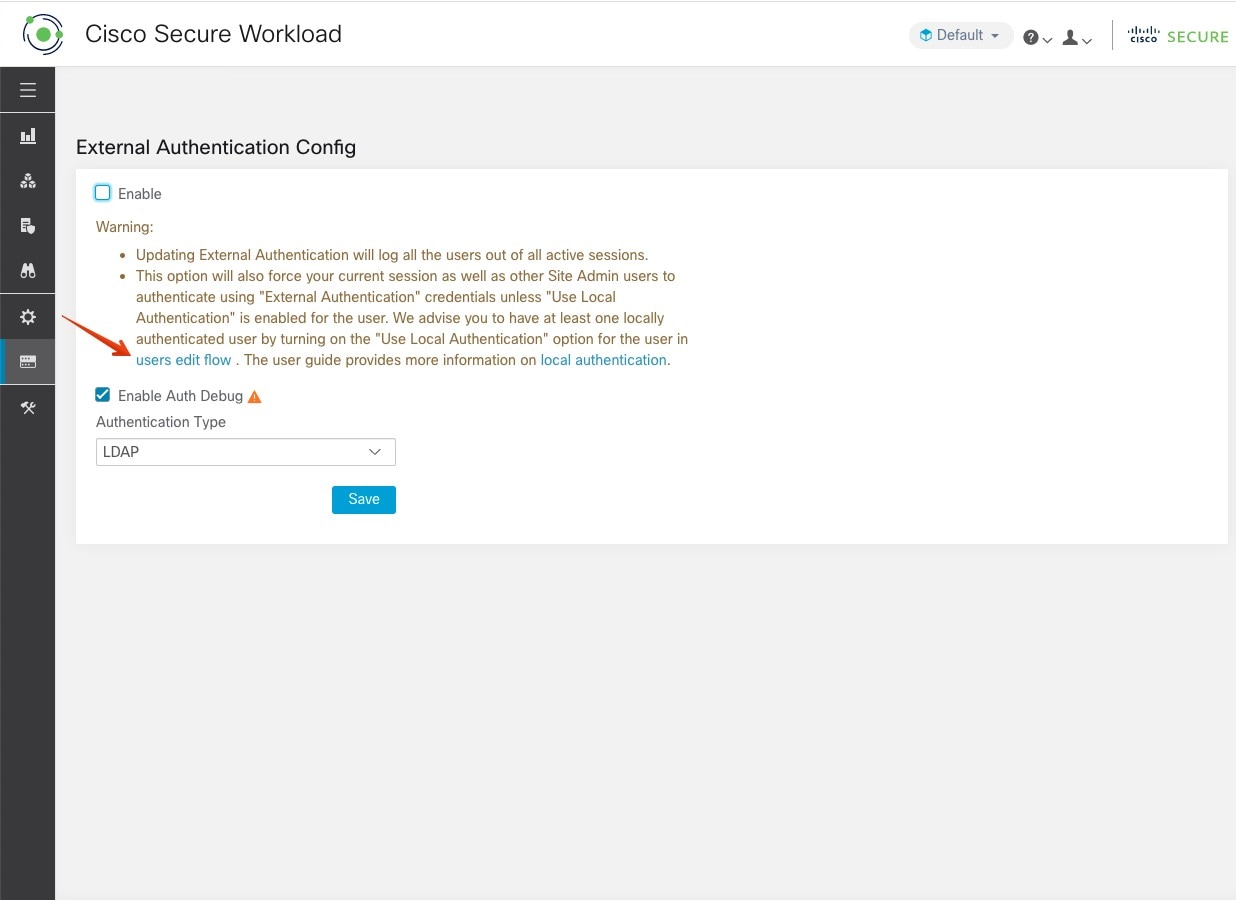
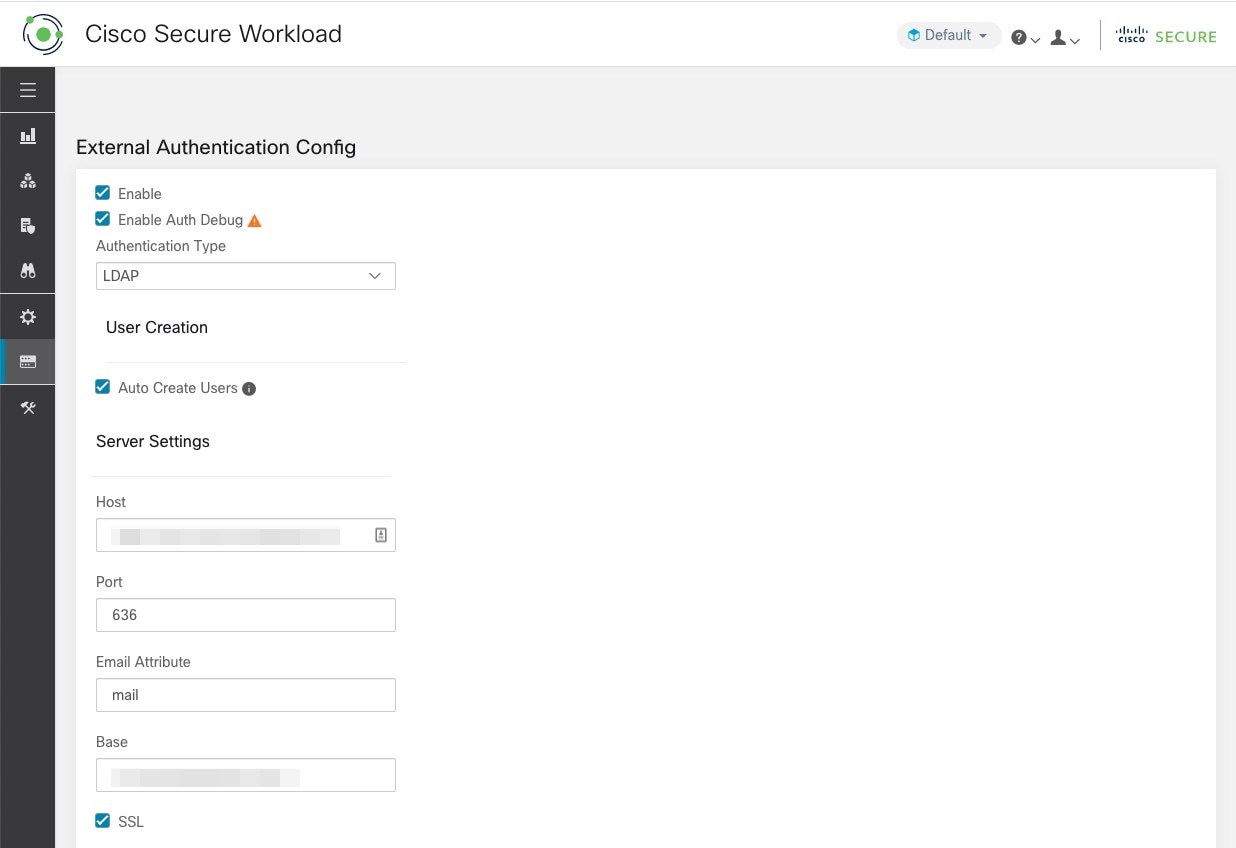
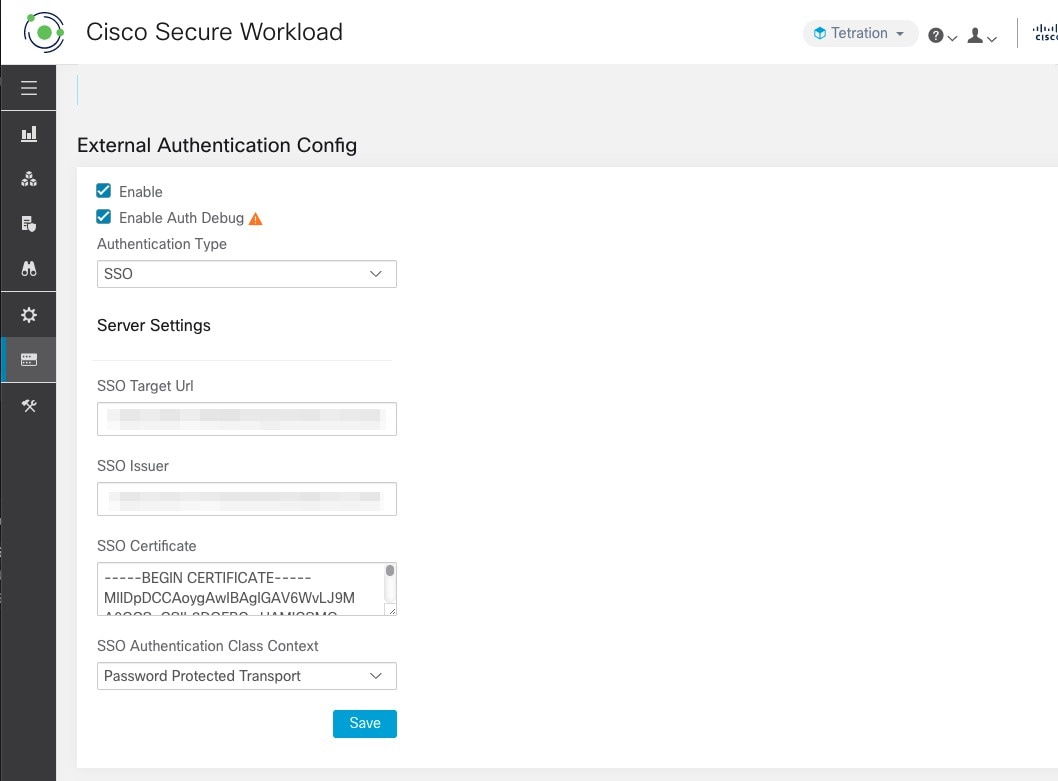
Platform |
External Authentication |
Yes |
Yes |
No |
No |
No |
No |
No |
|
Platform |
SSL Certificate |
Yes |
Yes |
No |
No |
No |
No |
No |
|
Platform |
Login Page Message |
Yes |
Yes |
No |
No |
No |
No |
No |
|
Platform |
Federation |
See below |
See below |
No |
No |
No |
No |
No |
|
Platform |
Data Backup |
See below |
See below |
No |
No |
No |
No |
No |
|
Platform |
Data Restore |
See below |
See below |
No |
No |
No |
No |
No |
|
Platform |
Upgrade/ Reboot/ Shutdown |
Yes |
Yes |
No |
No |
No |
No |
No |
Note |
|
|
Menu |
Option |
Site Admin |
Customer Support |
Customer Support Read Only |
Global Application Enforcement |
Global Application Management |
Global Read Only |
Agent Installer |
|---|---|---|---|---|---|---|---|---|
|
Troubleshoot |
Service Status |
Yes |
Yes |
Yes |
No |
No |
No |
No |
|
Troubleshoot |
Cluster Status |
See below |
See below |
No |
No |
No |
No |
No |
|
Troubleshoot |
Virtual Machine |
Yes |
Yes |
Yes |
No |
No |
No |
No |
|
Troubleshoot |
Snapshots |
Yes |
Yes |
No |
No |
No |
No |
No |
|
Troubleshoot |
Maintenance Explorer |
Yes |
Yes |
No |
No |
No |
No |
No |
|
Troubleshoot |
Resque |
Yes |
Yes |
No |
No |
No |
No |
No |
|
Troubleshoot |
Hawkeye (Charts) |
Yes |
Yes |
Yes |
No |
No |
No |
No |
|
Troubleshoot |
Abyss (Pipeline) |
Yes |
Yes |
Yes |
No |
No |
No |
No |
Note |
The Cluster Status option is available to Site Admin and Customer Support roles depending on the cluster type. |
Create a Role
Before you begin
You must already have a Site Admin or Customer Support user role.
-
In the navigation bar on the left, click .
-
Click Create New Role. The Roles panel appears.

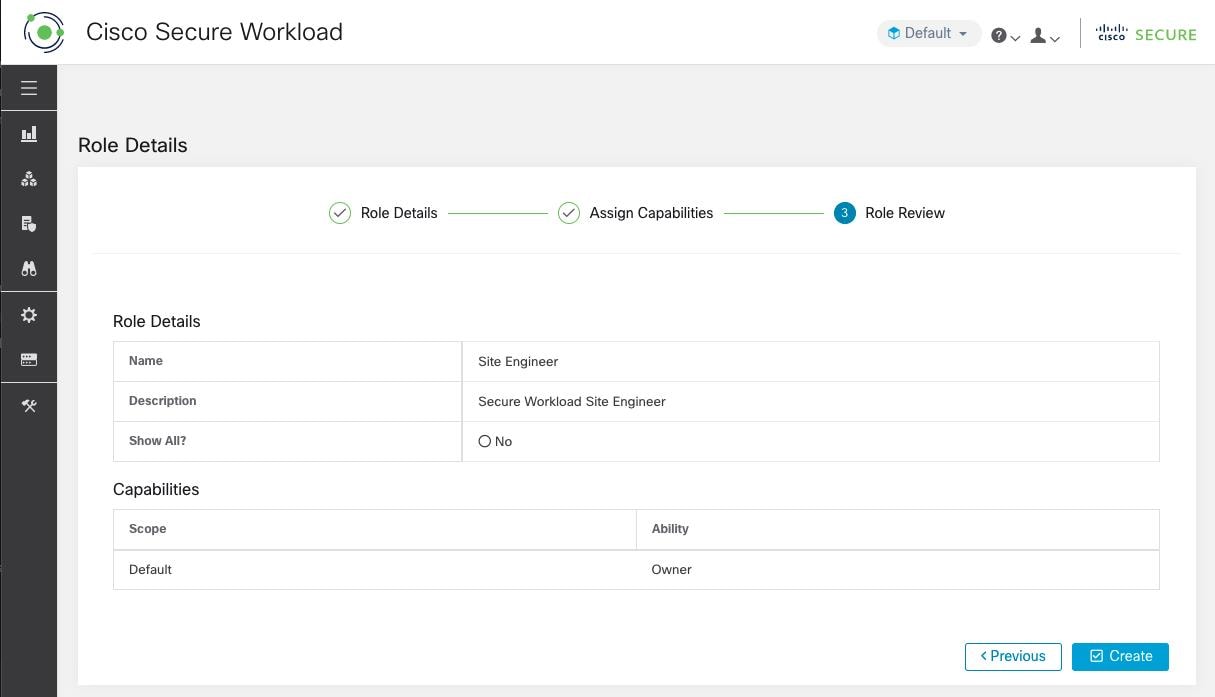
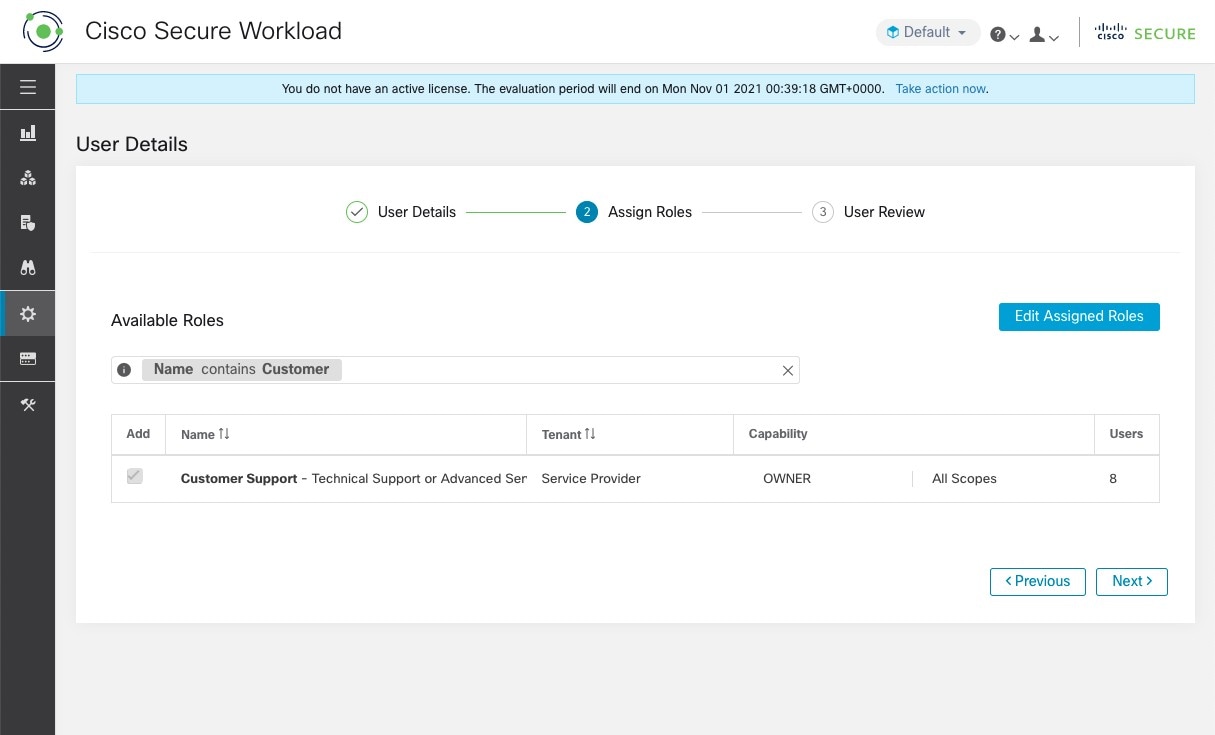
Creating a role using the Create Role Wizard is three-step process.
Procedure
|
Step 1 |
|
|
Step 2 |
|
|
Step 3 |
|
Edit a Role
This section explains how Site Admins and Customer Support users can edit roles.
Before you begin
You must be Site Admin or Customer Support User.
-
In the navigation bar on the left, click .
-
In the row of the role to edit, click the Edit button in the right-hand column. The Roles panel appears.
Editing a role using the Edit Role Wizard is three-step process.
Procedure
|
Step 1 |
|
||
|
Step 2 |
|
||
|
Step 3 |
|


 Feedback