Recycling Fabric Interconnect Components

This chapter contains the following topics:

Recycling the Fabric Interconnect PCBs

Each Cisco UCS X-Series Direct Fabric Interconnect 9108 100G has a printed circuit board (PCB) that is connected to a sheet metal tray. You must:

  • Disassemble and remove additional parts to gain access to the PCB.

  • Disconnect the PCB from the sheet metal to recycle the PCB.

  • Recycle each fabric interconnect in the Cisco UCS X9508 chassis.

Use the following procedure to recycle the fabric interconnects.

Before you begin


Note


For Recyclers Only! This procedure is not a standard field-service option. This procedure is for recyclers who will be reclaiming the electronics and sheet metal for proper disposal to comply with local eco design and e-waste regulations.

You will find it helpful to gather the following tools before beginning this procedure:

  • Screwdrivers: One each of T8 and T10 screwdriver, and #1 Phillips.

  • Nut drivers: One 8mm hexagonal.

Procedure


Step 1

Remove the following components by hand:

  1. Grasp each fan module cable and remove it.

  2. Grasp each fan module and remove it.

  3. Grasp the M.2 storage module and remove it.

  4. Grasp the light pipe and remove it.

Step 2

Remove the stiffener bracket.

  1. Using a T10 screwdriver, remove the M3 screws.

  2. Grasp the bracket and remove it.

Step 3

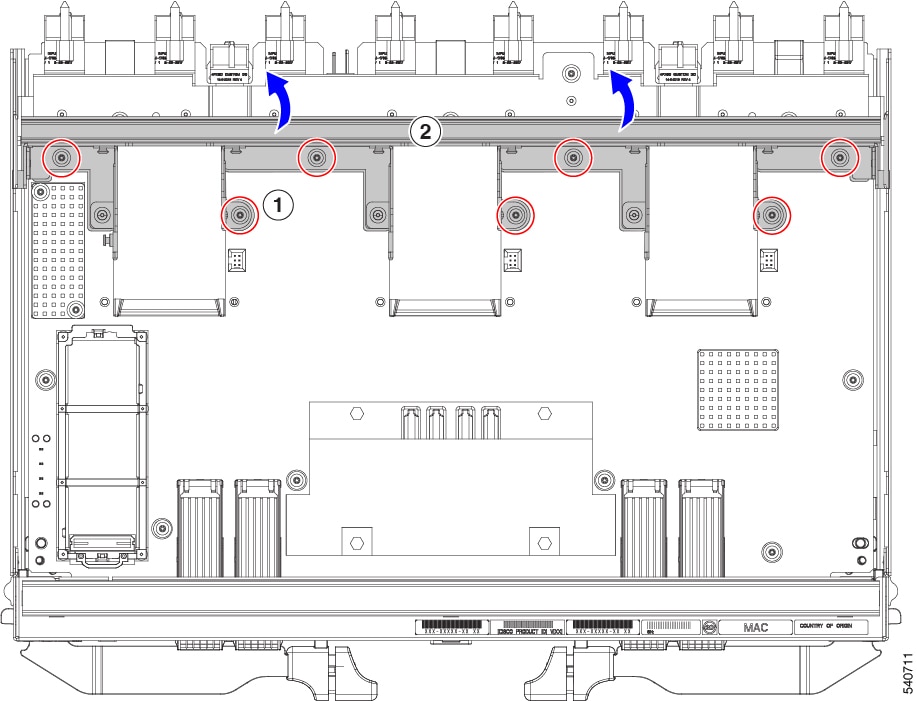
Remove the horizontal rear bracket.

  1. Using a T8 screwdriver, remove the M3 screws on the exterior of the fabric interconnect.

  2. Using a T10 screwdriver, remove the M3 screws on the interior of the fabric interconnect.

  3. Grasp the bracket and remove it.

Step 4

Disconnect additional components and fasteners.

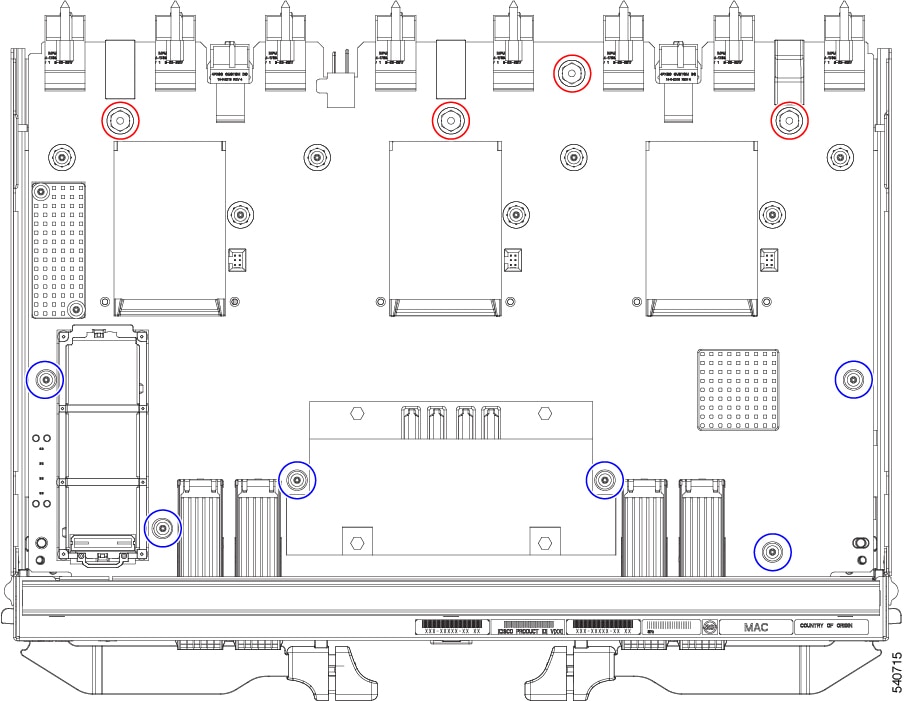
  1. Grasp each airflow baffle and remove it from the tray.

    The airflow baffles are attached to the tray by adhesive, so you must pull with enough force to break the adhesion.

  2. Using an 8mm hexagonal nut driver, remove the standoffs.

  3. Using a T10 screwdriver, remove the M3 screws.

    Red circles ( )

    M3 hexagonal standoffs, 4

    Blue circles ( )

    M3 screws, 6

  4. Grasp the PCBA and disconnect it from the sheet metal.

Step 5

Disconnect the remaining components from the PCBA.

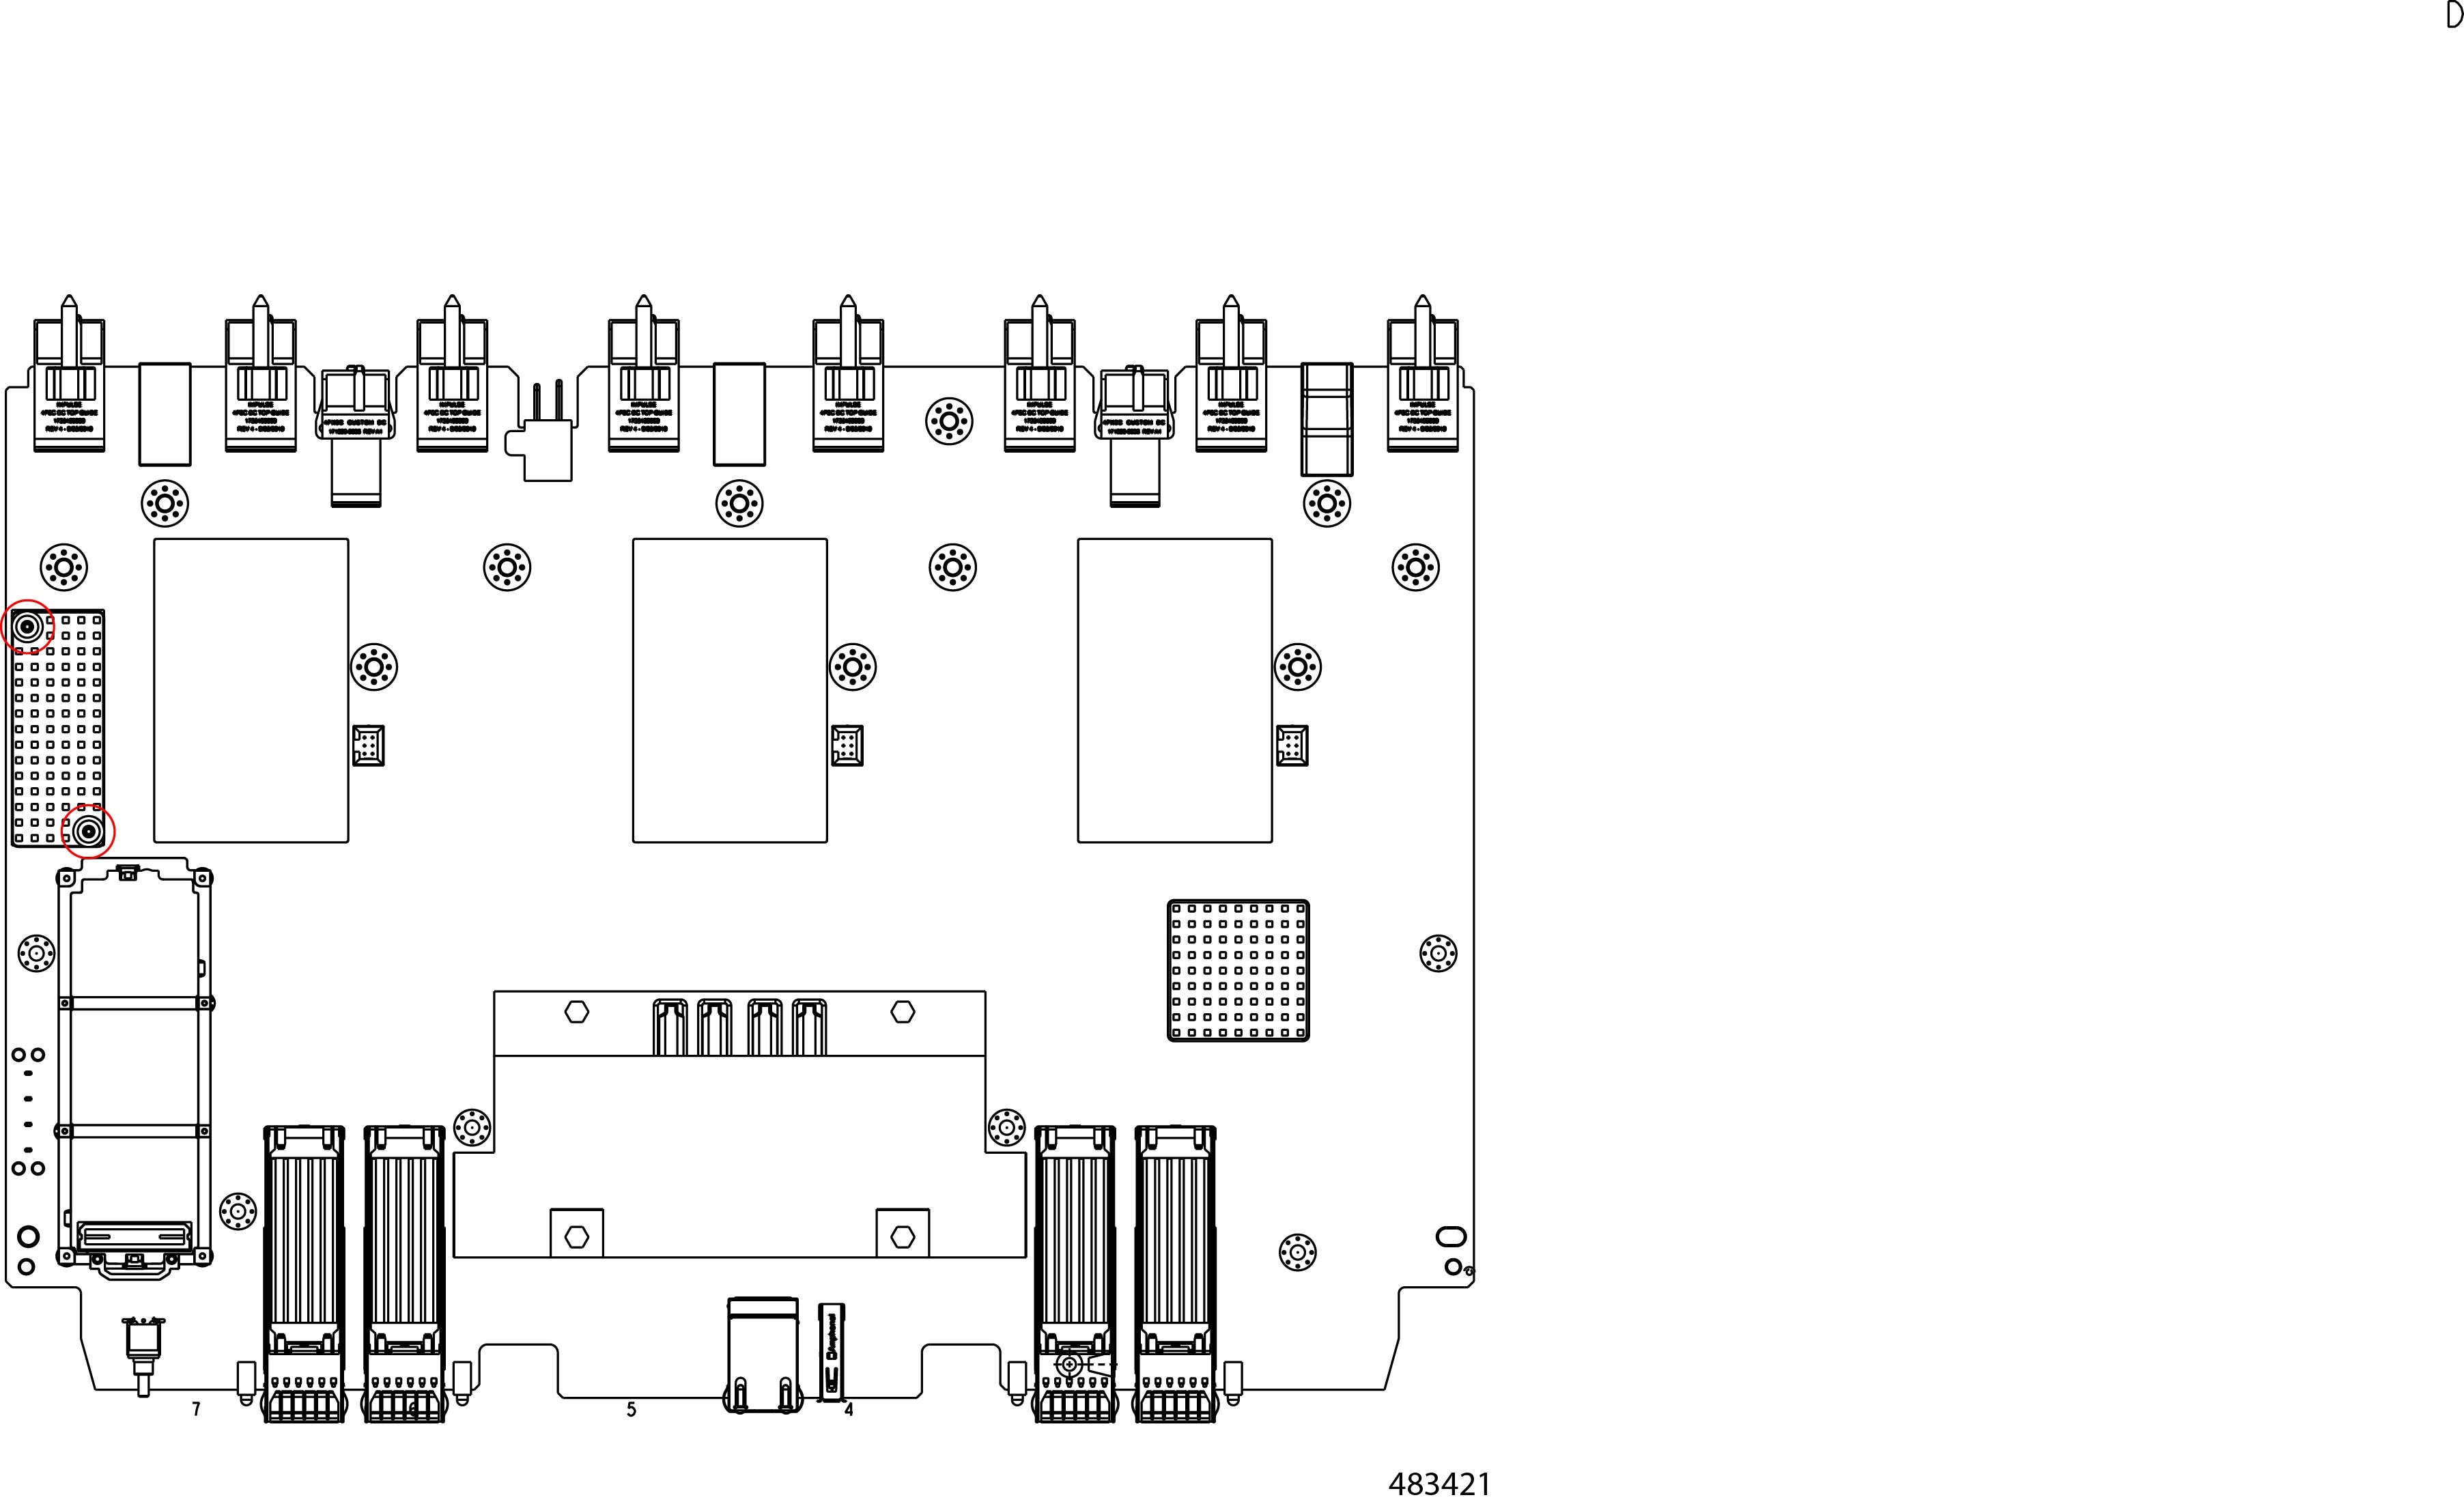
  1. Using the T10 screwdriver, remove the M3 screws for the top heatsink.

  2. Turn the PCBA over so that the bottom is facing up.

  3. Using the #1 Phillips screwdriver and remove the M2 screws.

  4. Using a pliers, release the four heatsink pushpins.

    Red circles ( )

    M2 screws for plastic bracket, 4

    Blue circles ( )

    Heatsink pushpins, 4

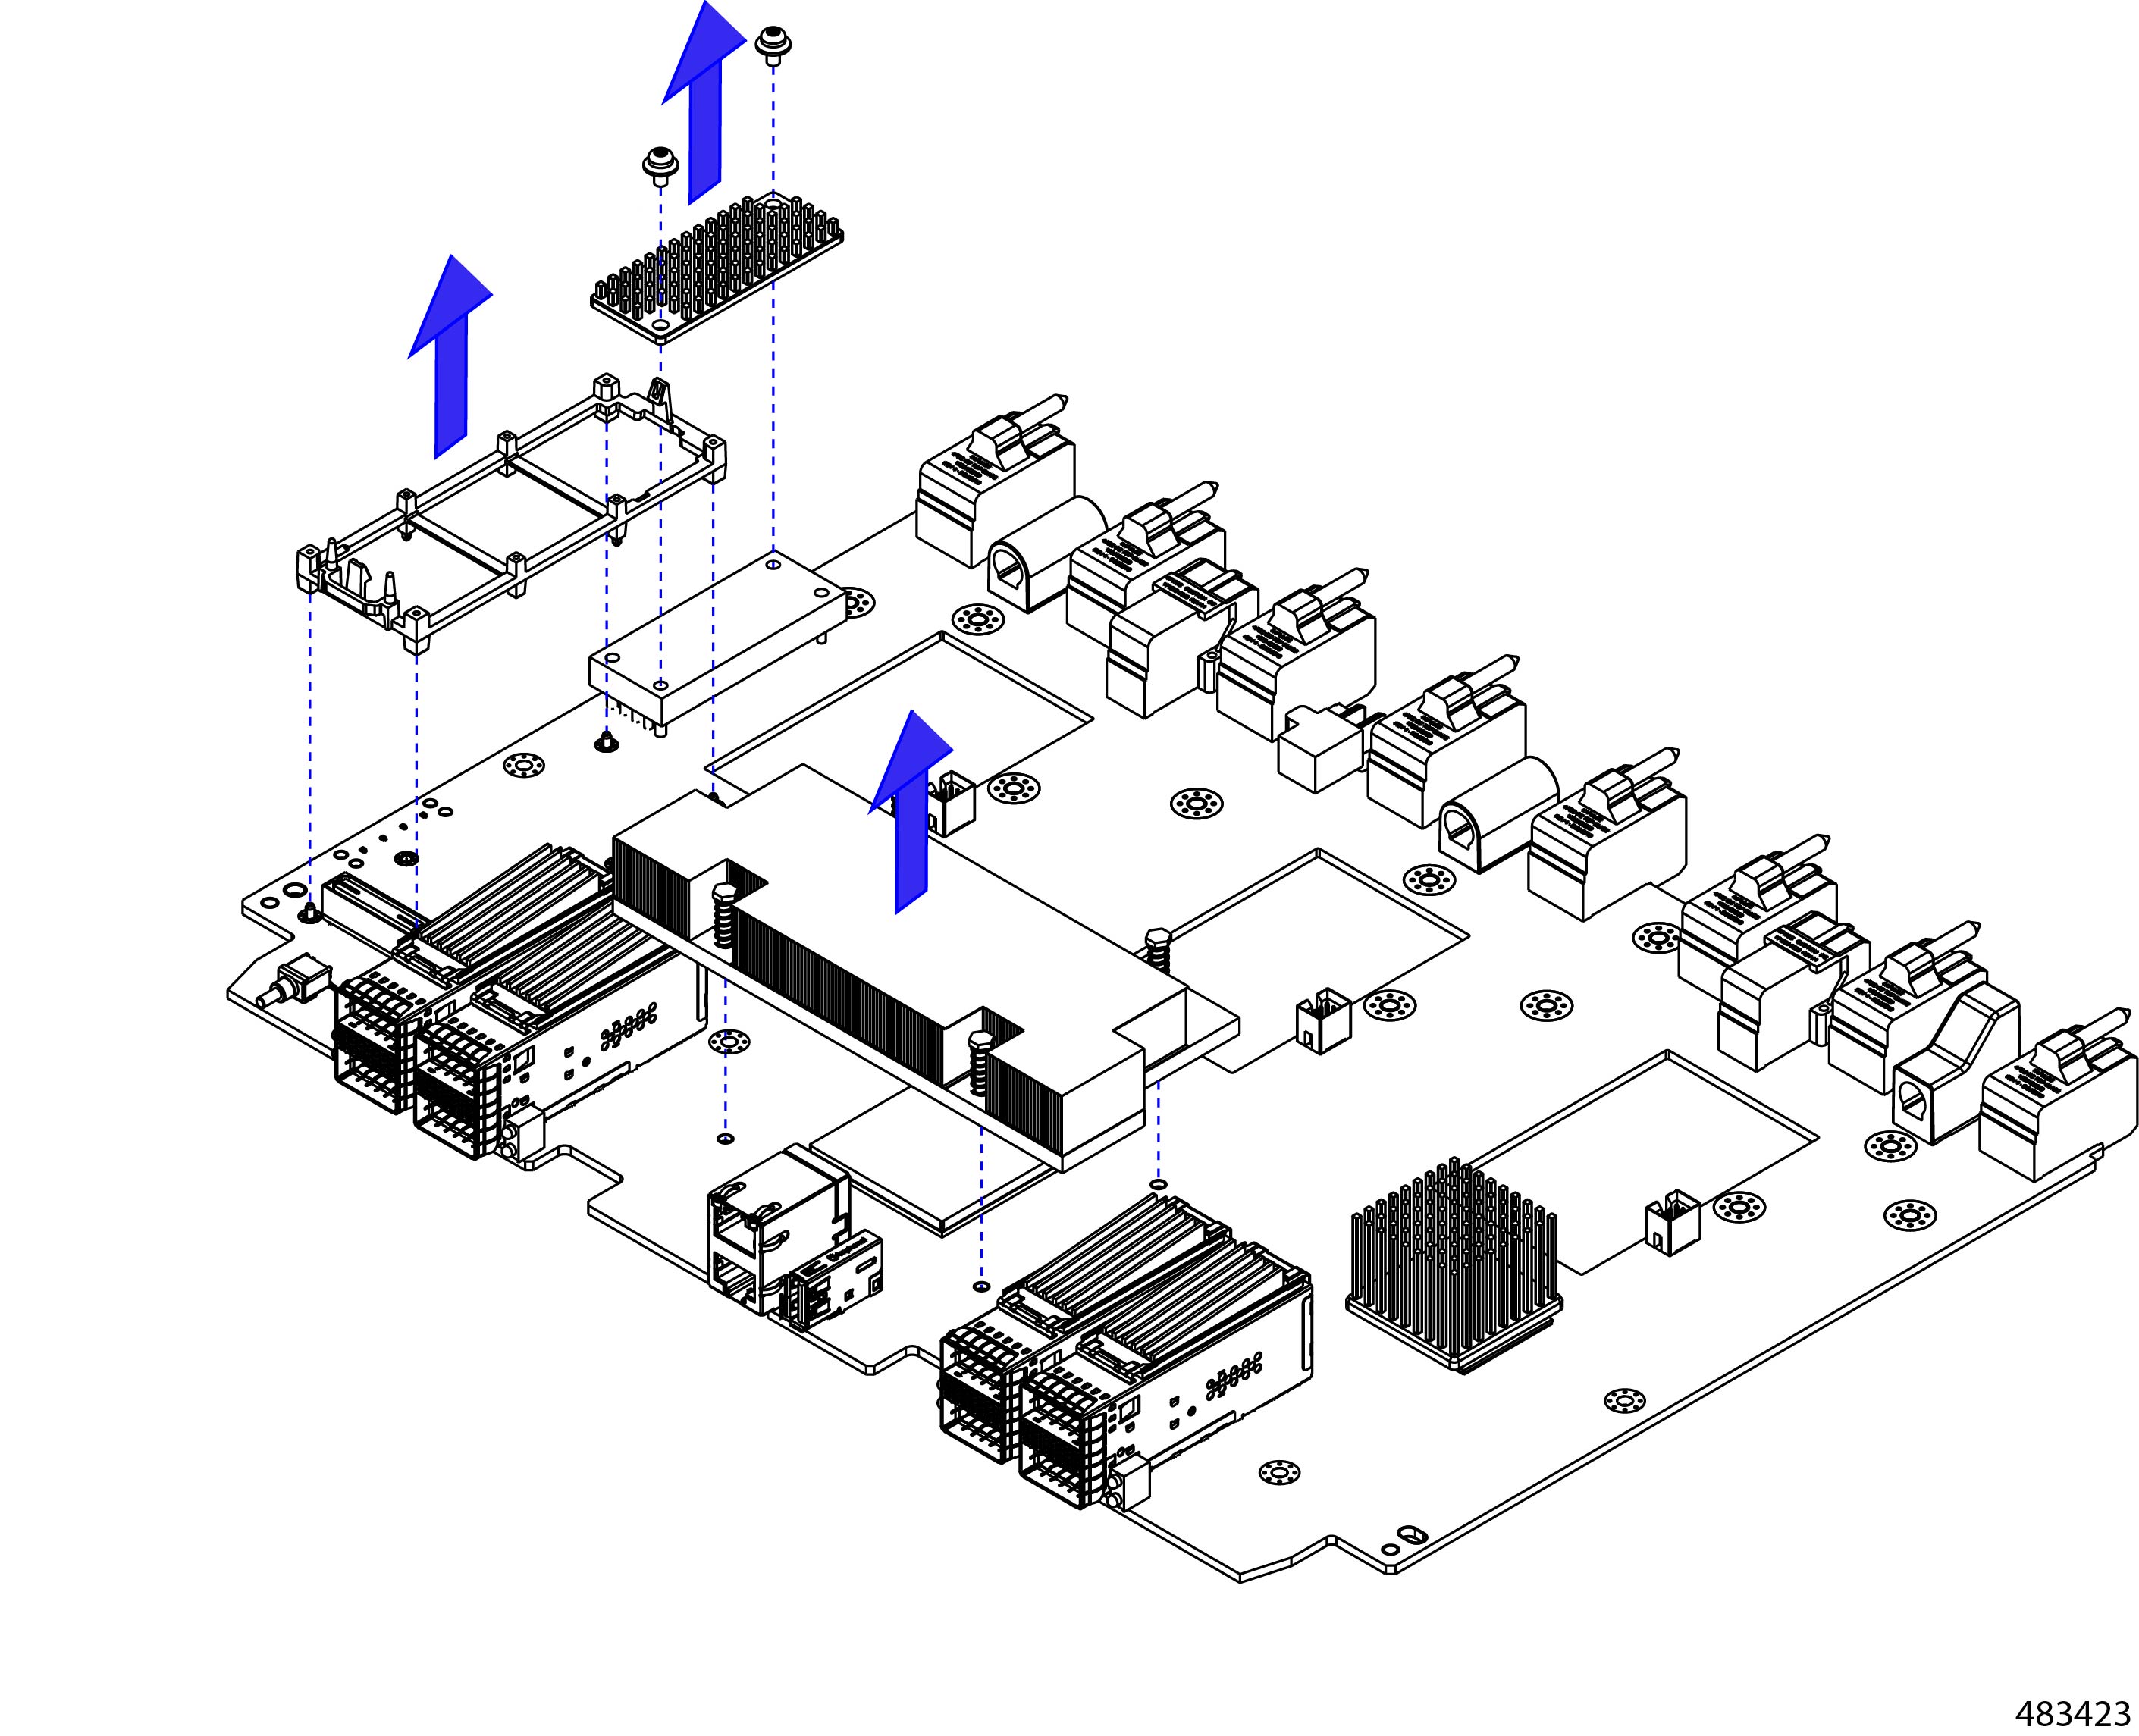
  5. Turn the PCBA over again so that the top is facing up.

  6. Grasp the plastic bracket for the M.2 module and remove it.

  7. If the top heat sink is still attached, grasp and remove it.

  8. Grasp the center heatsink and remove it.

Step 6

Recycle the sheet metal and motherboard in compliance with your local recycling and e-waste regulations.