Customize Your Dashboard Using Filters

Customize Your Dashboard with Filters

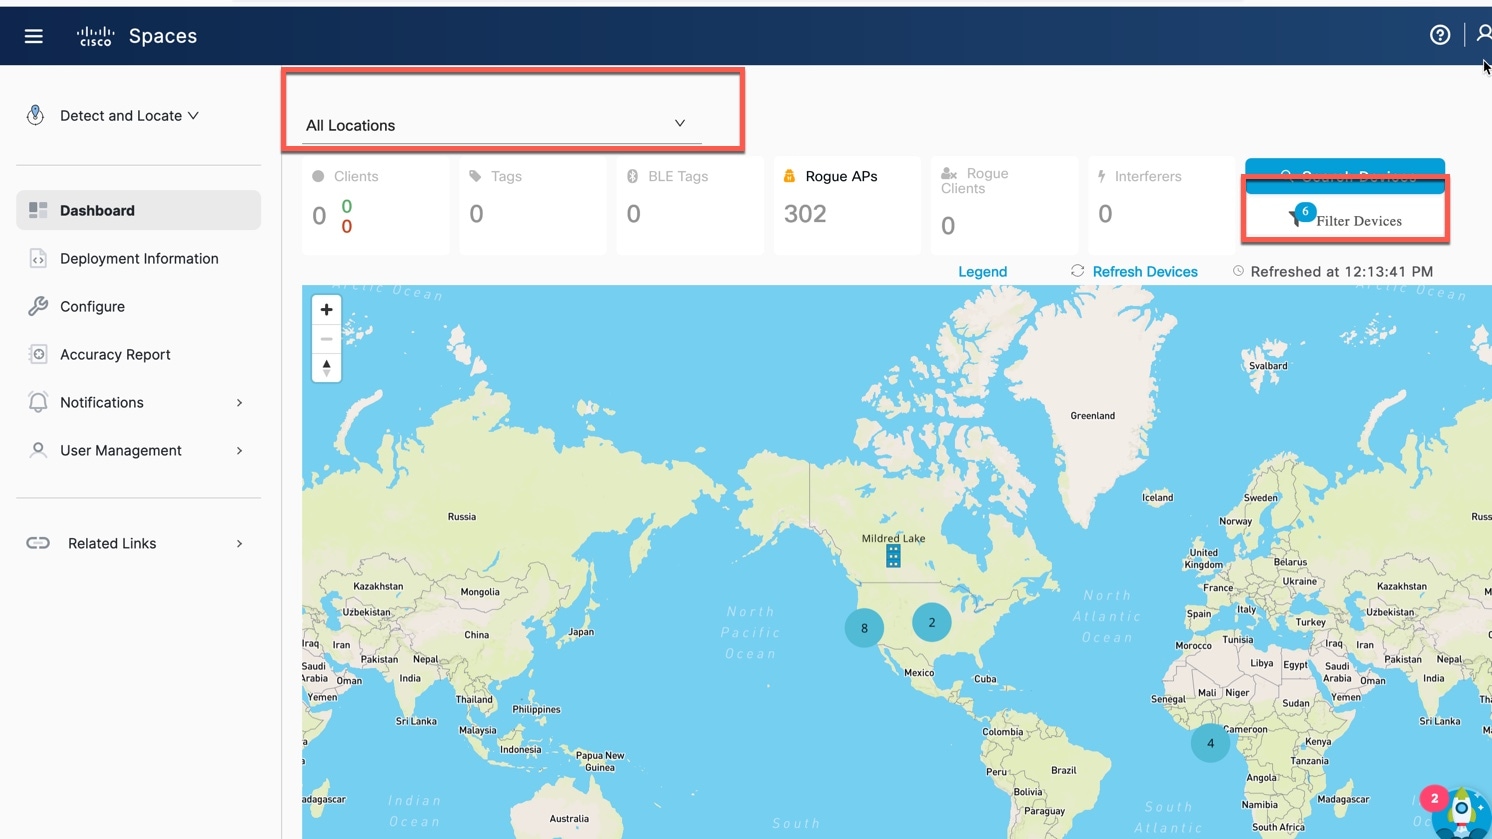
Detect and Locate aggregates and displays various devices in your network, such as clients, tags, BLE tags, and interferes. If the number of such devices is large, you maybe unable to focus on devices that are of specific interest to you.

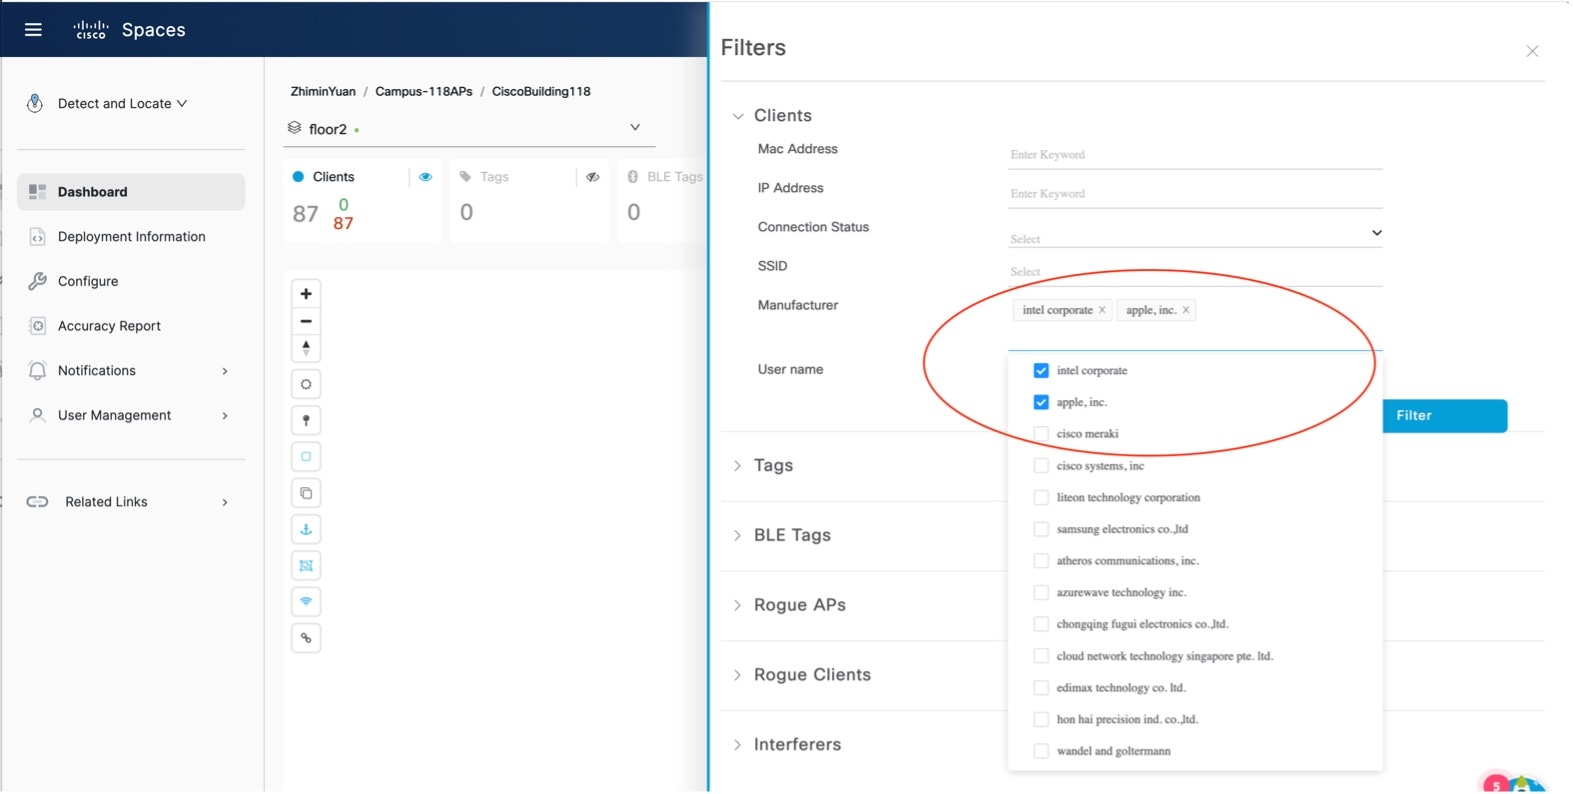
Filters are a feature of the Detect and Locate workspace. Filters allow you to control the visibility of devices on the Detect and Locate dashboard. This allows you to focus your attention on devices that are of interest to you. You can see that the device count displayed on the toolbar on the top of the dashboard also changes according to the criteria you have specified.

You can configure filters, and set them up at various levels of your location hierarchy.  Your filters can be applicable throughout your network (referred to as the global level) or at a specific floor or building (referred to as a hierarchical level)

Filter configurations are unique to each user. This means that your filter remains in place even after you log out and log back in. Detect and Locate does not remove your filters unless you delete them manually.

Set Up the Filter

This procedure shows you how to customize the devices that appear on your dashboard using filters.

Procedure


Step 1

From the Detect and Locate dashboard, navigate to the desired location.

Figure 1. Navigate to the Desired Location

Step 2

Locate the Filter Devices button on the dashboard.

Step 3

Specify the conditions of this filter, and then click Filter.

Figure 2. Specify the Filter Conditions
Figure 3. View All Configured Filters
In the same Filters window, you can now see the configured filters on the top right of each category. A total of all the filters also appears on the top right.

You can remove a filter by clicking the "X" next to the filter text.


The filter counts are also visible on the dashboard. You can see them on the Filter Devices button.
Figure 4. Filter Count on the Filter Devices Button

Using Multiple Device Filters for Multiple Conditions

Each condition requires a filter. To incorporate multiple conditions, you must create several filters. These filters operate collectively, necessitating that all established conditions be met for the search to become more precise.

Figure 5. Configuring Multiple Conditions with Multiple Filters

Filter Condition Dropdown Menu

The Filters window offers drop-down menus for specific conditions. You can see the options available at the chosen hierarchy level. Certain conditions, such as Service Set Identifier (SSID) and Connection Status permit only one selection. Others, like Manufacturer, allow for multiple selections. This means that once you choose an option such as Manufacturer as one of your multiple choices, the search results will display the device's manufacturer details.

Figure 6. Filter Conditions Dropdown Menu

Understanding Filtering by SSID

Networks with multiple SSIDs are often differentiated by suffixes such as _1, _2. You can filter SSIDs by specifying these suffixes. This can help in troubleshooting network issues.

Filter Effect on the Dashboard

When you apply a filter, the following gets modified:
  • the number displayed on the Device toolbar, and
  • the device icons on the map within the dashboard. Only device icons that meet the filter criteria are visible.

When you hover over the Filter Devices button, a popup appears displaying the active filter.

Figure 7. Effect of Filter on the Dashboard