Get Started with Cisco Spaces

This chapter provides an overview of Cisco Spaces, its features, the process flow, license packages, and system requirements for Cisco Spaces.

This chapter contains the following sections:

Overview of Cisco Spaces

Cisco Spaces is a multichannel engagement platform that enables you to connect, know, and engage with visitors at their physical business locations.

Cisco Spaces is the industry's most scalable end-to-end indoor location services cloud platform that empowers customers to achieve business outcomes at scale. With its comprehensive suite of services, it offers a robust solution for all your location-based needs.

Cisco Spaces provides solutions for monitoring and managing the assets in your premises.

It covers various verticals of business such as

  • retail

  • manufacturing

  • hospitality

  • healthcare

  • education

  • financial services

  • enterprise workspaces, and so on.

With Cisco Spaces, users gain centralized access to all location technology and intelligence via a unified dashboard interface. Designed for compatibility with existing Cisco Aironet, Cisco Catalyst, and Cisco Meraki infrastructure, Cisco Spaces stands out as a versatile solution for location-based service needs.
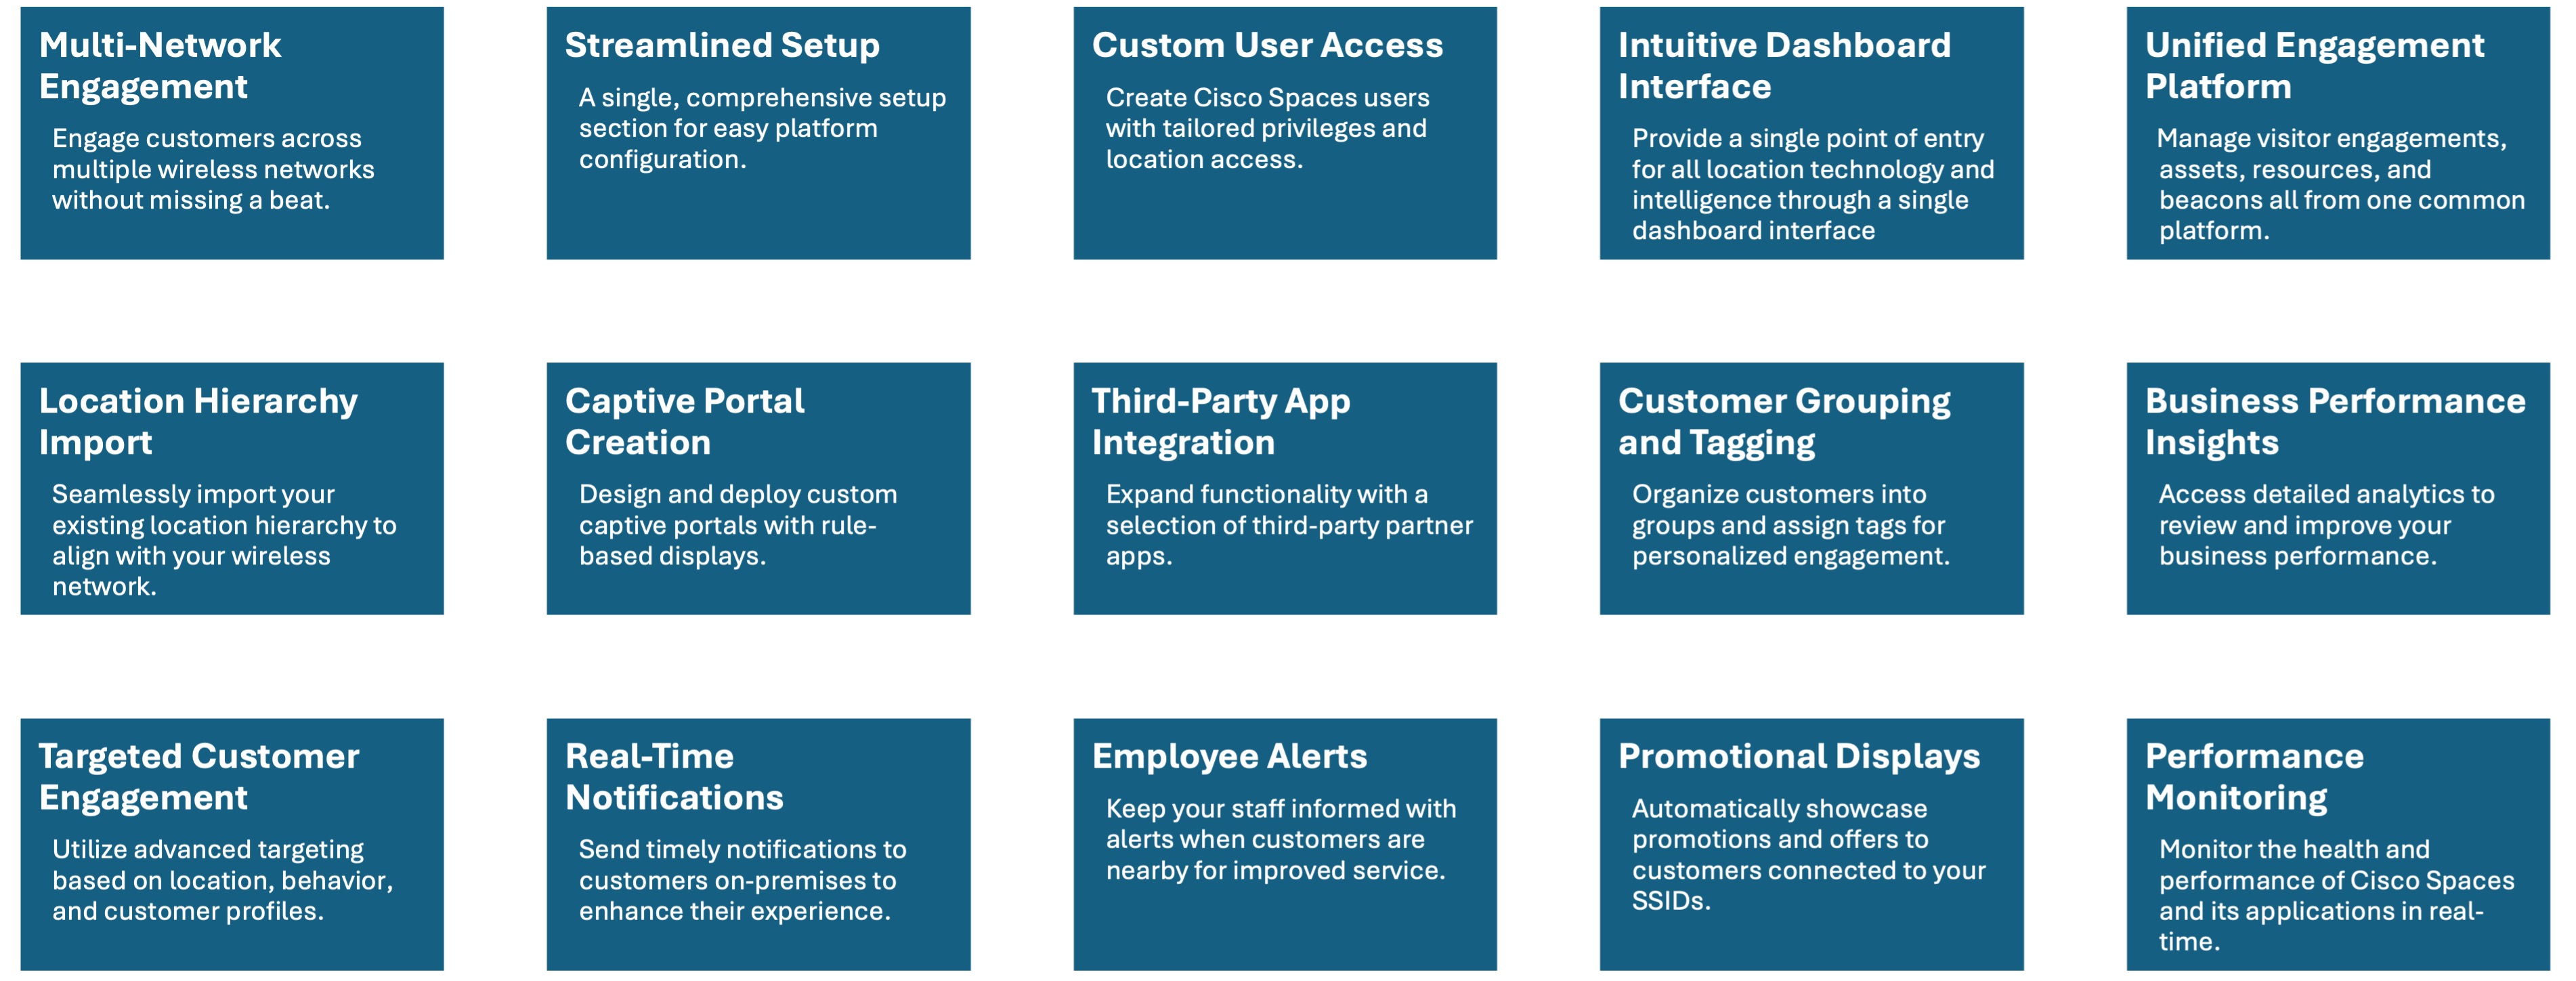
Figure 1. Feature Highlights

Use Case Scenario

In the ABC shopping mall, to get free Wi-Fi, the customers must connect to an SSID once they enter the mall. ABC wanted to provide a personalized experience to each customer who connects to the Wi-Fi based on their purchase history and visit frequency. After installing Cisco Spaces, ABC could collect the Wi-Fi user’s details through the captive portals, and utilize these details to send notifications to the customers regarding the offers and services available to them. The customers once connected to the Wi-Fi are taken to a captive portal, where they are provided with an option to register themselves by filling in details such as name, e-mail address, telephone number, and so on. This information captured is stored in Cisco Spaces. When customers re-visit the mall, promotional offers are sent to the customers through SMS, or e-mail.

Cisco Spaces can also be configured to notify business users such as employees regarding customer activities. For example, you can identify and tag repeat customers as platinum members on Cisco Spaces dashboard. When a platinum customer enters a restaurant and their device is detected by a wireless access point, the restaurant representatives would receive alerts on their devices and can provide personalized services to the customer.

Process Flow for Cisco Spaces

The process flow for Cisco Spaces is as shown in the following figure:

Figure 2. Process Flow for Cisco Spaces
process-flow

Cisco Spaces Subscriptions and Upgrade Options

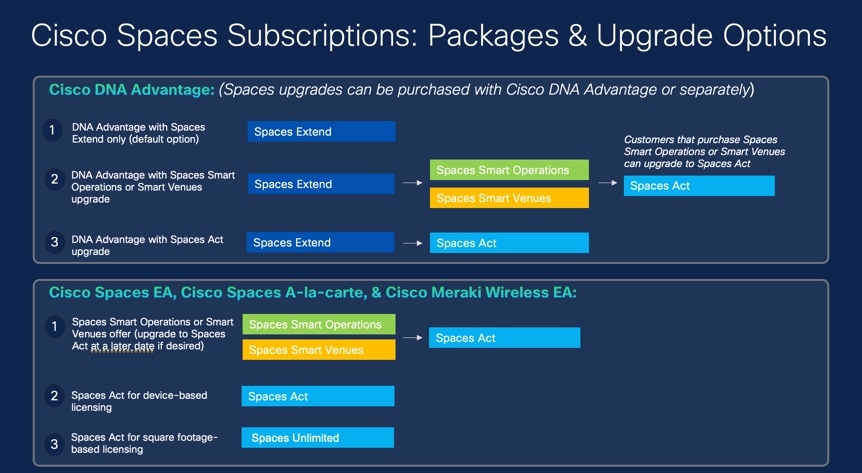
Cisco Spaces is available in two license formats:

  • Spaces EXTEND bundled with Cisco DNA Advantage with an upgrade option to Spaces ACT or choose between Spaces Smart Operations or Spaces Smart Venues.

  • Spsces A-la-carte that includes Spaces ACT (includes all Cisco Spaces features), Spaces Smart Operations, Spaces Smart Venues and Spaces UNLIMITED license.

You can purchase either Spaces ACT or Spaces Unlimited licenses, both of which offer full features. Alternatively, you can choose Spaces Smart Operations and Spaces Smart Venues for specific use cases.


Note


Spaces EXTEND subscriptions are only included with Cisco DNA Advantage subscriptions that are paired with Catalyst Wireless and Cisco Catalyst 9300 Series and Cisco Catalyst 9400 Series switches.


Figure 3. Package and Upgrade Options

Cisco DNA Advantage Package

The subscription options available are:

  • Cisco DNA Advantage with only Spaces EXTEND is the default subscription option.

  • Cisco DNA Advantage with Spaces EXTEND license and Spaces ACT license as the upgrade option.

  • Cisco DNA Advantage with Spaces Smart Operations or Spaces Smart Venues along with Spaces EXTEND license. In this subscription option you can upgrade to Spaces ACT license.

Cisco Spaces A-la-carte

The subscription options available are:

  • Spaces Smart Operations or Spaces Smart Venues with an option to upgrade to Spaces ACT

  • Spaces ACT for device-based licensing

  • Spaces ACT Unlimited for square footage based licensing

Cisco Spaces License Packages

Overview of Cisco Spaces License Packages

The Cisco Spaces License package supports the following licenses: ACT, EXTEND, SMART_VENUES, SMART_OPERATIONS, SMART_OPERATIONS_BASE and UNLIMITED.

With the Cisco Spaces License package, you can choose the license option that best suits your needs and preferences.

As a Cisco Spaces user, you can purchase either SPACES ACT or SPACES UNLIMITED licenses with full features or SMART_OPERATIONS and SMART_VENUES for specific use cases.

Licensing Options

The Cisco Spaces licensing options are:

  • EXTEND: Cisco Spaces Extend subscription is included with Cisco DNA Advantage subscriptions with Cisco Catalyst Wireless and Cisco Catalyst 9300 Series and 9400 Series Switches.

  • SPACES ACT: This license works based on the number of Access Point (AP) provisioned for the Cisco Spaces account.

    SPACES ACT license is based on per device/year basis. This is also available as an add-on option on Cisco DNA Advantage subscription (Transactional and EA) as well as offered separately.

    The SPACES ACT license is recommended for wireless customers who have Cisco DNA Advantage and who want to keep a device licensing model (without significant expansions or increased device density planned).

  • SPACES UNLIMITED: Cisco Spaces accounts with UNLIMITED license include all the entitlements similar to an existing ACT license. It is available in the new Cisco Spaces Unlimited EA and standalone subscription.

    Cisco Spaces SPACES UNLIMITED license is available on a per square foot/square meter building unit/year basis. The Cisco Spaces SPACES UNLIMITED license is recommended for users with:

    • Multiple technologies or have dense deployments with Cisco Smart Workspaces

    • Do not need other features besides Cisco Smart Workspaces

    • Hybrid work offers


    Note


    For a Cisco Smart License-enabled account with UNLIMITED license package, the license count is based on the total square foot area of all the floor locations calculated based on the maps uploaded to the Cisco Spaces platform.


  • SMART_VENUES: This license works in the same way as the existing EXTEND license with some additional entitlements.

  • SMART_OPERATIONS_BASE: This license works in the same way the current SMART_OPERATIONS license, excluding some entitlements and the following apps:

    • IoT Explorer,

    • Asset Locator, and

    • IoT Services.

  • SMART_OPERATIONS: This license works in the same way as the existing EXTEND license with some additional entitlements. The SMART_OPERATIONS license includes all the access privileges under the EXTEND license.

For information about features included in Cisco Spaces, see the Cisco Spaces Data Sheet.


Note


  • The features available for your account depends on the type of Cisco Spaces license package you own.

  • In the Cisco Spaces dashboard, the apps are displayed based on the license type for which they will be available.

  • Cisco Spaces users can now choose any of these licenses for a location using the Split License feature.


Licensing Usage Details for Cisco Smart License Enabled and Non-Enabled Accounts

The following table provides an overview of how licenses are consumed for Cisco Smart License enabled and Cisco Smart License non-enabled accounts, detailing the types of devices counted for each license type:

Table 1. License Consumption

Cisco Spaces Account Type

Devices Counted for License

Cisco Smart License Enabled

Multiple appliances such as: Access Points, Camera, Webex Devices, Sensor (Only Portal Beams), Switches

Cisco Smart License Non-Enabled

Only one appliance: Access Points


Note


The license counts for both Cisco Smart License enabled and Cisco Smart License non-enabled accounts will not include Cisco Meraki's MT Sensors.


Log In

Cisco Spaces is now integrated with the Cisco Customer Identity (CCI) application for the login workflow. Cisco Spaces users are now redirected to the CCI application window for login authentication and then proceed to log in to the Cisco Spaces dashboard.

The new workflow is applicable to the following users:

  • Cisco domain users

  • Customer domain non-SSO users

With the introduction of CCI integration, you can now use the Switch Users option to switch between different email addresses in the Cisco Spaces login window.


Note


  • Customer domain SSO users can continue to use the existing login workflow.

  • The domain specific URLs to log in to Cisco Spaces:


For more information about CCI, see Login and Account Help.

Procedure


Step 1

Go to Cisco Spaces and click Login.

Note


During the login process, a pop-up window is displayed for Cisco Spaces users who were on board before April 2022 to update their country information. You can either provide the required information or click Skip & Continue to skip and proceed to the Cisco Spaces Home window. Once you provide the information, the pop-up window is not prompted again during subsequent logins.

Step 2

In the Email field, enter your Cisco Spaces account email ID and click Continue.

You will be redirected to the CCI pop-up window.

Step 3

In the CCI pop-up window, enter your Cisco Spaces account email ID and click Next.

You can use the following options in the pop-up window as required:

  • Unlock account: Use to unlock the Cisco Spaces account if the account gets locked because of incorrect password attempts. Your account will be automatically locked if you make four failed attempts.

  • Forgot email address: Use to retrieve your Cisco Spaces account email address.

Step 4

In the Password field, enter your password.

Use Forgot password to retrieve or reset your password.

Step 5

Click Log In.

Step 6

In the Cisco Spaces pop-up window, from the Select Customer drop-down list, select a customer.

Step 7

Click Proceed.

Cisco Spaces dashboard window is displayed.

Note


To log out, click the profile icon () and choose Logout.


Single Sign-On for Cisco Spaces

Cisco Spaces supports Single Sign-On (SSO) so that users can login to Cisco Spaces using their SSO credentials. For example, if the Cisco domain is SSO-enabled, Cisco employees, who have a Cisco Spaces account, can access Cisco Spaces using their Cisco e-mail address and password. Additionally, if a Cisco employee is already logged in to the Cisco domain through any other Cisco website or application, that Cisco employee can access Cisco Spaces by simply specifying the Cisco e-mail address.

When you click the Login button, only the e-mail ID field will appear in the Login window along with a Continue button. If the user is already logged into the SSO-enabled domain, then the user will be directly taken to the Cisco Spaces Dashboard after clicking the Continue button. If the Cisco Spaces account supports multiple customer names, then the Select Customer window will be displayed. If the user has not logged into the domain, then the user will be redirected to the IDP page for login authentication, and user can login by specifying the SSO credentials.

To enable SSO for your Cisco Spaces account, contact the Cisco Spaces support team and provide the following information:

  • Account name

  • Domain name (for which SSO needs to be enabled)

  • Application Name

  • SSO type: Currently, only SAML is supported.

  • If only authentication is needed or both authentication and authorization needs to be enabled. This is done by setting the authenticateOnly flag to True or False.

    • True: Only authentication is enabled for the user.

    • False: Both authentication and authorization is enabled for the user.


      Note


      • If you set authenticateOnly to False:

        • You need to pass additional information from the IDP while sending the user details. For example, role=dnaspaces:174923535949:Dashboard_Admin.

        • The value for role is mandatory and must be available in the IDP while sending the user details.

        • You need not invite individual users from the Cisco Spaces dashboard > Admin Management. User invitation and activation is based on both authentication and authorization process by the specific customer IDP & Cisco Spaces.

          You can use the Cisco Spaces dashboard existing default roles or create a new role in the Cisco Spaces dashboard and use that specific role name. The Cisco Spaces dashboard default roles are:

          • Dashboard Admin Role: Provides full admin permission to the user for the selected account

          • Dashboard Admin Read: Provides read permission to the user for the selected account

          If you use the Cisco Spaces dashboard default roles, you must pass the role string value in the specified format:

          role": "dnaspaces:<account number>:Dashboard Admin Role",

          role": "dnaspaces:<account number>:Dashboard Admin Read",

          If you use custom roles, create these custom roles in Cisco Spaces > Admin Management > Roles and pass the role name as the role string value in the IDP response.


  • The following information from the metadata.xml file:

    • SSO Details

    • Entity

    • Entry point

Once you provide the above details, the Cisco Spaces support team will send you the following so that you can configure your application:

You need to configure your IDP metadata to return the firstName, lastName and email fields as below:

nameid-format:emailAddress","firstName":"Jane","lastName":"Doe","phone":"9876543210","level":"info","

Start Working with Cisco Spaces

Before starting working with Cisco Spaces ensure that you have the prerequisites mentioned in System Requirements.


Note


Initially, you must contact the Cisco Spaces support team for creating a Cisco Spaces account. You will get an invite to activate your Cisco Spaces account through e-mail. Click the Accept Activate button, and in the window that displays configure the log in credentials, and click Activate Account. You are now logged into Cisco Spaces. If you are a Dashboard Admin, you can now invite other Cisco Spaces users.

To start working with Cisco Spaces, perform the following steps:

Procedure


Step 1

Log in to Cisco Spaces.

Note


You can enable Single Sign-On for Cisco Spaces. For more information see, Single Sign-On for Cisco Spaces.

Step 2

Connect to your wireless network and configure the wireless network for Cisco Spaces referring to the instructions in the Setup section of the Cisco Spaces dashboard.

The setup instructions are also available in the following sections of this guide:

Note

 
Cisco Spaces provides a universal account so that you can connect Cisco Spaces to multiple wireless networks.

Step 3

Add your team members, and assign them roles and permissions. For more information about adding Cisco Spaces users, see Managing Cisco Spaces Users.

Step 4

Import the location hierarchy defined in your wireless network to Cisco Spaces. For more information on configuring the location hierarchy, see Location Hierarchy in Cisco Spaces and Overview of Location Hierarchy 2.0.

The following steps are optional and depend on the apps that you want to use and the activities that you want to perform.

Step 5

To use the Captive Portals app, import SSIDs to Cisco Spaces. For more information on importing the SSIDs, see the “SSIDs” section.

Step 6

Define Location Personas Rules to tag customers. For more information on creating a Location Personas Rule, see the “Creating or Modifying Tags Using a Location Persona App” section.

Step 7

Configure supporting features such as SMS Gateways. Refer to the respective topic in this guide for configuration.

Step 8

If required, create Captive Portals. For more information on creating the captive portals, see the “Creating and Managing Portal” section .

Step 9

If required, create Captive Portal Rules to display the appropriate captive portal to various customers. For more information on creating Captive Portal Rules, see the “Captive Portal Rule” section.

Step 10

If required, create Engagement Rules to send appropriate notifications to the customers. For more information on creating Engagement Rules, see the “Creating an Engagement Rule” section.

Step 11

Analyze the Cisco Spaces performance, and your business performance using apps such as Behavior Metrics, Location Analytics, and Impact Analysis. For more information on these apps, see the respective section..

Step 12

Monitor the Cisco Spaces domain and apps using the Monitor section.

Profile Information

Cisco Spaces supports adding the profile information such as first name, last name, and mobile number of the Cisco Spaces dashboard user.

  • A tab, My Profile, is available in the Account Preferences window to add the profile information. You can specify the first name, last name, and mobile number in this window, where mobile number and its verification are optional. When you specify the mobile number, a Verify Mobile Number link appears, which allows you to verify the mobile number using One Time Password. Once the mobile number is verified, the status Verified is shown. The Verify Mobile Number link will appear again when you change your mobile number.

  • The Login workflow for Cisco Spaces displays the Update Profile Information dialog box as part of the login process if the Profile Information is not available for the particular Cisco Spaces user. You can skip this step, and can proceed to log in. You can then add the profile details through the Account Preferences window any time later. However, the Profile Information dialog box is shown as part of the Login workflow till the time information is provided.

    Note


    The SSO users will not be able to edit the profile information or verify the mobile number. Also, the Update Profile Information dialog box will not be shown to SSO users during login.

Support to Change Password after Expiry Date

Cisco Spaces allows you to change your password even after your password is expired. After entering your credentials when you click the Continue button, a pop-up window to change the password appears.


Idle Timeout for Cisco Spaces

A user who is logged in to the Cisco Spaces dashboard can remain idle only for a specific time period. If inactive for 20 minutes, the user is automatically logged out of the dashboard. A notification is displayed 5 minutes before the idle timeout and the title of the browser window where the Cisco Spaces application is open changes to INACTIVE: You will be logged out in 5 mins. Any action performed on the corresponding window extends the user's session.

Migrate Data from Cisco Prime Infrastructure to Catalyst Center

In the Cisco Spaces Location Hierarchy, if you have previously imported map data using Cisco Prime Infrastructure's import feature, you can now perform the same map data import using Catalyst Center's import feature.

This migration from Cisco Prime Infrastructure import to Catalyst Center import is considered as the source data migration in Cisco Spaces Location Hierarchy. After the migration, the import type source is considered as Catalyst Center import.

Before proceeding with map import or data migration, we strongly recommend that you reach out to the Cisco Spaces support team for assistance and guidance.

Cisco Spaces Documentation

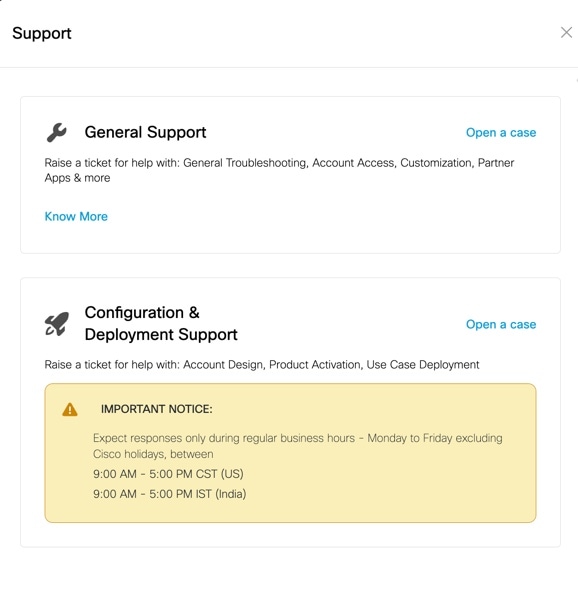
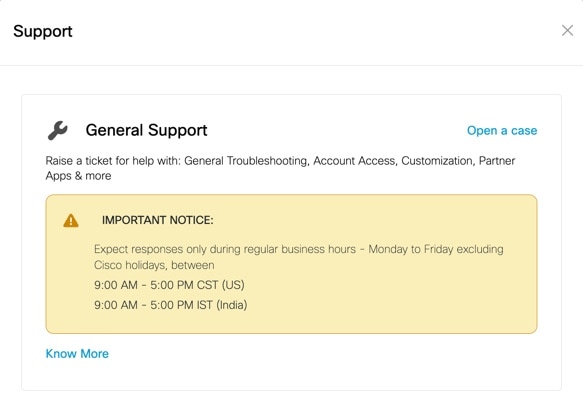
You can access the documentation for Cisco Spaces including Configuration Guides and Release Notes using the Cisco Spaces Support icon () displayed at the top-right of the Cisco Spaces dashboard.

You can also view the documentation, announcements, deployment guides, use cases and support information from the Spaces LaunchPad section. To do this, click the Spaces LaunchPad icon that is available at the bottom-right in Cisco Spaces UI.