- Information About Objects
- Licensing Requirements for Objects
- Guidelines and Limitations
- Configuring Objects
- Monitoring Objects
- Feature History for Objects
Objects
This chapter describes how to configure reusable named objects and groups for use in your configuration, and it includes the following sections:
Information About Objects
Objects are reusable components for use in your configuration. They can be defined and used in ASA configurations in the place of inline IP addresses, services, names, and so on. Objects make it easy to maintain your configurations because you can modify an object in one place and have it be reflected in all other places that are referencing it. Without objects you would have to modify the parameters for every feature when required, instead of just once. For example, if a network object defines an IP address and subnet mask, and you want to change the address, you only need to change it in the object definition, not in every feature that refers to that IP address.
Licensing Requirements for Objects
|
|
|
|---|---|
Guidelines and Limitations
Supported in single and multiple context mode.
Supported in routed and transparent firewall mode.
- Supports IPv6.
- The ASA does not support IPv6 nested network object groups, so you cannot group an object with IPv6 entries under another IPv6 object group.
- You can mix IPv4 and IPv6 entries in a network object group; you cannot use a mixed object group for NAT.
Additional Guidelines and Limitations
- Object must have unique names. While you might want to create a network object group named “Engineering” and a service object group named “Engineering,” you need to add an identifier (or “tag”) to the end of at least one object group name to make it unique. For example, you can use the names “Engineering_admins” and “Engineering_hosts” to make the object group names unique and to aid in identification.
- Objects and object groups share the same name space.
- You cannot remove an object or make an object empty if it is used in a command.
Configuring Objects
- Configuring Network Objects and Groups
- Configuring Service Objects and Service Groups
- Configuring Local User Groups
- Configuring Security Group Object Groups
- Configuring Regular Expressions
- Configuring Time Ranges

Note For other objects not included in this chapter, see the following chapters:
- Local Users—See Chapter34, “Local Database for AAA”
- Class Maps—See the firewall configuration guide.
- Inspect Maps—See the firewall configuration guide.
- TCP Maps—See the firewall configuration guide.
Configuring Network Objects and Groups
This section describes how to configure network objects and groups, and it includes the following topics:
Configuring a Network Object
A network object can contain a host, a network IP address, or a range of IP addresses, a fully qualified domain name (FQDN). You can also enable NAT rules on the object (excepting FQDN objects). (See the firewall configuration guide for more information.)
Detailed Steps
Step 1![]() Choose Configuration > Firewall > Objects > Network Objects/Group.
Choose Configuration > Firewall > Objects > Network Objects/Group.
Step 2![]() Click Add, and choose Network Object to add a new object, or choose an existing object to edit, and click Edit.
Click Add, and choose Network Object to add a new object, or choose an existing object to edit, and click Edit.
You can also add or edit network objects from the Addresses side pane in a rules window or when you are adding a rule.
To find an object in the list, enter a name or IP address in the Filter field, and click Filter. The wildcard characters asterisk (*) and question mark (?) are allowed.
The Add/Edit Network Object dialog box appears.
Step 3![]() Fill in the following values:
Fill in the following values:
- Name—The object name. Use characters a to z, A to Z, 0 to 9, a period, a dash, a comma, or an underscore. The name must contain 64 characters or fewer.
- Type—Either Network, Host, Range, or FQDN.
- IP Address—An IPv4 or an IPv6 address, either a host or network address. When you enter a colon (:) in this field for an IPv6 address, the Netmask field changes to Prefix Length. If you select Range as the object type, the IP Address field changes to allow you to enter a Start Address and an End address.
- Netmask or Prefix Length—If the IP address is an IPv4 address, enter the subnet mask. If the IP address is an IPv6 address, enter the prefix. (This field is not available if you enter the object type as Host.)
- Description—(Optional) The description of the network object (up to 200 characters in length).
Note![]() To add NAT rules to the network object, see the firewall configuration guide for more information.
To add NAT rules to the network object, see the firewall configuration guide for more information.
Step 5![]() Click Apply to save the configuration.
Click Apply to save the configuration.
You can now use this network object when you create a rule. If you edit an object, the change is inherited automatically by any rules using the object.
Configuring a Network Object Group
Network object groups can contain multiple network objects as well as inline networks. Network object groups can support a mix of both IPv4 and IPv6 addresses.
Restrictions
You cannot use a mixed IPv4 and IPv6 object group for NAT, or object groups that include FQDN objects.
Detailed Steps
Step 1![]() Choose Configuration > Firewall > Objects > Network Objects/Groups.
Choose Configuration > Firewall > Objects > Network Objects/Groups.
Step 2![]() Click click Add > Network Object Group to add either a new object or a new object group.
Click click Add > Network Object Group to add either a new object or a new object group.
You can also add or edit network object groups from the Addresses side pane in a rules window, or when you add a rule.
To find an object in the list, enter a name or IP address in the Filter field, and click Filter. The wildcard characters asterisk (*) and question mark (?) are allowed.
The Add Network Object Group dialog box appears.
Step 3![]() In the Group Name field, enter a group name.
In the Group Name field, enter a group name.
Use characters a to z, A to Z, 0 to 9, a period, a comma, a dash, or an underscore. The name must contain 64 characters or fewer.
Step 4![]() (Optional) In the Description field, enter a description, up to 200 characters in length.
(Optional) In the Description field, enter a description, up to 200 characters in length.
Step 5![]() You can add existing objects or groups to the new group (nested groups are allowed), or you can create a new address to add to the group:
You can add existing objects or groups to the new group (nested groups are allowed), or you can create a new address to add to the group:
You can also select the object, and then click Add. The object or group is added to the right-hand Members in Group pane.
The object or group is added to the right-hand Members in Group pane. This address is also added to the network object list.
To remove an object, double-click the object in the Members in Group pane, or select the object and click Remove.
Step 6![]() After you add all the member objects, click OK.
After you add all the member objects, click OK.
You can now use this network object group when you create a rule. For an edited object group, the change is inherited automatically by any rules using the group.
Configuring Service Objects and Service Groups
Service objects and groups identify protocols and ports. This section describes how to configure service objects, service groups, TCP and UDP port service groups, protocol groups, and ICMP groups, and it includes the following topics:
Configuring a Service Object
The service object can contain a protocol, ICMP, ICMPv6, TCP or UDP port or port ranges.
Detailed Steps
Step 1![]() Choose Configuration > Firewall > Objects > Service Object/Group.
Choose Configuration > Firewall > Objects > Service Object/Group.
Step 2![]() Choose Add > Service Object from the drop-down list.
Choose Add > Service Object from the drop-down list.
Step 3![]() In the name field, enter a name for the service object. Use characters a to z, A to Z, 0 to 9, a period, a dash, a comma, or an underscore. The name must be 64 characters or fewer.
In the name field, enter a name for the service object. Use characters a to z, A to Z, 0 to 9, a period, a dash, a comma, or an underscore. The name must be 64 characters or fewer.
Step 4![]() From the Service Type field, choose the desired type: tcp, udp, icmp, or icmp6 protocol.
From the Service Type field, choose the desired type: tcp, udp, icmp, or icmp6 protocol.
Step 5![]() (Optional) If you chose tcp or udp as the Service Type, enter the following:
(Optional) If you chose tcp or udp as the Service Type, enter the following:
Step 6![]() (Optional) If you chose icmp or icmp6 as the Service Type, enter the following:
(Optional) If you chose icmp or icmp6 as the Service Type, enter the following:
Step 7![]() If you chose protocol as the Service Type, enter the following:
If you chose protocol as the Service Type, enter the following:
Step 8![]() Click OK, and then Apply.
Click OK, and then Apply.
Configuring a Service Group
A service object group includes a mix of protocols, if desired, including optional source and destination ports for TCP or UDP.
Detailed Steps
Step 1![]() Choose Configuration > Firewall > Objects > Service Object/Group.
Choose Configuration > Firewall > Objects > Service Object/Group.
Step 2![]() Choose Add > Service Group from the drop-down list.
Choose Add > Service Group from the drop-down list.
The Add Service Group dialog box appears.
Step 3![]() In the Name field, enter a name for the new service group. The name can be up to 64 characters in length and must be unique for all object groups. A service group name cannot share a name with other objects and groups.
In the Name field, enter a name for the new service group. The name can be up to 64 characters in length and must be unique for all object groups. A service group name cannot share a name with other objects and groups.
Step 4![]() In the Description field, enter a description for this service group (up to 200 characters in length).
In the Description field, enter a description for this service group (up to 200 characters in length).
Step 5![]() To add an existing service object or group, or predefined protocol or port, click the Existing Service/Service Group radio button, select the entry from the Name field, and click Add.
To add an existing service object or group, or predefined protocol or port, click the Existing Service/Service Group radio button, select the entry from the Name field, and click Add.
Step 6![]() To create a new service, click the Create new member radio button and then choose the Service Type from the drop-down list:
To create a new service, click the Create new member radio button and then choose the Service Type from the drop-down list:
- If you choose tcp, udp, or tcp/udp, enter a name, the destination port/range, the source port/range, and an optional description.
- If you choose icmp or icmp6, enter a name, the ICMP Type (from the Existing Service/Service Group list), an ICMP Code (a value from 0-255), and an optional description.
- If you choose protocol, enter a name, the protocol, and an optional description.
Click Add to add the new service.
Step 7![]() Click OK, and then Apply.
Click OK, and then Apply.
Configuring a TCP or UDP Port Service Group
A TCP or UDP service group includes a group of ports for a specific protocol (TCP, UDP, or TCP-UDP).
Step 1![]() Choose Configuration > Firewall > Objects > Service Object/Group.
Choose Configuration > Firewall > Objects > Service Object/Group.
Step 2![]() Choose Add > TCP Service Group, UDP Service Group, or TCP-UDP Service Group from the drop-down list.
Choose Add > TCP Service Group, UDP Service Group, or TCP-UDP Service Group from the drop-down list.
The Add Service Group dialog box appears.
Step 3![]() In the Name field, enter a name for the new service group. The name can be up to 64 characters in length and must be unique for all object groups. A service group name cannot share a name with other objects and groups.
In the Name field, enter a name for the new service group. The name can be up to 64 characters in length and must be unique for all object groups. A service group name cannot share a name with other objects and groups.
Step 4![]() In the Description field, enter a description for this service group (up to 200 characters in length).
In the Description field, enter a description for this service group (up to 200 characters in length).
Step 5![]() To add an existing service group, or predefined port, click the Existing Service/Service Group radio button, select the entry from the Name field, and click Add.
To add an existing service group, or predefined port, click the Existing Service/Service Group radio button, select the entry from the Name field, and click Add.
Step 6![]() To create a new port, click the Create new member radio button, enter the port name, number, or range and then click Add to add the new port.
To create a new port, click the Create new member radio button, enter the port name, number, or range and then click Add to add the new port.
Step 7![]() Click OK, and then Apply.
Click OK, and then Apply.
Configuring an ICMP Group
Detailed Steps
Step 1![]() Choose Configuration > Firewall > Objects > Service Object/Group.
Choose Configuration > Firewall > Objects > Service Object/Group.
Step 2![]() Choose Add > ICMP Group from the drop-down list.
Choose Add > ICMP Group from the drop-down list.
The Add ICMP Group dialog box appears.
Step 3![]() In the Name field, enter a name for the new ICMP group. The name can be up to 64 characters in length and must be unique for all object groups. An ICMP group name cannot share a name with other objects and groups..
In the Name field, enter a name for the new ICMP group. The name can be up to 64 characters in length and must be unique for all object groups. An ICMP group name cannot share a name with other objects and groups..
Step 4![]() In the Description field, enter a description for this ICMP group (up to 200 characters in length).
In the Description field, enter a description for this ICMP group (up to 200 characters in length).
Step 5![]() To add an existing ICMP group, or predefined type, click the Existing Service/Service Group radio button, select the entry from the Name field, and click Add.
To add an existing ICMP group, or predefined type, click the Existing Service/Service Group radio button, select the entry from the Name field, and click Add.
Step 6![]() To create a new type, click the Create new member radio button, enter the type name or number, and then click Add to add the new type.
To create a new type, click the Create new member radio button, enter the type name or number, and then click Add to add the new type.
Step 7![]() Click OK, and then Apply.
Click OK, and then Apply.
Configuring a Protocol Group
Detailed Steps
Step 1![]() Choose Configuration > Firewall > Objects > Service Object/Group.
Choose Configuration > Firewall > Objects > Service Object/Group.
Step 2![]() Choose Add > Protocol Group from the drop-down list.
Choose Add > Protocol Group from the drop-down list.
The Add Protocol Group dialog box appears.
Step 3![]() In the Name field, enter a name for the new group. The name can be up to 64 characters in length and must be unique for all object groups. A group name cannot share a name with other objects and groups.
In the Name field, enter a name for the new group. The name can be up to 64 characters in length and must be unique for all object groups. A group name cannot share a name with other objects and groups.
Step 4![]() In the Description field, enter a description for this group (up to 200 characters in length).
In the Description field, enter a description for this group (up to 200 characters in length).
Step 5![]() To add an existing protocol group, or predefined protocol, click the Existing Service/Service Group radio button, select the entry from the Name field, and click Add.
To add an existing protocol group, or predefined protocol, click the Existing Service/Service Group radio button, select the entry from the Name field, and click Add.
Step 6![]() To create a new protocol, click the Create new member radio button, enter the protocol name or number, and then click Add to add the new protocol.
To create a new protocol, click the Create new member radio button, enter the protocol name or number, and then click Add to add the new protocol.
Step 7![]() Click OK, and then Apply.
Click OK, and then Apply.
Configuring Local User Groups
You can create local user groups for use in features that support the identity firewall (IDFW) by including the group in an extended ACL, which in turn can be used in an access rule, for example.
The ASA sends an LDAP query to the Active Directory server for user groups globally defined in the Active Directory domain controller. The ASA imports these groups for identity-based rules. However, the ASA might have localized network resources that are not defined globally that require local user groups with localized security policies. Local user groups can contain nested groups and user groups that are imported from Active Directory. The ASA consolidates local and Active Directory groups.
A user can belong to local user groups and user groups imported from Active Directory.
Prerequisites
See “Identity Firewall,” to enable IDFW.
Detailed Steps
Step 1![]() Open the Configuration > Firewall > Objects > Local User Groups pane.
Open the Configuration > Firewall > Objects > Local User Groups pane.
A table of user groups and their members appears.
Step 2![]() To add a group, click Add. The Add User Object Group dialog appears.
To add a group, click Add. The Add User Object Group dialog appears.
Step 3![]() Enter a name and description for the group.
Enter a name and description for the group.
The group name can contain any character including [a-z], [A-Z], [0-9], [!@#$%^&()-_{}. ]. If the group name contains a space, you must enclose the name in quotation marks.
Step 4![]() From the Domain list, select the default domain for users in this group or click Manage to add a new domain or edit and existing domain.
From the Domain list, select the default domain for users in this group or click Manage to add a new domain or edit and existing domain.
Step 5![]() To add existing groups to this group, enter a search string in the text box and click Find.
To add existing groups to this group, enter a search string in the text box and click Find.
Step 6![]() To add users to the group, enter a search string in the text box and click Find.
To add users to the group, enter a search string in the text box and click Find.
Step 7![]() Select groups and click the Add button to add them to the group.
Select groups and click the Add button to add them to the group.
Step 8![]() Select users and click the Add button to add them to the group.
Select users and click the Add button to add them to the group.
Step 9![]() Click OK to save your changes.
Click OK to save your changes.
Configuring Security Group Object Groups
You can create security group object groups for use in features that support Cisco TrustSec by including the group in an extended ACL, which in turn can be used in an access rule, for example.
When integrated with Cisco TrustSec, the ASA downloads security group information from the ISE. The ISE acts as an identity repository, by providing Cisco TrustSec tag to user identity mapping and Cisco TrustSec tag to server resource mapping. You provision and manage security group ACLs centrally on the ISE.
However, the ASA might have localized network resources that are not defined globally that require local security groups with localized security policies. Local security groups can contain nested security groups that are downloaded from the ISE. The ASA consolidates local and central security groups.
To create local security groups on the ASA, you create a local security object group. A local security object group can contain one or more nested security object groups or Security IDs or security group names. User can also create a new Security ID or security group name that does not exist on the ASA.
You can use the security object groups you create on the ASA to control access to network resources. You can use the security object group as part of an access group or service policy.
Prerequisites
See “ASA and Cisco TrustSec,” to enable TrustSec.
Detailed Steps
Step 1![]() In the main ASDM application window, choose Configuration > Firewall > Objects > Security Group Object Groups. The Security Group Object Groups pane appears:
In the main ASDM application window, choose Configuration > Firewall > Objects > Security Group Object Groups. The Security Group Object Groups pane appears:

The Security Group Object Groups pane lists the members of the security object group and shows the number of members in the Count column. Click Where Used to display where the selected security group object is used in an ACL or nested in another security group object.
Step 2![]() Click Add. The Add Security ID Object Group dialog box appears.
Click Add. The Add Security ID Object Group dialog box appears.
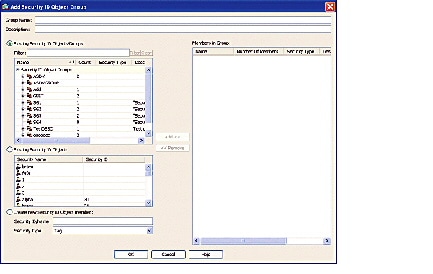
Step 3![]() In the Group Name field, enter the name for the group as a 32-byte case sensitive string. The group name can contain any character including [a-z], [A-Z], [0-9], [!@#$%^&()-_{}. ].
In the Group Name field, enter the name for the group as a 32-byte case sensitive string. The group name can contain any character including [a-z], [A-Z], [0-9], [!@#$%^&()-_{}. ].
Step 4![]() In the Description field, enter a description for the group.
In the Description field, enter a description for the group.
Step 5![]() Add members to the security group object by performing the following task:
Add members to the security group object by performing the following task:
a.![]() Select one of the following options:
Select one of the following options:
In the Filter field, enter the security object ID number or the name of the security group and click Filter. Use wildcards to broaden the search for security groups.
b.![]() Click Add to select it as Members in Group.
Click Add to select it as Members in Group.
A security object group must contain at least one member.
c.![]() Continue selecting members and clicking Add. You can create nested security object groups by selecting existing security ID object/groups and existing security ID objects.
Continue selecting members and clicking Add. You can create nested security object groups by selecting existing security ID object/groups and existing security ID objects.
Step 6![]() Create a locally defined object by performing the following tasks:
Create a locally defined object by performing the following tasks:
a.![]() Click the Create new Security ID Object member radio button.
Click the Create new Security ID Object member radio button.
b.![]() From the Security Type drop-down field, select Tag or Name.
From the Security Type drop-down field, select Tag or Name.
An SGT is assigned to a device through IEEE 802.1X authentication, web authentication, or MAC authentication bypass (MAB) by the ISE. Security group names are created on the ISE and provide user-friendly names for security groups. The security group table maps SGTs to security group names.
c.![]() In the Security ID/Name field, enter a number from 1 to 65533 for A Tag security type or a 32-byte case-sensitive string for a Name security type.
In the Security ID/Name field, enter a number from 1 to 65533 for A Tag security type or a 32-byte case-sensitive string for a Name security type.
A security group has a single name assigned to it. The same name can only be associated with a single SGT.
Step 7![]() Click OK. The Security ID Objects/Groups pane reappears.
Click OK. The Security ID Objects/Groups pane reappears.
Step 8![]() Click Apply to save the changes to the running configuration.
Click Apply to save the changes to the running configuration.
Configuring Regular Expressions
Creating a Regular Expression
A regular expression matches text strings either literally as an exact string, or by using metacharacters so that you can match multiple variants of a text string. You can use a regular expression to match the content of certain application traffic; for example, you can match a URL string inside an HTTP packet.
Guidelines
Note![]() As an optimization, the ASA searches on the deobfuscated URL. Deobfuscation compresses multiple forward slashes (/) into a single slash. For strings that commonly use double slashes, like “http://”, be sure to search for “http:/” instead.
As an optimization, the ASA searches on the deobfuscated URL. Deobfuscation compresses multiple forward slashes (/) into a single slash. For strings that commonly use double slashes, like “http://”, be sure to search for “http:/” instead.
Table 21-1 lists the metacharacters that have special meanings.
Detailed Steps
Step 1![]() Choose Configuration > Global Objects > Regular Expressions.
Choose Configuration > Global Objects > Regular Expressions.
Step 2![]() In the Regular Expressions area, click Add.
In the Regular Expressions area, click Add.
The Add Regular Expression dialog box appears.
Step 3![]() In the Name field, name the expression, up to 40 characters in length.
In the Name field, name the expression, up to 40 characters in length.
Step 4![]() (Optional) Click Build to use the Creating a Regular Expression Class Map dialog box. See Table 21-1 for more information about metacharacters.
(Optional) Click Build to use the Creating a Regular Expression Class Map dialog box. See Table 21-1 for more information about metacharacters.
- Build Snippet—This area lets you build text snippets of regular text or lets you insert a metacharacter into the Regular Expression field.
- Starts at the beginning of the line (^)—Indicates that the snippet should start at the beginning of a line, using the caret (^) metacharacter. Be sure to insert any snippet with this option at the beginning of the regular expression.
- Specify Character String—Enter a text string manually.
–![]() Character String—Enter a text string.
Character String—Enter a text string.
–![]() Escape Special Characters—If you entered any metacharacters in your text string that you want to be used literally, check this box to add the backslash (\) escape character before them. for example, if you enter “example.com,” this option converts it to “example\.com”.
Escape Special Characters—If you entered any metacharacters in your text string that you want to be used literally, check this box to add the backslash (\) escape character before them. for example, if you enter “example.com,” this option converts it to “example\.com”.
–![]() Ignore Case—If you want to match upper and lower case characters, this check box automatically adds text to match both upper and lower case. For example, entering “cats” is converted to “[cC][aA][tT][sS]”.
Ignore Case—If you want to match upper and lower case characters, this check box automatically adds text to match both upper and lower case. For example, entering “cats” is converted to “[cC][aA][tT][sS]”.
–![]() Negate the character—Specifies not to match the character you identify.
Negate the character—Specifies not to match the character you identify.
–![]() Any character (.)—Inserts the period (.) metacharacter to match any character. For example, d.g matches dog, dag, dtg, and any word that contains those characters, such as doggonnit.
Any character (.)—Inserts the period (.) metacharacter to match any character. For example, d.g matches dog, dag, dtg, and any word that contains those characters, such as doggonnit.
–![]() Character set—Inserts a character set. Text can match any character in the set. Sets include:
Character set—Inserts a character set. Text can match any character in the set. Sets include:
[\n\f\r\t] (which matches a new line, form feed, carriage return, or a tab)
For example, if you specify [0-9A-Za-z], then this snippet will match any character from A to Z (upper or lower case) or any digit 0 through 9.
–![]() Special character—Inserts a character that requires an escape, including \, ?, *, +, |,., [, (, or ^. The escape character is the backslash (\), which is automatically entered when you choose this option.
Special character—Inserts a character that requires an escape, including \, ?, *, +, |,., [, (, or ^. The escape character is the backslash (\), which is automatically entered when you choose this option.
–![]() Whitespace character—Whitespace characters include \n (new line), \f (form feed), \r (carriage return), or \t (tab).
Whitespace character—Whitespace characters include \n (new line), \f (form feed), \r (carriage return), or \t (tab).
–![]() Three digit octal number—Matches an ASCII character as octal (up to three digits). For example, the character \040 represents a space. The backslash (\) is entered automatically.
Three digit octal number—Matches an ASCII character as octal (up to three digits). For example, the character \040 represents a space. The backslash (\) is entered automatically.
–![]() Two digit hexadecimal number—Matches an ASCII character using hexadecimal (exactly two digits). The backslash (\) is entered automatically.
Two digit hexadecimal number—Matches an ASCII character using hexadecimal (exactly two digits). The backslash (\) is entered automatically.
–![]() Specified character—Enter any single character.
Specified character—Enter any single character.
- Snippet Preview— Display only. Shows the snippet as it will be entered in the regular expression.
- Append Snippet—Adds the snippet to the end of the regular expression.
- Append Snippet as Alternate—Adds the snippet to the end of the regular expression separated by a pipe (|), which matches either expression it separates. For example, dog|cat matches dog or cat.
- Insert Snippet at Cursor—Inserts the snippet at the cursor.
Regular Expression—This area includes regular expression text that you can enter manually and build with snippets. You can then select text in the Regular Expression field and apply a quantifier to the selection.
- Selection Occurrences—Select text in the Regular Expression field, click one of the following options, and then click Apply to Selection. For example, if the regular expression is “test me,” and you select “me” and apply One or more times, then the regular expression changes to “test (me)+”.
–![]() Zero or one times (?)—A quantifier that indicates that there are 0 or 1 of the previous expression. For example, lo?se matches lse or lose.
Zero or one times (?)—A quantifier that indicates that there are 0 or 1 of the previous expression. For example, lo?se matches lse or lose.
–![]() One or more times (+)—A quantifier that indicates that there is at least 1 of the previous expression. For example, lo+se matches lose and loose, but not lse.
One or more times (+)—A quantifier that indicates that there is at least 1 of the previous expression. For example, lo+se matches lose and loose, but not lse.
–![]() Any number of times (*)—A quantifier that indicates that there are 0, 1 or any number of the previous expression. For example, lo*se matches lse, lose, loose, and so on.
Any number of times (*)—A quantifier that indicates that there are 0, 1 or any number of the previous expression. For example, lo*se matches lse, lose, loose, and so on.
–![]() At least—Repeat at least x times. For example, ab(xy){2,}z matches abxyxyz, abxyxyxyz, and so on.
At least—Repeat at least x times. For example, ab(xy){2,}z matches abxyxyz, abxyxyxyz, and so on.
–![]() Exactly—Repeat exactly x times. For example, ab(xy){3}z matches abxyxyxyz.
Exactly—Repeat exactly x times. For example, ab(xy){3}z matches abxyxyxyz.
–![]() Apply to Selection—Applies the quantifier to the selection.
Apply to Selection—Applies the quantifier to the selection.
Step 5![]() If you do not use the Build tool, enter the regular expression manually in the Value field, up to 100 characters in length. Refer to the metacharacters in Table 21-1 .
If you do not use the Build tool, enter the regular expression manually in the Value field, up to 100 characters in length. Refer to the metacharacters in Table 21-1 .
Step 6![]() To test the regular expression before adding it, click Test.
To test the regular expression before adding it, click Test.
The Test Regular Expression dialog box appears.
- Regular Expression—Enter the regular expression you want to test. By default, the regular expression you entered in the Add/Edit Regular Expression or Build Regular Expression dialog box is input into this field. If you change the regular expression during your testing, and click OK, the changes are inherited by the Add/Edit Regular Expression or Build Regular Expression dialog boxes. Click Cancel to dismiss your changes.
- Test String—Enter a text string that you expect to match the regular expression.
- Test—Tests the Text String against the Regular Expression,
- Test Result— Display only. Shows if the test succeeded or failed.
Creating a Regular Expression Class Map
A regular expression class map identifies one or more regular expressions. You can use a regular expression class map to match the content of certain traffic; for example, you can match URL strings inside HTTP packets.
Prerequisites
Create one or more regular expressions according to the Creating a Regular Expression.
Detailed Steps
Step 1![]() Choose Configuration > Global Objects > Regular Expressions.
Choose Configuration > Global Objects > Regular Expressions.
Step 2![]() In the Regular Expression Classes area, click Add.
In the Regular Expression Classes area, click Add.
- Name—Enter a name for the class map, up to 40 characters in length. The name “class-default” is reserved. All types of class maps use the same name space, so you cannot reuse a name already used by another type of class map.
- Description—Enter a description, up to 200 characters in length.
- Available Regular Expressions—Lists the regular expressions that are not yet assigned to the class map.
–![]() Edit—Edits the selected regular expression.
Edit—Edits the selected regular expression.
–![]() New—Creates a new regular expression.
New—Creates a new regular expression.
- Add—Adds the selected regular expression to the class map.
- Remove—Removes the selected regular expression from the class map.
- Configured Match Conditions—Shows the regular expressions in this class map, along with the match type.
–![]() Match Type—Shows the match type, which for regular expressions is always a positive match type (shown by the icon with the equal sign (=)) the criteria. (Inspection class maps allow you to create negative matches as well (shown by the icon with the red circle)). If more than one regular expression is in the class map, then each match type icon appears with “OR” next it, to indicate that this class map is a “match any” class map; traffic matches the class map if only one regular expression is matched.
Match Type—Shows the match type, which for regular expressions is always a positive match type (shown by the icon with the equal sign (=)) the criteria. (Inspection class maps allow you to create negative matches as well (shown by the icon with the red circle)). If more than one regular expression is in the class map, then each match type icon appears with “OR” next it, to indicate that this class map is a “match any” class map; traffic matches the class map if only one regular expression is matched.
–![]() Regular Expression—Lists the regular expression names in this class map.
Regular Expression—Lists the regular expression names in this class map.
Configuring Time Ranges
Create a reusable component that defines starting and ending times that can be applied to various security features. Once you have defined a time range, you can select the time range and apply it to different options that require scheduling.
The time range feature lets you define a time range that you can attach to traffic rules, or an action. For example, you can attach an ACL to a time range to restrict access to the ASA.
A time range consists of a start time, an end time, and optional recurring entries.
Guidelines
- Multiple periodic entries are allowed per time range. If a time range has both absolute and periodic values specified, then the periodic values are evaluated only after the absolute start time is reached, and they are not further evaluated after the absolute end time is reached.
- Creating a time range does not restrict access to the device. This procedure defines the time range only.
Detailed Steps
Step 1![]() Choose Configuration > Global Objects > Time Ranges.
Choose Configuration > Global Objects > Time Ranges.
The Add Time Range window appears.
Step 3![]() In the Time Range Name field, enter a time range name, with no spaces.
In the Time Range Name field, enter a time range name, with no spaces.
Step 4![]() Choose the Start Time and the End Time by doing one of the following:
Choose the Start Time and the End Time by doing one of the following:
a.![]() Allow the default settings, in which the Start Now and the Never End radio buttons are checked.
Allow the default settings, in which the Start Now and the Never End radio buttons are checked.
b.![]() Apply a specific time range by clicking the Start at and End at radio buttons and selecting the specified start and stop times from the lists.
Apply a specific time range by clicking the Start at and End at radio buttons and selecting the specified start and stop times from the lists.
The time range is inclusive of the times that you enter.
Step 5![]() (Optional) To specify additional time constraints for the time range, such as specifying the days of the week or the recurring weekly interval in which the time range will be active, in the Recurring Time Ranges area, click Add.
(Optional) To specify additional time constraints for the time range, such as specifying the days of the week or the recurring weekly interval in which the time range will be active, in the Recurring Time Ranges area, click Add.
The Add Recurring Time Range dialog box appears.
Step 6![]() Do one of the following:
Do one of the following:
Step 7![]() Click OK, and then click Apply.
Click OK, and then click Apply.
Monitoring Objects
To view which rules use a network object or group, in the Configuration > Firewall > Objects > Network Objects/Group pane, click the magnifying glass Find icon.
The Usages dialog box appears, listing all the rules currently using the network object or group. This dialog box also lists any network object groups that contain the object.
Feature History for Objects
Table 21-2 lists each feature change and the platform release in which it was implemented. ASDM is backwards-compatible with multiple platform releases, so the specific ASDM release in which support was added is not listed.
 Feedback