User Control with Remote Access VPN

The following topics discuss how to perform user awareness and user control with Remote Access VPN:

The Remote Access VPN Identity Source

Secure Client is the only client supported on endpoint devices for remote VPN connectivity to threat defense devices.

When you set up a secure VPN gateway as discussed in Create a New Remote Access VPN Policy, you can set up an identity policy for those users and associate the identity policy with an access control policy, provided your users are in an Active Directory repository.


Note


If you use remote access VPN with User Identity and RADIUS as the identity source, you must configure the realm (Objects > Object Management > AAA Server > RADIUS Server Group).


The login information provided by a remote user is validated by an LDAP or AD realm or a RADIUS server group. These entities are integrated with the Secure Firewall Threat Defense secure gateway.


Note


If users authenticate with remote access VPN using Active Directory as the authentication source, users must log in using their username; the format domain\username or username@domain fails. (Active Directory refers to this username as the logon name or sometimes as sAMAccountName.) For more information, see User Naming Attributes on MSDN.

If you use RADIUS to authenticate, users can log in with any of the preceding formats.


Once authenticated via a VPN connection, the remote user takes on a VPN Identity. This VPN Identity is used by identity policies on the Secure Firewall Threat Defense secure gateway to recognize and filter network traffic belonging to that remote user.

Identity policies are associated with access control policies, which determine who has access to network resources. It is in this way that the remote user blocked or allowed to access your network resources.

Configure RA VPN for User Control

Before you begin

Procedure


Step 1

Log in to the management center.

Step 2

Click Devices > VPN > Remote Access.

Step 3

See Create a New Remote Access VPN Policy.


What to do next

Troubleshoot the Remote Access VPN Identity Source

  • For other related troubleshooting information, see Troubleshoot Realms and User Downloads and Troubleshoot User Control .

  • If you experience issues with Remote Access VPN, check the connection between your management center and a managed device. If the connection fails, all Remote Access VPN logins reported by the device cannot be identified during the downtime, unless the users were previously seen and downloaded to the management center.

    The unidentified users are logged as Unknown users on the management center. After the downtime, the Unknown users are re identified and processed according to the rules in your identity policy.

  • The host name of the managed device must be less than 15 characters for Kerberos authentication to succeed.

  • Active FTP sessions are displayed as the Unknown user in events. This is normal because, in active FTP, the server (not the client) initiates the connection and the FTP server should not have an associated user name. For more information about active FTP, see RFC 959.

Not Observing Correct Settings for VPN Statistics

This task discusses steps you must take after either enabling or disabling the VPN Statistics setting in a health policy. Failure to perform this task means managed devices have a health policy with incorrect settings.

Procedure


Step 1

Log in to the Secure Firewall Management Center if you haven't already done so.

Step 2

Click System (system gear icon) > Health > Policy.

Step 3

Under Firewall Threat Defense Health Policies, click Edit (edit icon) next to a policy to edit.

Step 4

On the Health Modules tab page, scroll down to locate VPN Statistics.

Step 5

Verify the VPN statistics setting is correct or change it if necessary.

Step 6

If you changed the setting, click Save, then click Cancel to return to the health policy.

Step 7

Under Firewall Threat Defense Health Policies, click Deploy health policy (deploy icon) to apply the policy.

Step 8

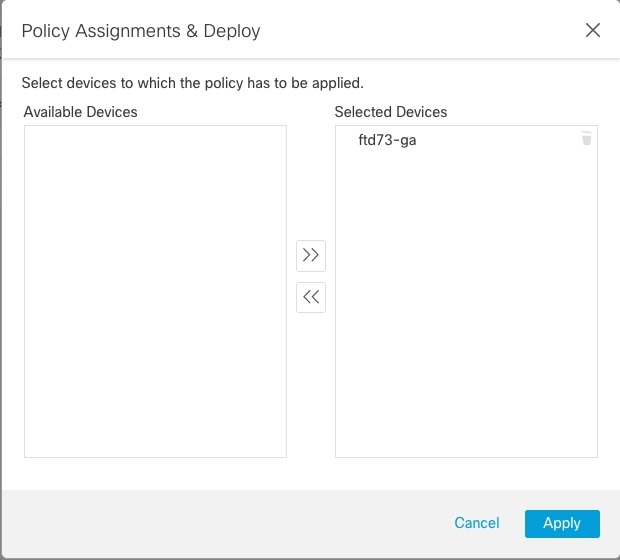
In the Policy Assignments & Deploy dialog box, move the devices to which to deploy the health policy to the Selected Devices field.

Deploy health policies to the Selected Devices list. Use the arrow buttons to move devices between Available and Selected Devices lists.

Step 9

Click Apply.

A message is displayed when the health policy is deployed.

Step 10

After the health policy has finished deploying, click Policies > Access Control to edit an access control policy.

Step 11

Click Edit (edit icon) next to a policy to edit.

Step 12

Make a minor change to the policy, such as changing its name.

Step 13

Save the access control policy.

Step 14

Deploy configuration changes..